
This is Scott Yu-Jan’s Macintosh Studio, an awesome 3D-printed case that turns the Mac Studio into a neat little modern-day version of the original 1984 Macintosh. And look, what’s he using for the display? An iPad.
Using an old tablet instead of buying a new display is a great way to reduce your impact on the environment. It’s a real shame to send a working tablet through a recycling shredder that can only recover a tiny fraction of the raw materials inside. But iPad software is kind of locked down, and it’s not immediately obvious how to get one to work as a display.
Recently, Apple added support in its Sidecar feature to let you use the iPad as an external display for Macs, but it’s limited (you need an Apple Pencil to use it), and it only works with Macs. What if you have an older iPad or older Mac that doesn’t work with Sidecar? Or if you want to hook up something that isn’t a Mac or isn’t even (gasp!) an Apple product? Today we’re going to dig into how an old iPad can make a great display for a game console, a camera, or a PC—and how it can give your Mac a great touchscreen.
Sidecar
Let’s start with Apple’s own Sidecar. This feature turns an iPad into a wireless or wired screen for your Mac. You can use it in a few ways. One is to hover over the green circle at the top left of pretty much any window on your Mac. After a few seconds, you’ll see a pop-up menu that includes a list of available iPads—this includes iPads connected by USB, or just nearby, asleep, and available via Wi-Fi. Click one, and that window will be shunted off to the iPad.
The other option is to open up the System Settings on your Mac, open the Displays panel, click the + button to add a display, and choose your iPad from the list. In this case, the iPad will show up just like any other external display for your Mac, only it can also be wireless, as well as connected over Lightning or USB-C.
However you connect it, you can use the Displays preference panel to choose how the iPad behaves. You can move it to the left or right of the main display, above or below, and you can set it to extend or mirror the current desktop.
It works really well, except when—like all of Apple’s Just Works™ features—it doesn’t work, and you can’t work out why. Sidecar also has one serious limitation—you have to use it with an Apple Pencil. Fingers can be used for scrolling lists, and pinch-to-zoom, but for interacting with the UI, mousing, and clicking, you need the Pencil.
Also, you can’t use Sidecar as the main display for a Mac. It only works once the Mac is up and running, after you have entered your password. You could enable automatic login on your Mac to avoid the password step, but that’s a pretty bad idea, security-wise.
Luckily, Sidecar isn’t the only way to do it.
Duet Display
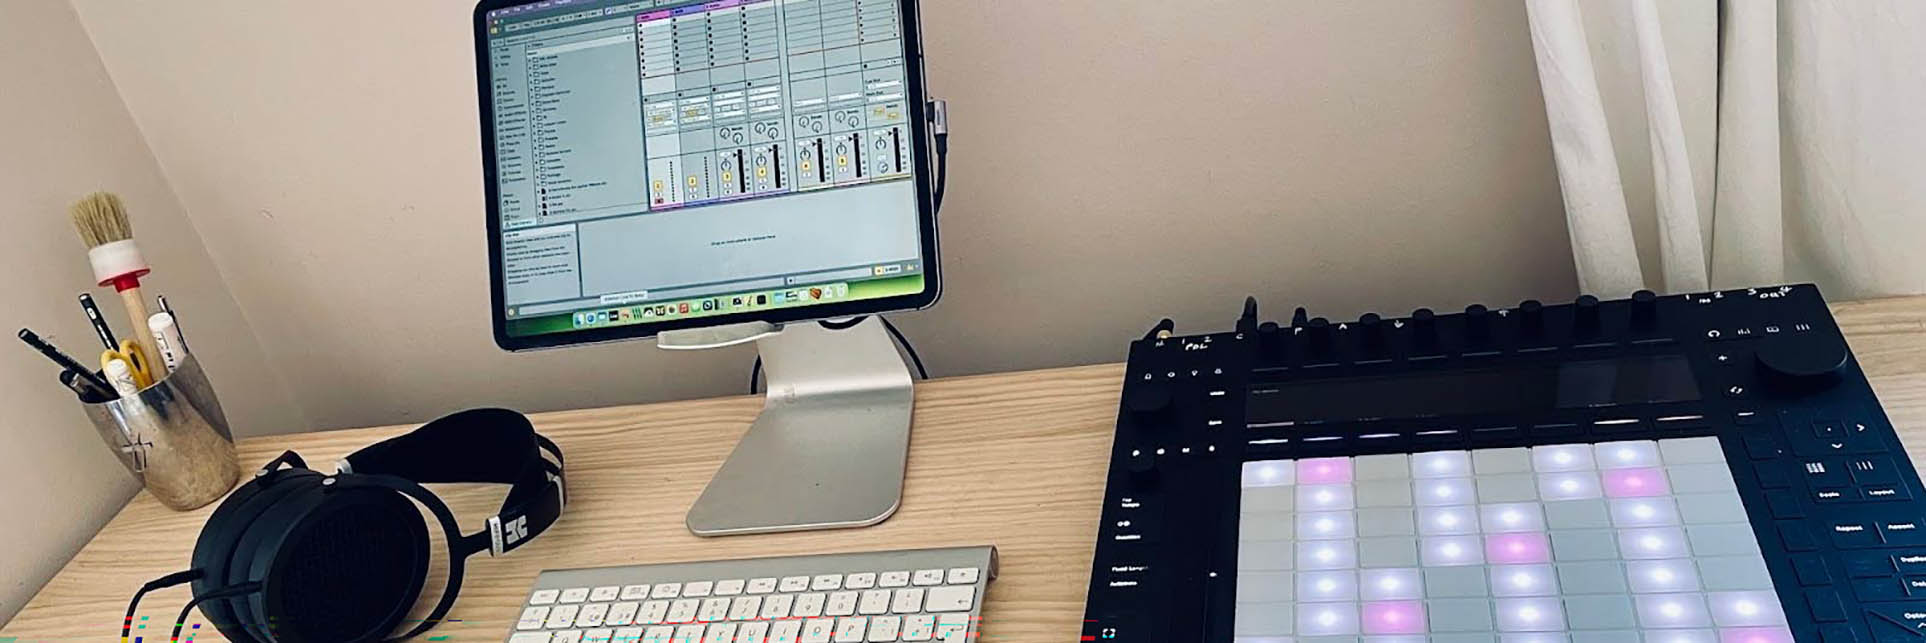
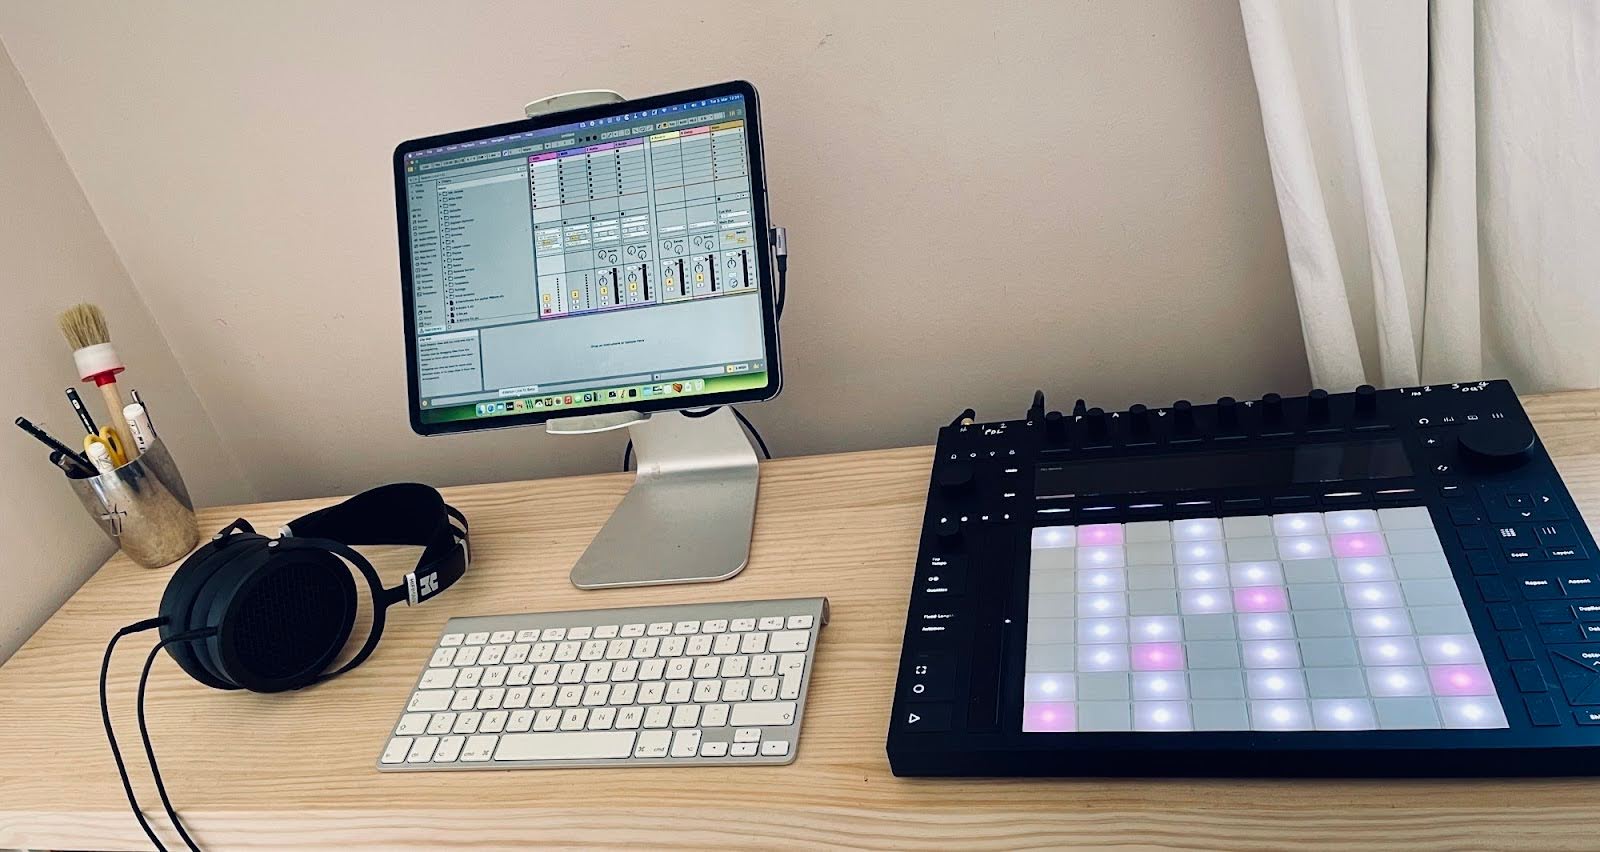
Duet Display is a way more flexible piece of software that does the same as Sidecar, and more. The biggest difference is that you can use touch. Duet is what I use for the setup in this picture. What you see is an Ableton Push and an iPad, both connected to a Mac mini (hidden under the desk). The Mac mini is running Ableton, and the iPad is a touchscreen. Ableton works really, really well with touch.
Duet consists of two apps, one for the Mac, one for the iPad. You can connect via USB or over the Air. I prefer USB as it keeps the iPad charged, and wires are always more reliable than Wi-Fi, but in my experience, Duet also works really well over the air. Plus, the wireless option works even if your Mac is in a different room.
The very best thing about Duet, though, is that you can use it as the main display for a Mac, like I do with that Mac mini, although it’s best when combined with a cheap dongle.
The dongle is a dummy HDMI adapter, which tricks the Mac into thinking it has a real display attached. This means that it will start up normally. You can then use some kind of screensharing app to dial in to your Mac over the network, and enter your password. In theory, you can just enter your password directly into the Mac with its keyboard, without having to see the screen.
This step is a pain, but on the other hand, you only have to do it at reboot, and the payoff is not having to buy a new monitor. You can just use any old iPad.
Duet Display costs from $4 per month and works on Macs from OS X 10.13 onwards and iOS hardware running iOS 10 or later (that means any iPad from 2012 and on).
A similar option is Astro’s Luna Display, which comes with a special dongle that makes it all work, but I prefer Duet’s software-only approach.

Nintendo Switch
The Nintendo Switch is a handheld game console that can be played on the TV via a docking station, or on the go. Released March 3rd, 2017.
View DeviceSwitch
Next up is the Nintendo Switch, or really, any other device that puts out HDMI—your camera, a PlayStation, and so on. For this, you do need some extra hardware. The good news is, it’s cheap.
iPadOS 17 added support for USB video devices. For example, you can hook up a USB webcam and use it to make FaceTime calls, just like you’ve always been able to connect a USB microphone or audio interface.
The neat part is that you can now use your iPad as a display for all kinds of devices, from video cameras to game consoles. When I heard about it, I had to try to connect my 12.9-inch iPad Pro (the old 2018 model) to a Nintendo Switch, and it totally worked.
If you have a video device that outputs a UVC (USB video class) signal, then all you have to do is plug it into the iPad and you’re off to the races. Well, almost off. The only way to view the video stream is in the FaceTime app, so you’ll need something like Genki Studio, an iPad app that started out as an indie project, and which lets you view video streams on the iPad.
Unfortunately, you can’t just run a USB-C cable from the Switch to the iPad. I tried, and it doesn’t work. First, you need a portable dock for the Switch that outputs an HDMI signal, and then you need another dongle to turn the HDMI signal into a compatible USB signal for the iPad.
I won’t link to products, as the ones I used are pretty generic Amazon fare, but for reference, I used a Geekria TV Dock (around €20-30), and an HDMI to USB-C video capture “card” (which is not a card), with a short 30cm HDMI cable between them.
The result is amazing. Not only can you view the Switch games on a nice hi-res screen, you also get sound, and you can even use wireless headphones (although after daisy-chaining all those cables and dongles, perhaps a headphone cable isn’t the worst thing to deal with).
You probably don’t want to buy an iPad just to use as a screen, but if you have an old one that you don’t use, this is a great way to give it an extra life.
I use my old iPad Pro all the time. It’s probably my most used computer. And now it’s even better, because I can use it to play Mario Kart with my better half while traveling, and I can turn my Mac mini into a touch-screen Mac, which is something that Apple doesn’t seem interested in doing.
4 Comments
There is also an app called Splashtop. It works locally or over the internet and is a cheaper subscription.
Roger Randall - Reply
Another cool iPad app is Orion, but only for modern USB-C iPads.
Combined with a USB-HDMI adapter, you can use it as a real HDMI monitor for anything; cameras, computers, satellite boxes etc.
Handy for troubleshooting in a pinch.
Axel Roest - Reply
The question is, jost now recent does an iPad have to be to make use of these functions? I have the in-laws' old iPad2 (they've upgraded a couple of times since that one) and haven't found a good current use for it (other than a portable FaceTime device so I don't have to dig out my MacBook Pro). But I haven't needed to do that for a couple of years. And I'm presuming FT hasn't become incompatible with the version on it.
If nothing else maybe I'd turn it into a digital photo frame.
SenileOtaku - Reply
The info on Sidecar seems woefully out of date. It claims to be introduced “recently” but it’s a feature from Catalina 4-5 years ago.
Now you can easily add the iPad as an external display (no Apple Pencil required as claimed in the article) or simply drag your cursor to the side of your screen and have it control the iPad.
Matt - Reply