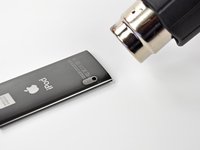
Introduction
Bringing the power back to your 5th generation iPod Nano.
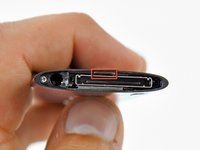
What you need
-
-
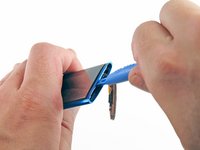
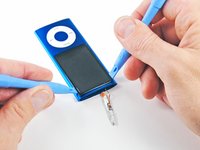
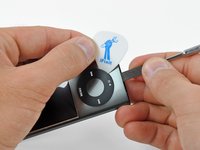
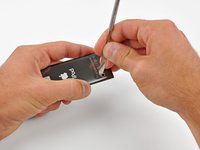
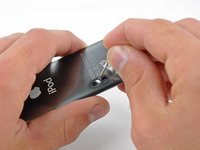
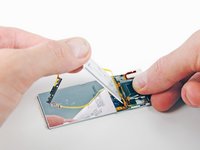
Insert an iPod opening tool between the outer case and top bezel near the screen.
-
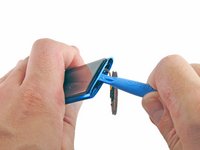
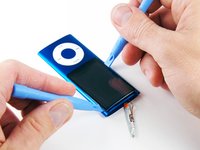
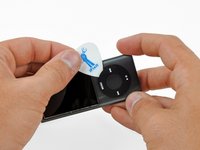
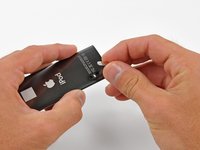
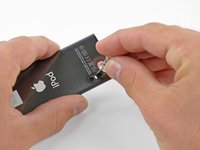
Lifting up on the iPod opening tool, gently pry the top panel off of the device.
-
-
-
-
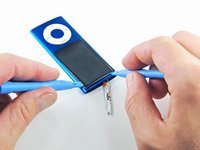
Use a heat gun to soften the adhesive underneath the plastic bezel at the bottom of the iPod.
-
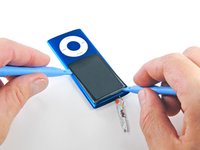
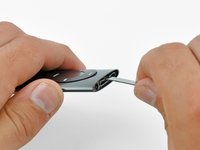
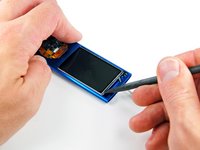
Use a plastic opening tool to pry the bezel from the case of the iPod and remove it.
-
-
-
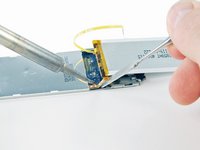
Use a heat gun to soften the adhesive underneath the camera/microphone cover.
-
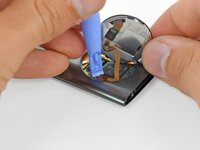
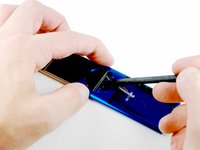
Pry the camera/microphone cover off the case with a metal spudger and remove it.
-
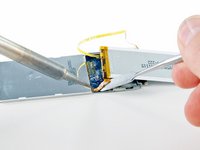
Use a hot glue gun to apply a bead of glue across the cover.
-
Move the nozzle in the glue for 20 seconds to heat the lens adhesive holding the lens in place.
-
Press a spudger into the hot glue and hold it in place until the glue cools and hardens.
-
Pull on the spudger with firm steady force, while using a fingernail to pry on the cover edge.
-
-
-
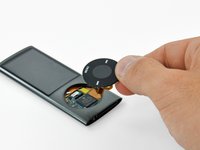
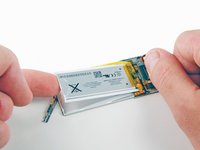
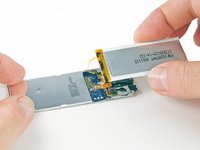
Use your fingers to carefully lift the battery off the back of the LCD, starting at the top of the LCD.
-


To reassemble your device, follow these instructions in reverse order.
To reassemble your device, follow these instructions in reverse order.
Cancel: I did not complete this guide.
109 other people completed this guide.

35 Comments
This it bs. I need to buy new device now. Nothing comes off that easy. My screen shattered when I was trying to pull it up. If you are not a pro, don't do it.
Obviously you weren’t careful enough.
You are supposed to push down from the top of the screen, not up. I managed to get mine out but I ripped the hold ribbon in the process. Luckily I have another one for spares. Good luck next time
I'm sure this can be done, but the tools included in the Ifixit kit are not up to the task. Spent about 45 minutes with the flimsy blue tools and distorted the LCD trying to remove the glass. Then took a heat gun and used the black nylon tool (which I suppose is the replacement for the metal spudger) in the kit. Had the glass out in a single minute. There is no tool in the kit long enough to dislodge the click wheel. I got out my dental tools and finished the disassembly. It is cheaper at this point to just buy another than replace the broken parts. It is a poor carpenter that blames his tools, but you can't cut down a tree with a fish. Use your own tools