
iMac Intel 27" EMC 2309 and 2374 Optical Drive Replacement

Introduction
Go to step 1DVD writer not writing? Get back in business and replace your optical drive.
What you need
Parts


Tools


Show more…
-
Tool used on this step:Heavy-Duty Suction Cups (Pair)$14.95
-
Stick a heavy-duty suction cup near each of the two top corners of the glass panel.
-
While lightly holding the suction cup against the glass, raise the movable handle until it is parallel with the other handle (as indicated by the third picture).
-
-
-
-
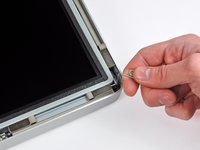
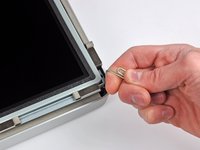
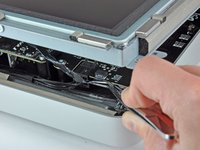
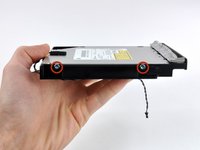
Remove the four T10 Torx screws securing the optical drive to the outer case.
-
-
-
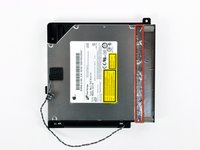
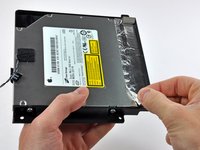
Peel back the portion of aluminum tape highlighted in red, leaving the rest attached to the black plastic optical drive bracket.
-
-
-
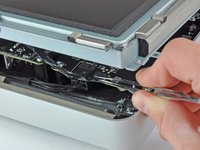
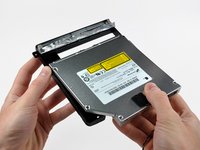
Use the tip of a spudger to press each of the optical drive bracket tabs out of their slots on the bottom of the optical drive.
-
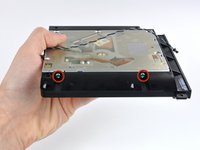
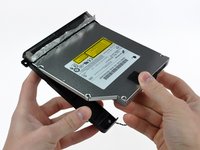
Rotate the optical drive bracket slightly away from the optical drive.
-
Pull the optical drive bracket away from the open end of the optical drive, minding any tabs that may get caught.
-
-
-
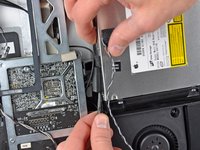
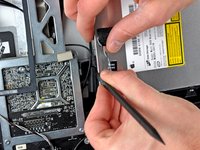
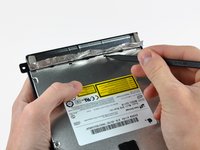
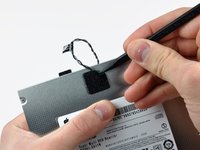
Use the tip of a spudger to peel back the piece of foam tape covering the optical drive thermal sensor.
-
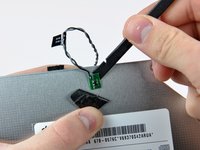
Use the flat end of a spudger to carefully pry the thermal sensor up off the adhesive securing it to the optical drive.
-
If you have a disc or anything else stuck inside your optical drive, we have a guide to fix it.
-


To reassemble your device, follow these instructions in reverse order.
To reassemble your device, follow these instructions in reverse order.
Cancel: I did not complete this guide.
59 other people completed this guide.

6 Comments
Great tutorial. The recommended T10 Torx Screwdriver was too big - I had to use a T9.
Also, it isn't necessary to unplug the optical drive thermal sensor connector socket on the logic board (Step 10), I just disconnected the optical drive thermal sensor from the drive (Step 17) before removing it.
Awesome guide! I bought your suction cups for the front glass, and a toolkit, along with a 2TB HDD to replace the original 1TB drive. It was easy to replace both the optical drive and the HDD with the right tools and this very detailed guide to follow. I have had no problems with the internal cooling fans running fast with the new HDD either. It all came apart easily and seems to have gone back together without any problems as well. A huge help! You saved me several hundred dollars in repair bills. Thank you!
Left a comment in the other area too, I used this guide and another linked to it to replace both an HDD and the Superdrive. Perfect Instructions - I was daunted by this task the moment I opened the iMac, but these instructions made it doable. I also replaced the HDD and the Superdrive while in standing position. All I needed were a bunch of Pill Bottles for the screws, my cheap precision ratchet screwdriver set which had the proper size Torx Screw Bit, and an old iPhone Toolkit which had the rest of the things I needed. I used a Palette Knife to remove the sensor. The hardest part is getting the Screen screws back in, because the magnets make it difficult. I can probably do this now with other Model iMacs- This was the second iMac I used your guides to replace the HDD, this was my first Superdrive. Thanks a LOT.