
What you need

This teardown is not a repair guide. To repair your Family Inada ROBO chair HCP-D5A Massage Chair, use our service manual.

    • Start w chair in fully up right position. Might need to carefully reapply power to move chair for easier fastener access

  1. Family Inada ROBO chair HCP-D5A Massage Chair Teardown, Disconnecting cushions from leg portion: step 2, image 1 of 2 Family Inada ROBO chair HCP-D5A Massage Chair Teardown, Disconnecting cushions from leg portion: step 2, image 2 of 2
    • Surprisingly easy to remove the leg portion. This is very useful for decreasing the weight of the chair if you need to move it.

    • You might be able to get to the side securing fasteners with out removing the leg portion, but it is easy to do.

    • Carefully lift up on the main seat cushion. It is just velcro (ed) in place

    • then pull the top of the leg cushion portion forward

    • Next release the thin crossed velcro straps by pulling them forward as well

  2. Family Inada ROBO chair HCP-D5A Massage Chair Teardown, Mechanically separating the leg portion: step 3, image 1 of 2 Family Inada ROBO chair HCP-D5A Massage Chair Teardown, Mechanically separating the leg portion: step 3, image 2 of 2
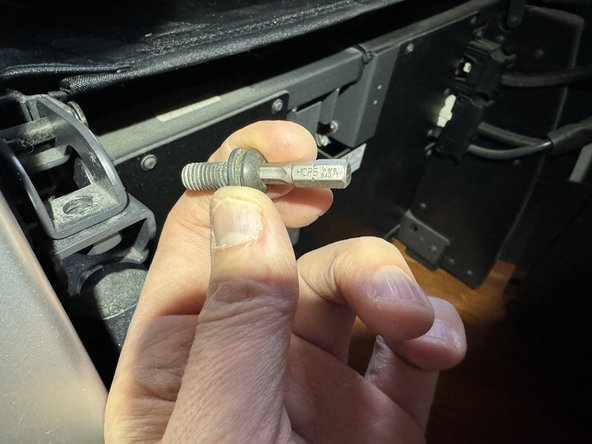
    • Use 5 mm hex to remove the two bolts to the left or the two circles in the drawing

    • then lift up on the securing points latches

    • then you can lift up slightly on the leg portion to move it away from the chair

    • carefully as it is still attached electrically

    • the leg portion does had wheels on it so it moves easily after you lift it free (it is quite heavy)

  3. Family Inada ROBO chair HCP-D5A Massage Chair Teardown, Leg portion rotation point close up: step 4, image 1 of 2 Family Inada ROBO chair HCP-D5A Massage Chair Teardown, Leg portion rotation point close up: step 4, image 2 of 2
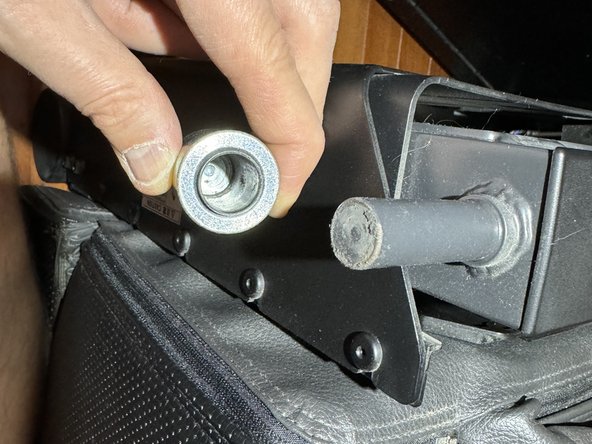
    • just a close up of how the leg portion connects and what it rotates on

  4. Family Inada ROBO chair HCP-D5A Massage Chair Teardown, Electrically disconnecting the leg portion: step 5, image 1 of 3 Family Inada ROBO chair HCP-D5A Massage Chair Teardown, Electrically disconnecting the leg portion: step 5, image 2 of 3 Family Inada ROBO chair HCP-D5A Massage Chair Teardown, Electrically disconnecting the leg portion: step 5, image 3 of 3
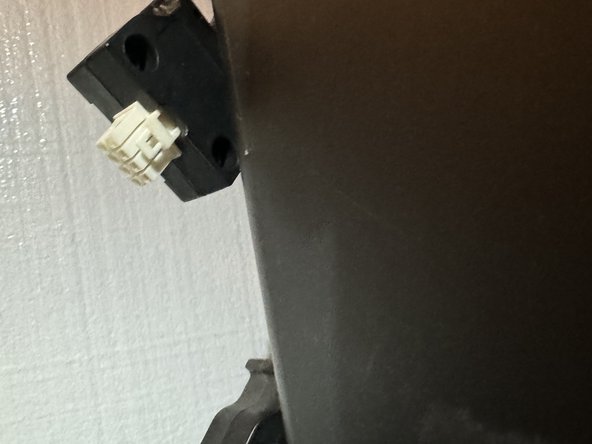
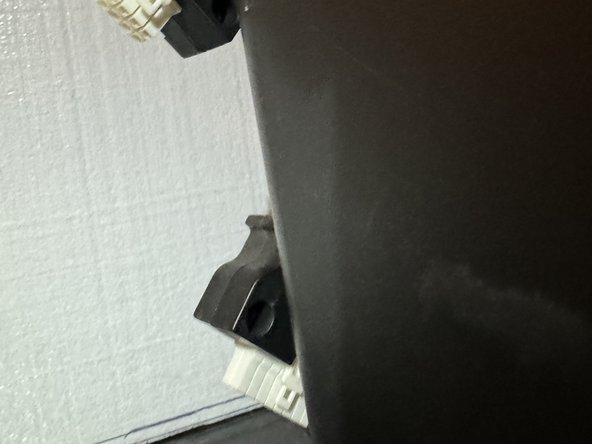
    • with a small flat head screw driver or similar, gently push the center of the connector toward the outside of the chair as you pull the entire connector forward.

    • There are two you need to disconnect to the right o the red squares.

    • 2nd photo shows them disconnected

  5. Family Inada ROBO chair HCP-D5A Massage Chair Teardown, removing the lower side panels part 1: step 6, image 1 of 3 Family Inada ROBO chair HCP-D5A Massage Chair Teardown, removing the lower side panels part 1: step 6, image 2 of 3 Family Inada ROBO chair HCP-D5A Massage Chair Teardown, removing the lower side panels part 1: step 6, image 3 of 3
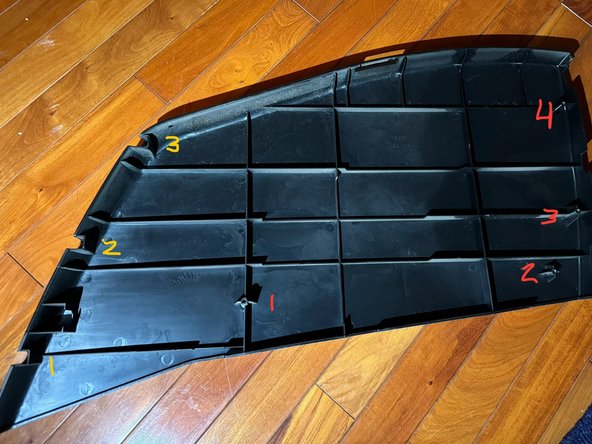
    • there are three #2 Phillips screws to be removed along the back of the panel shown in yellow numbers on the first photo

  6. Family Inada ROBO chair HCP-D5A Massage Chair Teardown, Removing the lower side panels part 2: step 7, image 1 of 2 Family Inada ROBO chair HCP-D5A Massage Chair Teardown, Removing the lower side panels part 2: step 7, image 2 of 2
    • there are four #2 Phillips screws to be removed along the front and top of the panel shown in red numbers on the first photo

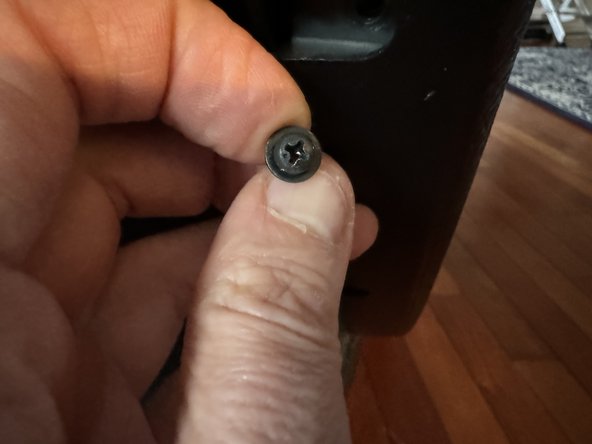
    • The second photos shows how the top center screw can be Gard to get to

    • all of these screws are accessed from the inside of the arm rest. Near where the outsides of where your thighs would be if you were sitting in the chair

  7. Family Inada ROBO chair HCP-D5A Massage Chair Teardown, Behind the side panel: step 8, image 1 of 2 Family Inada ROBO chair HCP-D5A Massage Chair Teardown, Behind the side panel: step 8, image 2 of 2
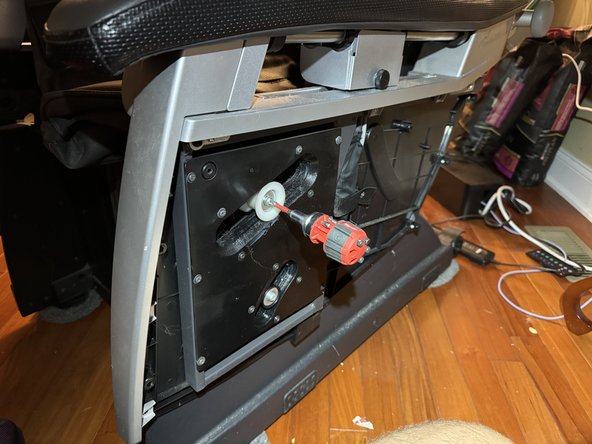
    • here I checked all the screws tight. the larger ones are #3 Phillips while the smaller ones are #2

    • The 2nd photo shows the screw I found loose that was making my arm rest move too much

  8. Family Inada ROBO chair HCP-D5A Massage Chair Teardown, Probable side panel main attachment points: step 9, image 1 of 3 Family Inada ROBO chair HCP-D5A Massage Chair Teardown, Probable side panel main attachment points: step 9, image 2 of 3 Family Inada ROBO chair HCP-D5A Massage Chair Teardown, Probable side panel main attachment points: step 9, image 3 of 3
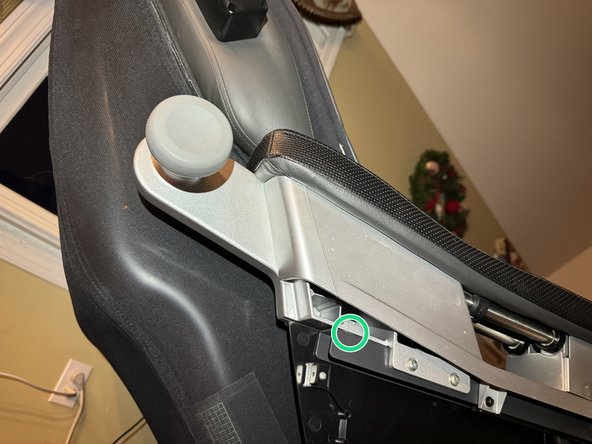
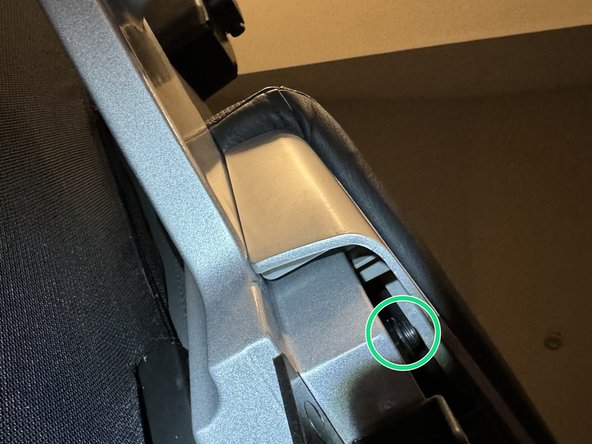
    • I think the entire side panel is attached by the three circles shown in the photo

    • to the right of the two red circles and to the upper left of the green circle are the three points

    • probably have to disassemble the grey plastic below the arm rest to get to the green bolt

  9. Family Inada ROBO chair HCP-D5A Massage Chair Teardown, Bottom photo: step 10, image 1 of 1
    • just a photo of the bottom if your curious

    • chair is very heavy lift carefully

    • I'll add more to this guide when I take it apart more (currently together and running well:)

igolten

Member since: 09/01/12

938 Reputation

5 Guides authored

Team

Repair is War on Entropy Member of Repair is War on Entropy

Community

25 Members

1,111 Guides authored

0 Comments

Add Comment

View Statistics:

Past 24 Hours: 2

Past 7 Days: 16

Past 30 Days: 69

All Time: 162