(Fat) Xbox 360 Hard Drive Replacement

(Fat) Xbox 360 Hard Drive Replacement

Nick

Nick and 2 other contributors

Last updated on March 14, 2025

25 minutes - 1 hour
Easy
Community-Contributed Guide

Introduction

Go to step 1

This guide is inspired by the existing guide on iFxit. This is an attempt to improve the procedure.

ATTENTION: Technically the Xbox Live ToS prohibit this, but the Xbox Live enforcement team (generally) doesn't care about the hard drive modification, unless you are using mods and cheats. IN THE EVENT OF A BAN, YOU WERE WARNED!!!

WARNING: THIS WILL VOID YOUR WARRANTY if you have one on the drive you purchased!

If you have a low capacity hard drive and want to upgrade it or need the hard drive for a S/E console, this guide will show you how to take the fat 360 hard drive apart for the hard drive. Taking the drive apart isn't difficult, but it requires access to Torx T6 and T10 screwdrivers.

Once the enclosure is open, any compatible drive can be installed. There may be compatibility limitations to deal with, so buy the correct drive or it may not work.

Guide notes

  • Try not to destroy the enclosure if you do not need it. These can be sold to recoup some of your costs.
  • Any known compatible drive can be installed. Some drives do not work, so bear this in mind when purchasing a drive.
  1. (Fat) Xbox 360 Hard Drive Replacement, Remove the bottom screws: step 1, image 1 of 3 (Fat) Xbox 360 Hard Drive Replacement, Remove the bottom screws: step 1, image 2 of 3 (Fat) Xbox 360 Hard Drive Replacement, Remove the bottom screws: step 1, image 3 of 3
    • EET owners: Your kit has this bit. No purchase needed.

    • Buy the drive at a cost you can afford to eat. This will void any warranties offered.

    • Remove the 3 screws from the bottom of the drive. Use a T6 Torx driver.

    • Remove the warranty seal and final screw. Use a T6 Torx driver.

  2. (Fat) Xbox 360 Hard Drive Replacement, Disassembly tip: step 2, image 1 of 1
    • EET owners: Your kit has this bit. No purchase needed.

    • If the drive is difficult to open and you are opening it to put the drive into a later Xbox 360 with no intention to preserve the enclosure, a screwdriver or pry tool can help.

    • If you are opening it to replace the drive inside for an original console, it is best to use a plastic pry tool instead. While a screwdriver "works" it will likely mar the enclosure.

  3. (Fat) Xbox 360 Hard Drive Replacement, Open the drive: step 3, image 1 of 3 (Fat) Xbox 360 Hard Drive Replacement, Open the drive: step 3, image 2 of 3 (Fat) Xbox 360 Hard Drive Replacement, Open the drive: step 3, image 3 of 3
    • EET owners: Your kit has this bit. No purchase needed.

    • If you are taking the enclosure apart for the bare drive, less caution is needed.

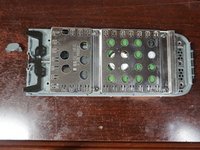
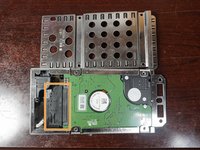
    • After removing the 4 bottom screws, remove the top cover. Remove the spring and locking tab before removing the drive cage.

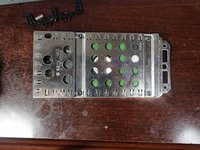
    • Remove the drive cage from the drive enclosure. If the drive has never been opened, additonal force may be required.

  4. (Fat) Xbox 360 Hard Drive Replacement, Disconnect and remove the hard drive: step 4, image 1 of 3 (Fat) Xbox 360 Hard Drive Replacement, Disconnect and remove the hard drive: step 4, image 2 of 3 (Fat) Xbox 360 Hard Drive Replacement, Disconnect and remove the hard drive: step 4, image 3 of 3
    • EET owners: Your kit has this bit. No purchase needed.

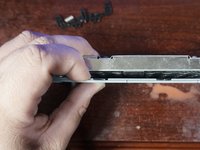
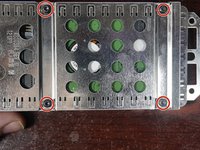
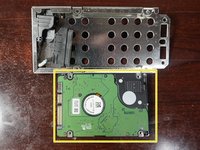
    • Remove the four T10 Torx screws securing the hard drive.

    • After removing the screws, slide the top cover off and disconnect the drive.

    • Disconnect the hard drive and remove it from the enclosure.

Finish Line

10 other people completed this guide.

Nick

Member since: 11/10/09

93,345 Reputation

59 Guides authored

Team

Master Techs Member of Master Techs

Community

327 Members

1,697 Guides authored

0 Comments

Add Comment

View Statistics:

Past 24 Hours: 24

Past 7 Days: 124

Past 30 Days: 486

All Time: 12,752