Introduction
This guide should be followed in order to access all the components underneath the keys. This includes the backlighting LEDs and the switches underneath the keys. The beginning steps for replacing both components are the same. Therefore the only difference between replacing these components will be the last two steps. Step nine will be used to replace the LEDs while step ten will be used to access the switches either for replacement or adding the aftermarket silencers to the keys.
What you need
-
-
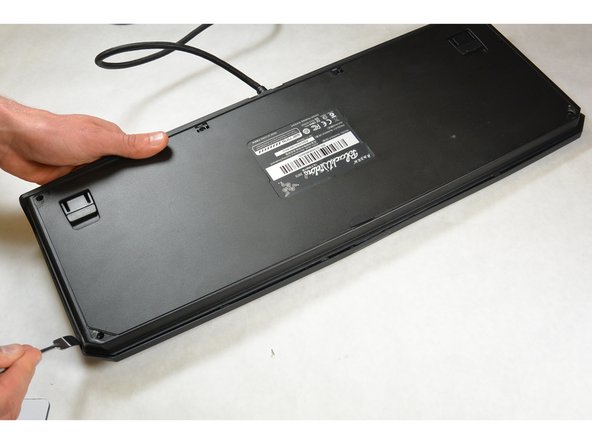
There are two tabs on both sides of where the cable enters the back of the keyboard. Use the metal spudgers to gently pull up the tabs. These are circled in red on the picture.
-
-
-
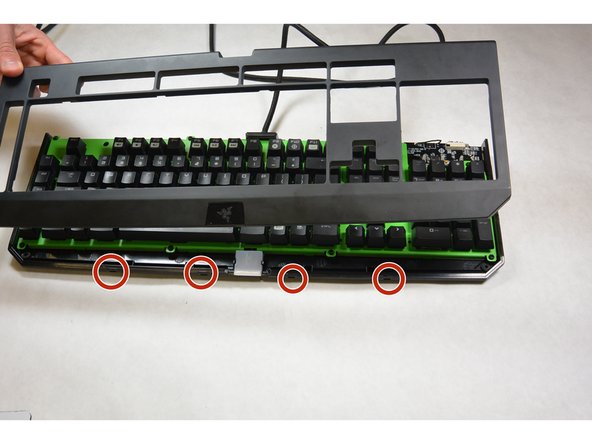
Utilizing your broad metal spudger, begin to pry off the faceplate of the keyboard.
-
There are small tabs between the faceplate and the keyboard's base that must be released. There are four tabs along the front of the keyboard and two along each side. Examples of the tabs you are looking for are circled in the third image.
-
-
-
-
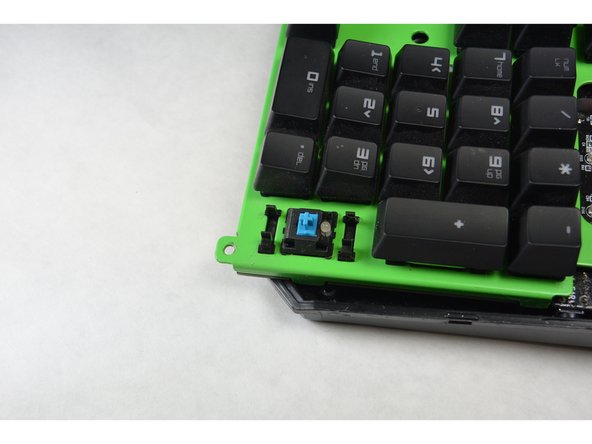
Keys can be removed from the board by pulling them upward with your fingers.
-
Larger keys can be removed by lifting the key away to expose the metal pin underneath for added support. Detach the pin by pulling out from the plastic tabs holding the pin using tweezers.
-
-
-
Follow the link below to watch a video that goes through all of the steps on how to remove the switches and LEDs from the keyboard. https://youtu.be/luHI4UjkyCY?t=5m37s
-


To reassemble your keyboard, follow these instructions in reverse order. There are no special steps to put this back together and it is just as easy to put it back together.
To reassemble your keyboard, follow these instructions in reverse order. There are no special steps to put this back together and it is just as easy to put it back together.
Cancel: I did not complete this guide.
13 other people completed this guide.
Team

IUPUI, Team 2-3, Harley Fall 2015 Member of IUPUI, Team 2-3, Harley Fall 2015
IUPUI-HARLEY-F15S2G3
4 Members
4 Guides authored
6 Comments
Can I use this guide for my Razer Blackwidow Ultimate 2014 Tournament edition?