
Acer Aspire 5742 Hard Drive Removal
Introduction
Go to step 1Removal of the hard drive is easy, but just be careful not to knock, jerk or drop it in the process as it's a delicate electromechanical device.
What you need
Fix Kits
These kits contain all the parts and tools needed to complete this guide.


Parts


Tools


Show more…
-
-
Move the battery catch to the "unlocked" position.
-
Pull back the second spring-loaded battery catch until the battery pops up.
-
Remove the battery.
-
-
-
Turn the notebook around to face you.
-
There are two Phillips #00 screws securing the cover panel to the rest of the notebook. Remove these screws.
-
-
-
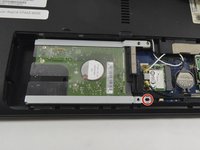
Unscrew the Phillips #00 screw which retains the hard drive in place.
-
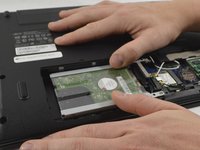
Gently slide the hard drive to the left in order to disengage the SATA connectors.
-
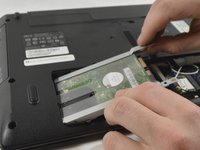
Lift the drive out of the notebook.
-


To reassemble your device, follow these instructions in reverse order.
To reassemble your device, follow these instructions in reverse order.
Cancel: I did not complete this guide.
16 other people completed this guide.
4 Comments
Great guide except for the missing screw sizes. Does anybody know the screw sizes?
I have this laptop with a bad HDD, it was a Toshiba 640 GB , 5400 RPM drive.
I like to know if this laptop supports 7200 RPM drives
Also, does this laptop support an SSD drive ?
Yes, any 2.5in SATA HDD or SSD can be fitted in place of any other.
I love this guide! It's the best! Thank You!