Introduction
If you've tried replacing the batteries to your remote, and still experience issues. You can replace the remote control's motherboard with this guide.
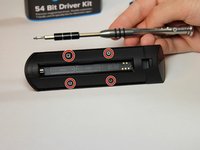
You will be removing multiple screws with this fix. Be sure to keep the removed screws inside a container since they are very small and easy to misplace.
What you need
-
-
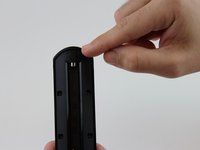
Turn the remote control over to show its back and place your index finger in the tab. Squeeze gently to open the battery cover.
-
Lift the battery cover up to expose the batteries.
-
-
-
Use your index finger to push the battery back and lift up to remove the battery.
-
Repeat the procedure for the second battery.
Do regular AAA batteries work? I changed the batteries and I am still not getting a signal.
-
-
-
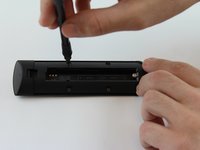
Locate the four 3.6 mm Phillips J#00 screws found under the back panel of the remote control and remove them.
-
-
-
-
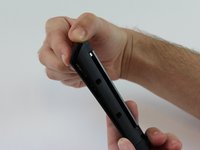
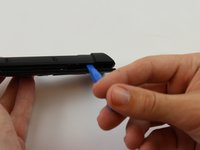
Insert a plastic opening tool in the gap and apply some force to disconnect the two pieces away from each other.
Vorsicht! Dieser Schritt ist falsch, da sich unter einer Abdeckung zwei weitere Schrauben befinden. Wenn man die Fernbedienung jetzt mit Gewalt öffnet, brechen die beiden im Kunststoffteil eingegossenen Metallinnengewinde heraus!
Vorab muss eine weitere kleine Kunststoffabdeckung abgehebelt werden. Wenn man gedanklich den Batteriedeckel längs bis zur Front der Fernbedienung verlängert, so ist gerade der verbleibende Rest des Bodenteils gemeint, der eben nicht Teil der Batterieabdeckung ist, jedoch ebenfalls im Querschnitt bogenförmig ist. Dieser ist an beiden Seiten der Fernbedienung eingerastet und zudem mit doppelseitigem Klebestreifen angebracht, daher einseitig ausklinken und dann vorsichtig dem Bogen entlang lösen. Darunter befinden sich zwei weitere Schrauben!
Exactly how PMB described: Caution! This step is incorrect because there are two more screws under a cover. If you open the remote control with force, the two metal internal threads cast into the plastic part will break out!
Another small plastic cover must first be pry off.
If you mentally extend the battery cover lengthways to the front of the remote control, you are referring to the remaining part of the bottom part, which is not part of the battery cover, but is also curved in cross section.
This is snapped into place on both sides of the remote control and is also attached with double-sided adhesive strips, so release it on one side and then carefully release it along the arch. There are two more screws underneath!
-
-
-
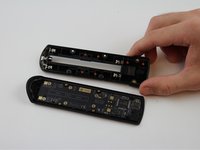
Place the plastic opening tool or your fingernail in the gap at the top end and lift the motherboard.
Schritt 5 ist leider flasch, da man mit dieser Methode die eingelassenen Muttern herausreißt. Man muss die geklebte Kappe entfernen, dann kommen zwei weitere Schrauben zum Vorschein die sich lösen lassen.
Dann muss man die Kappe zwar beim Zusammenbauen neu kleben, aber hat dafür nicht die Muttern rausgerissen.
Anleitung überarbeiten! Sie ist falsch.
Wie der Vorredner bereits schreibt muss erst die geklebte Blende bei den zwei verdeckten Schrauben abgehebelt werden! Das Gehäuse der Fernbedienung wird ansonsten beschädigt. Grober Schnitzer.
-


To reassemble your device, follow these instructions in reverse order.
To reassemble your device, follow these instructions in reverse order.
Cancel: I did not complete this guide.
6 other people completed this guide.
Team

USF Tampa, Team 16-3, Wollert Fall 2015 Member of USF Tampa, Team 16-3, Wollert Fall 2015
USFT-WOLLERT-F15S16G3
4 Members
16 Guides authored
3 Comments
Hello,
step 5 is wrong! There are no pins but screws!
You need to disconnect the upper piece (infrared sensor) first. Underneath you will find two more screws. Then you can open the case easily.
The circuit board can not be fixed instead of replaced. Understand might be cheaper to replace
This was useful to me to find a location I could attach a lanyard to the remote. It is so small it keeps disappearing.