Introduction
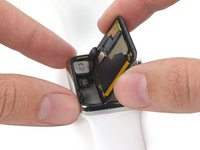
Unfortunately, opening up your Apple Watch may damage the Force Touch Sensor, which also serves as a gasketing seal. The sensor is made up of two layers, glued together. These layers may separate when you open your watch, compromising its seal after reassembly. If this happens, you'll need to repair or replace the sensor before reassembling your watch.
If your Force Touch gasket works correctly and you just need to replace the adhesive, follow our Apple Watch Adhesive Replacement guide instead.
What you need
-
-
Before starting repairs, take your watch off the charger and power it down.
-
-
-
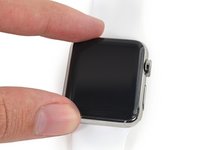
Prepare an iOpener (or grab a hair dryer or heat gun) and heat the face of the watch until it's slightly too hot to touch.
-
Leave the iOpener on the watch for at least a minute to fully heat the screen and soften the adhesive holding it to the case.
-
-
-
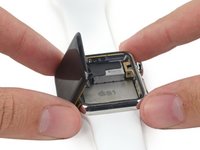
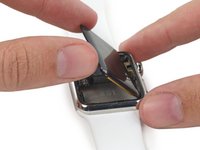
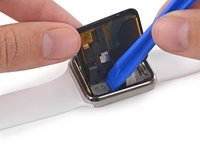
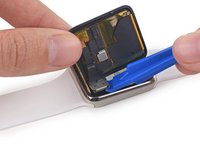
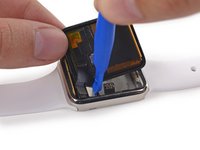
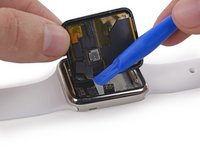
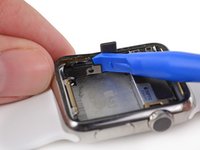
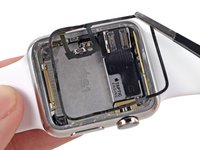
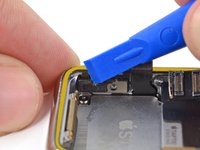
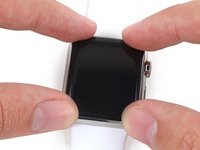
Place the curved section of the blade in the gap between the glass and case on the lower edge of the watch face, and press firmly straight down into the gap.
-
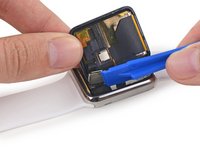
When the glass has lifted, gently rotate the knife down, opening the gap more by pushing the glass up.
-
-
-
-
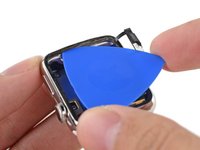
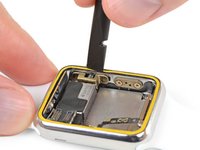
Use scissors to cut one of your opening picks to about the width of the battery. Try not to leave any sharp corners.
-
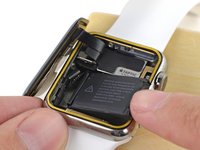
Insert the modified pick between the right side of the battery and the case.
-
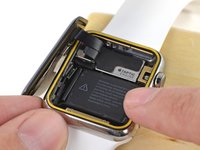
Use constant, steady pressure to slowly pry the battery up, separating it from the adhesive securing it to the system board.
-
On the larger (42 mm) models, it's possible to accidentally pry at the system board underneath the battery. Insert the pick only far enough to get underneath the battery, not the system board.
-
If needed, apply a little high concentration isopropyl alcohol (90% or greater) around and under the battery to help weaken the adhesive.
-
-
Tool used on this step:Tweezers$4.99
-
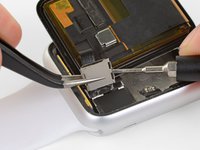
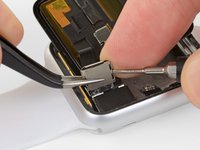
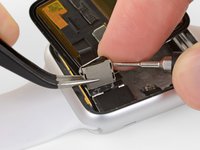
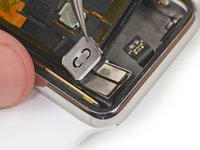
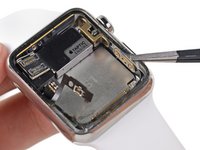
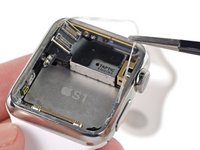
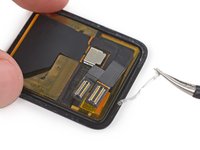
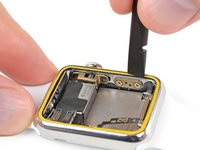
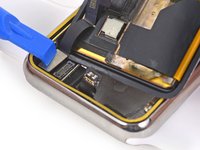
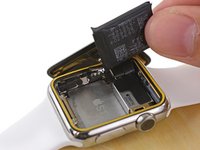
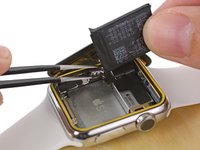
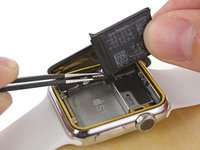
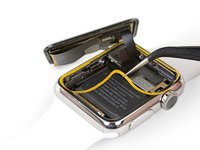
Steady the bracket from the left side using your fingers or tweezers.
-
At the same time, insert a small (1 mm) flathead screwdriver under the tiny tab on the right.
-
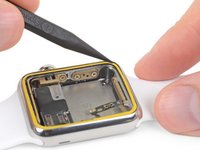
Finally, place one finger behind the tab, and pinch the bracket hard between your finger and the screwdriver to detach the cover.
-
-
-
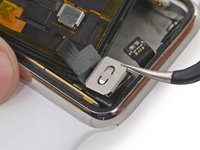
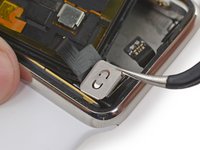
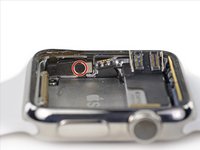
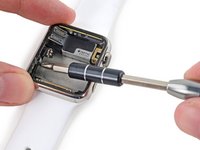
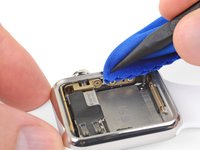
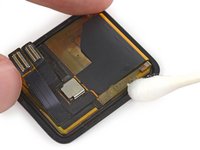
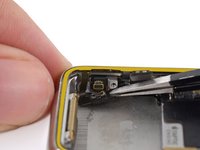
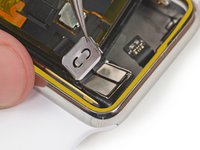
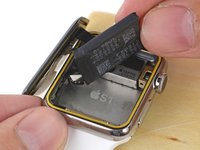
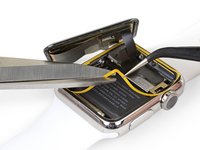
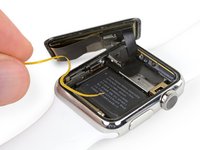
Use a Y000 driver to remove the single tri-point screw securing the Force Touch sensor connector cable.
-
-
-
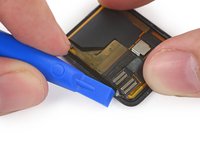
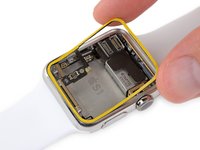
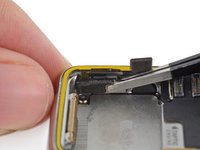
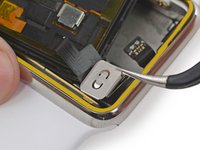
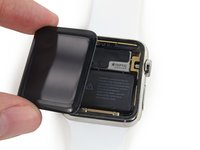
Use tweezers to peel up any adhesive left behind on the lower case.
-
Clean all traces of adhesive (and broken glass, if any) thoroughly from the case before re-sealing your watch. Scour the case using the tip of an opening tool or spudger wrapped in a lint-free cloth or coffee filter, along with a little isopropyl alcohol (90% concentration or greater).
-
-
Tool used on this step:Tesa 61395 Tape$5.99
-
If needed, try re-using the existing adhesive to secure the battery. Alternatively, try a small piece of double-sided tape such as Tesa 61395, or a dab of liquid adhesive such as E6000.
-
Rotate the battery down into its slot, and press it into position.
-
Press the battery down against the system board to re-adhere it in place.
-


Take your e-waste to an R2 or e-Stewards certified recycler.
Repair didn’t go as planned? Try some basic troubleshooting, or search our Answers forum for help.
Take your e-waste to an R2 or e-Stewards certified recycler.
Repair didn’t go as planned? Try some basic troubleshooting, or search our Answers forum for help.
Cancel: I did not complete this guide.
134 other people completed this guide.

Team

Tobias Isakeit - Repairability Engineer Member of Tobias Isakeit - Repairability Engineer
Business
1 Member
1,131 Guides authored
37 Comments
does the touch function need the force touch sensor? i am lost. i have replaced the sensor (which worked even if separated) put the thing together, have attached the force touch sensor and i just tried to test the watch. it turns on, but i have no touch. there was touch prior to the force touch replacing. does the touch work if the protective film is still on it?
Hi palokiller, the force touch sensor is responsible for the force touch function (pressing on the display). The touch itself is handled by the display assembly, meaning the three cables at the back of the display. Check those cables and make sure they are seated deep enough and the ZIF flap is closed properly. The touch (and also the force touch) should work with a protective film still on.
Hey,
I’m kind of facing the same problem of having not touch after assembly. Do you have find your problem, because I have no clue what I have done wrong.
Step 20 of this guide can and should be completely skipped. This is by far the most difficult part of the process. It requires excessive force on parts of a fragile cable that is prone to ripping. While it is easier to clean the edge of the display assembly with it removed, it is still possible to clean it while attached.
I thought the same. But then I discovered, there is a with applying the latch. If you watch carefully at the pictures, you’ll notice they lifted the connector assembly up. In this uplift position the latch can be mounted, but it’s almost impossible to mount it at the rested position.
Hope this helps someone.