
Asus X401A Trackpad Replacement
Introduction
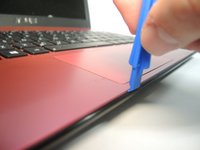
Go to step 1Is your trackpad not responding to touch? Are the buttons on your trackpad malfunctioning? Replacing your trackpad may help address these issues.


-
-
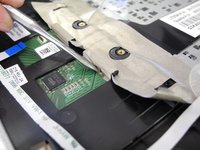
Use a Phillips Head #1 screwdriver to unscrew the eight 3mm screws.
-
Use a Phillips head #1 screwdriver to unscrew the two 4mm screws.
-
-
-
Removing the white wiring from the trackpad.
-
Continue removing the wire until you get to the end.
-
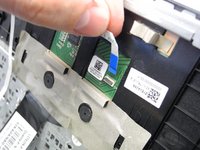
Fold up the latch on the where the cable meets the motherboard.
-
-
-
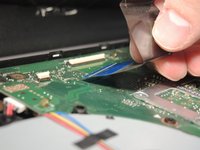
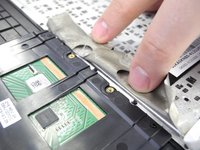
Use a spudger to lift the ZIF connector tabs up.
-
Remove the black and the white ribbon cable.
-
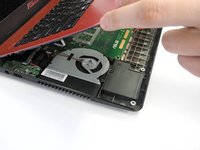
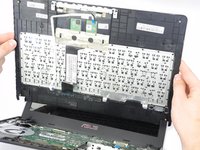
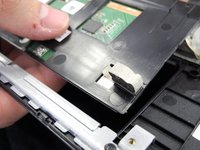
Remove the entire keyboard covering.
-
-
-
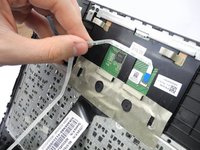
Lay the keyboard cover down with the keys facing down. This component contains the track pad. You will be working with this component until you reassemble.
-
-
Tool used on this step:Magnetic Project Mat$19.95
-
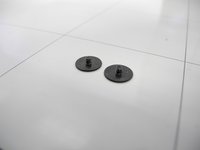
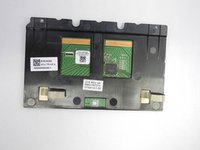
Using a PH0 Phillips Screwdriver, remove the two screws located within the circles of the band aid seal.
-
-
-
Begin peeling back the band aid tape. Use the plastic spudger if necessary. This will allow you to free up the trackpad.
-


Team

Ohio State, Team 1-4, Wilder Spring 2017 Member of Ohio State, Team 1-4, Wilder Spring 2017
OSU-WILDER-S17S1G4
4 Members
5 Guides authored