
Asus ZenBook UX303U Back Panel Replacement
Introduction
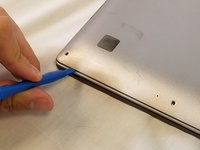
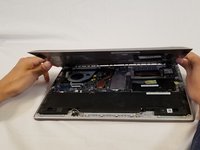
Go to step 1This guide will show you how to replace a dented or damaged bottom panel on an Asus ZenBook UX303U laptop.
What you need


To reassemble your device, follow these instructions in reverse order.
To reassemble your device, follow these instructions in reverse order.
Cancel: I did not complete this guide.
2 other people completed this guide.
Team

USF Tampa, Team S3-G5, Nance Spring 2018 Member of USF Tampa, Team S3-G5, Nance Spring 2018
USFT-NANCE-S18S3G5
3 Members
9 Guides authored
One Comment
Some models may utilize Phillips #00 screws, but mine (and many others based on what I’ve now read) utilize Torx T5 screws around the edges of the panel.