Introduction
In this guide, we will be showing you how to remove the flash dial in order to replace it.
What you need


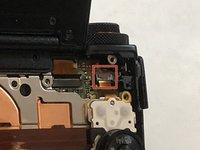
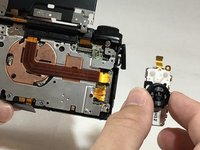
Almost done!
To reassemble your device, follow these instructions in reverse order.
Conclusion
To reassemble your device, follow these instructions in reverse order.
Team

Eastern Washington University, Team S1-G3, Carnegie Spring 2018 Member of Eastern Washington University, Team S1-G3, Carnegie Spring 2018
EWU-CARNEGIE-S18S1G3
4 Members
6 Guides authored
One Comment
Good guide. If you need to repair the jog dial, check this video for an excellent guide: https://www.youtube.com/watch?v=amuCb5ko...