
Classen Sod Cutter HSC18AHD 2018 Blade Replacement

What you need

  1. Careful: steps 1-4 are sourced from a guide that's marked as in-progress.

    Classen Sod Cutter HSC18AHD 2018 Blade Replacement, Safety precautions: step 1, image 1 of 2 Classen Sod Cutter HSC18AHD 2018 Blade Replacement, Safety precautions: step 1, image 2 of 2
    • Make sure the engine is off and cool to the touch before you proceed.

  2. Classen Sod Cutter HSC18AHD 2018 Blade Replacement: step 2, image 1 of 1
    • Place wheel chocks against the roller and rear wheel to prevent the machine from moving.

  3. Classen Sod Cutter HSC18AHD 2018 Blade Replacement: step 3, image 1 of 2 Classen Sod Cutter HSC18AHD 2018 Blade Replacement: step 3, image 2 of 2
    • Flip the gas shutoff switch next to the motor to the left into the off position.

  4. Classen Sod Cutter HSC18AHD 2018 Blade Replacement: step 4, image 1 of 2 Classen Sod Cutter HSC18AHD 2018 Blade Replacement: step 4, image 2 of 2
    • Grab the plastic housing at the end of the spark plug wire.

    • Pull firmly to disconnect the wire from the spark plug.

  5. Classen Sod Cutter HSC18AHD 2018 Blade Replacement, Unbolt the cutter blade: step 5, image 1 of 1
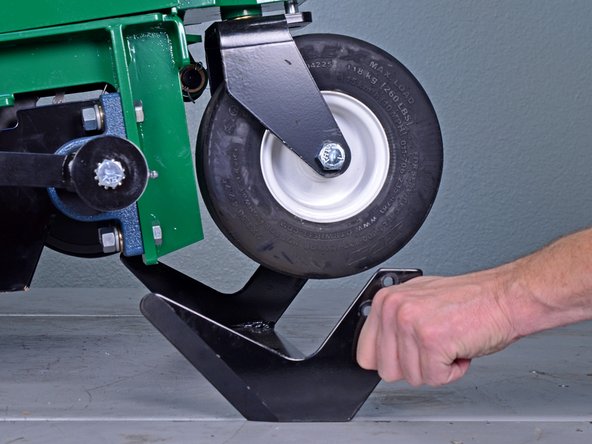
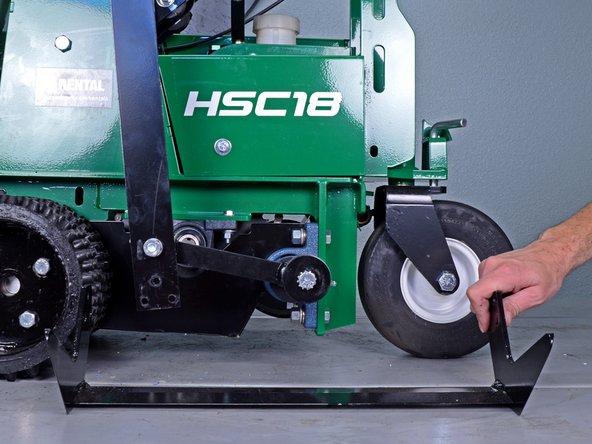
    • Use a 1/2 inch socket to remove the three bolts securing the cutter blade on the left side of the machine.

    • You may need to use a 1/2 inch wrench in combination with the socket wrench to hold the nuts in place.

  6. Classen Sod Cutter HSC18AHD 2018 Blade Replacement: step 6, image 1 of 1
    • Use a 1/2 inch socket to remove the three bolts securing the cutter blade on the right side of the machine.

    • You may need to use a 1/2 inch wrench in combination with the socket wrench to hold the nuts in place.

  7. Classen Sod Cutter HSC18AHD 2018 Blade Replacement, Remove the cutter blade: step 7, image 1 of 3 Classen Sod Cutter HSC18AHD 2018 Blade Replacement, Remove the cutter blade: step 7, image 2 of 3 Classen Sod Cutter HSC18AHD 2018 Blade Replacement, Remove the cutter blade: step 7, image 3 of 3
    • Slide the cutter blade out from under the machine to remove it.

    • Do not handle the blade from the cutting edge.

Conclusion

To reassemble your device, follow these instructions in reverse order.

Sam Omiotek

Member since: 02/25/19

76,055 Reputation

288 Guides authored

0 Comments

Add Comment

View Statistics:

Past 24 Hours: 0

Past 7 Days: 0

Past 30 Days: 9

All Time: 418