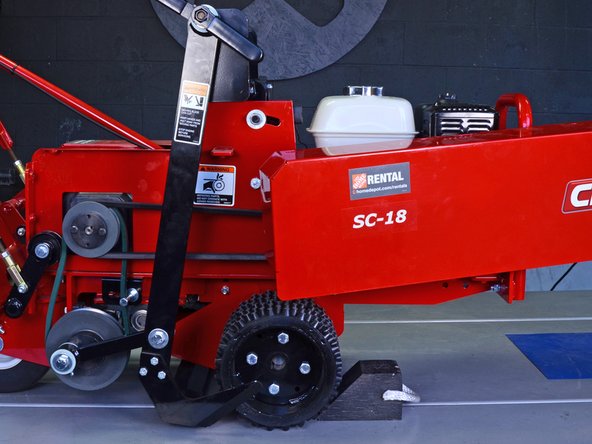
Classen Sod Cutter SC18AHDCA 2019 Guard Panel Replacement

Prerequisite Only
This guide is only intended to be used as a prerequisite for other guides. It's incomplete by itself.

What you need

  1. Classen Sod Cutter SC18AHDCA 2019 Guard Panel Replacement, Safety precautions: step 1, image 1 of 2 Classen Sod Cutter SC18AHDCA 2019 Guard Panel Replacement, Safety precautions: step 1, image 2 of 2
    • Before you begin, make sure that the machine is turned off.

    • For safety purposes, disconnect the spark plug.

    • Grab the plastic housing at the end of the spark plug wire.

    • Pull firmly to disconnect the wire from the spark plug.

  2. Classen Sod Cutter SC18AHDCA 2019 Guard Panel Replacement: step 2, image 1 of 1
    • Place wheel chocks against the roller and rear wheel to prevent the machine from moving.

  3. Classen Sod Cutter SC18AHDCA 2019 Guard Panel Replacement, Position the blade: step 3, image 1 of 2 Classen Sod Cutter SC18AHDCA 2019 Guard Panel Replacement, Position the blade: step 3, image 2 of 2
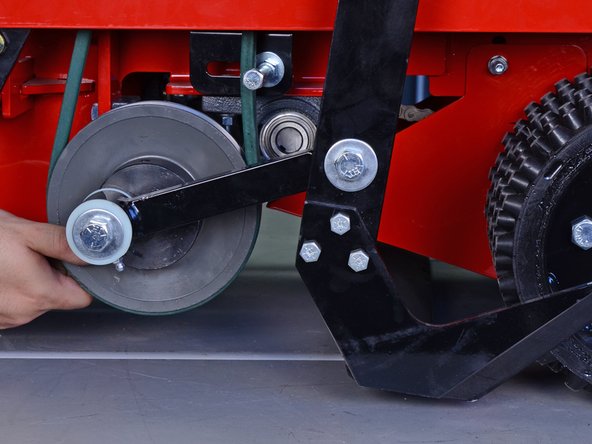
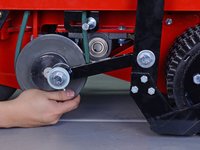
    • Use your hand to slowly rotate the blade pulley so that the blade is pulled back as far as possible.

  4. Classen Sod Cutter SC18AHDCA 2019 Guard Panel Replacement, Unscrew the right guard panel: step 4, image 1 of 3 Classen Sod Cutter SC18AHDCA 2019 Guard Panel Replacement, Unscrew the right guard panel: step 4, image 2 of 3 Classen Sod Cutter SC18AHDCA 2019 Guard Panel Replacement, Unscrew the right guard panel: step 4, image 3 of 3
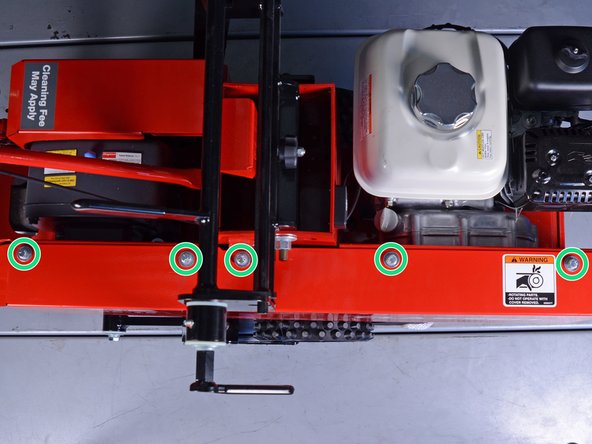
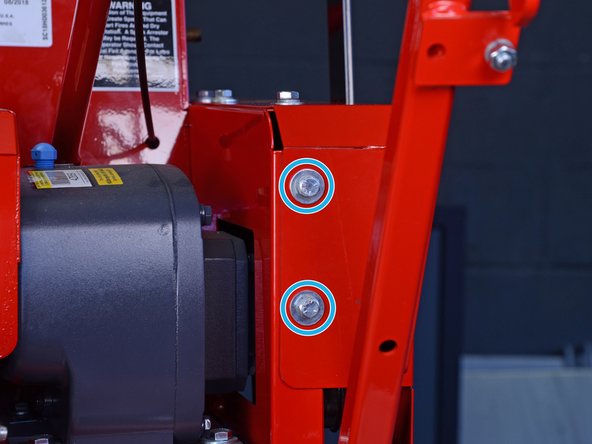
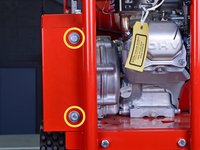
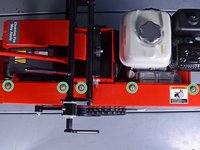
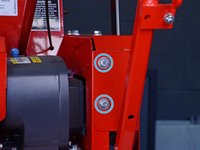
    • Use a 1/2" socket wrench to remove the nine 1 inch-long bolts securing the right guard panel:

    • Two bolts on the front of the panel

    • Five bolts on the top of the panel

    • Two bolts on the back of the panel

  5. Classen Sod Cutter SC18AHDCA 2019 Guard Panel Replacement, Remove the guard panel: step 5, image 1 of 3 Classen Sod Cutter SC18AHDCA 2019 Guard Panel Replacement, Remove the guard panel: step 5, image 2 of 3 Classen Sod Cutter SC18AHDCA 2019 Guard Panel Replacement, Remove the guard panel: step 5, image 3 of 3
    • Slide the guard panel forward until the panel clears the black blade arm.

    • Swing the panel outward to clear the screw post.

    • Remove the panel.

Conclusion

To reassemble your device, follow these instructions in reverse order.

Arthur Shi

Member since: 01/03/18

281,620 Reputation

584 Guides authored

Team

iFixit Member of iFixit

Staff

118 Members

19,410 Guides authored

0 Comments

Add Comment

View Statistics:

Past 24 Hours: 0

Past 7 Days: 0

Past 30 Days: 0

All Time: 11