
Dell Inspiron E1705 Lower Case Replacement
Introduction
Go to step 1This guide will be very important for other guides, as it gives you access to the inner parts of your computer.
What you need


-
-
Remove the 12 Phillips #1 screws from the edges of the lower case.
-
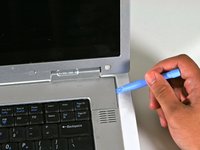
You may also need to remove the central screw next to the lock icon.
-
-
-
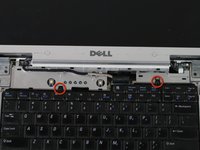
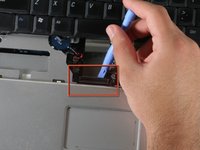
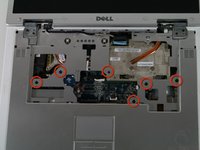
Using a Phillips head screwdriver, remove the screws shown in the image. They all have the letter "P" next to them.
-
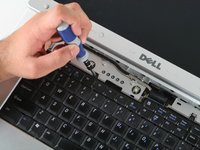
Carefully unplug the connections shown.
-
Also, the wireless cables on the right side may prevent moving the upper case out of the way.
-
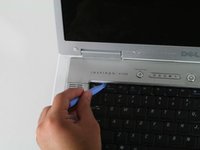
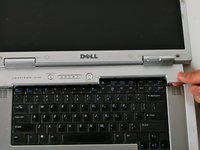
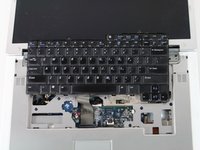
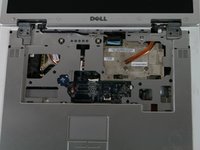
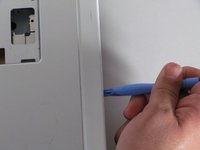
Once the screws have been removed and the connections unplugged, use the plastic opening tool to gently separate the panel from the lower case.
-


To reassemble your device, follow these instructions in reverse order.
To reassemble your device, follow these instructions in reverse order.
Cancel: I did not complete this guide.
2 other people completed this guide.
Team

Cal Poly, Team 22-5, Maness Fall 2010 Member of Cal Poly, Team 22-5, Maness Fall 2010
CPSU-MANESS-F10S22G5
4 Members
11 Guides authored