Introduction
This guide explains how to replace the motherboard in the Dell XPS 13 9350. The motherboard connects all the hardware components in the device and is a critical component. If your Dell XPS 15 is experiencing power issues a motherboard replacement might be necessary. To make sure this is the right fix, check the troubleshooting section for specific symptoms such as failure to boot, overheating and power issues.
What you need
-
-
Use a plastic opening tool to pry open the 'XPS' flap in the middle.
No flap or screw on the XPS 9370, just a press-fit latch at the centre of the cover. This can be gently prised off.
-
-
-
Use opening picks or a plastic pry tool to pry open the case clips, beginning from the back edge.
It’s not that easy to lift actually, cause there are latches. Had t release them gently all around beforehand.
Also there’s one additional screw under that plate on the bottom!
Maybe the later models are different, since it should be from the front: https://www.youtube.com/watch?v=xFIE2SKs...
Very difficult step, Proceed very carefull
If you are replacing the battery of a 9360 or latter (2016 onward) make sure to do the FRONT first. There are latches on the back that you may break if you try to force it open that way. After prying up the front and the sides, just lift up the front like you would open a hinged box. You shouldn’t feel that much resistance as the back hinges off towards you after you’ve lifted it around 30-40 degrees.
-
-
-
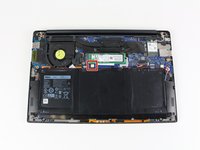
Remove the bottom cover.
good evening, is there a site that sells the back part because it's broken
good evening, is there a site that sells the
back part because it's broken
-
-
-
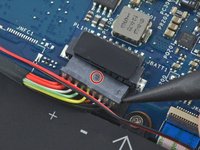
Pull the battery cable connector towards the battery to disconnect it from its socket.
-
If the connector is stubborn, push a little at one side, then the other, to "walk" it out of its socket.
-
If you have trouble walking the connector out of the socket, use the point of a spudger to gently push on the connector indent to slide the connector out.
-
Open the display and press the power button for five seconds to drain any remaining charge from the system.
DO NOT OPEN THE DISPLAY!!! When I did, on my Dell XPS 13 9360, I cracked something in the top right corner where the power button is, and the plastic part of the button came out. I can still press it, but there is now a gap there and dust can get it.
I opened they display, very carefull. No problem. Open just enough to press they button.
Agree with Asher Grossman, open at your peril!
First put the bottom cover back, with 4 screws, one at each corner. Then you can safely open the display and press the button. Then close the display and take the bottom cover off again.
I did not do the open display and drain the battery because I did not understand this part and I know my battery was essentially dead, hence why I ordered one. Did everything else and voila! Works perfectly!
Opening the display worked fine for me, but when I closed it again, something definitely didn’t quite go right – I think it was trying to push against the missing back cover. I managed to carefully close the display by pushing against the metal corner thingy that was meant to push against the cover, and so far the laptop still seems to work, but I concur with Asher and James, be careful at least. Patrick’s suggestion sounds great if I’d seen it in time :)
Ich konnte den Stecker schliesslich mit Hilfe einer Plektren sehr gut entfernen. Das Display habe ich nicht geöffnet.
Much better to ensure the old battery is fully depleted (unplug from mains & switch on & let it expire) before you begin replacement.
This allows you to leave the unit face down whilst you work on replacing the battery.
-
-
Tool used on this step:Tweezers$4.99
-
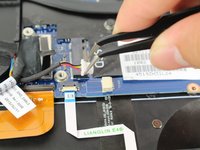
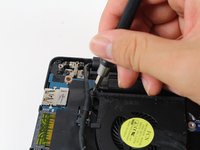
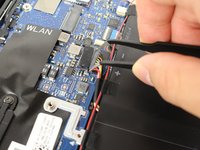
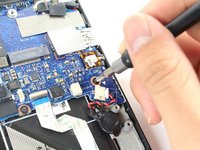
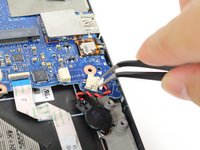
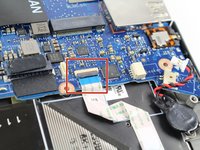
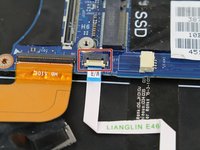
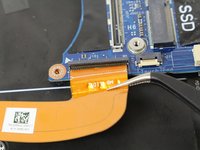
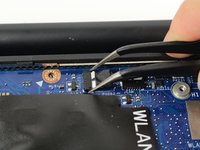
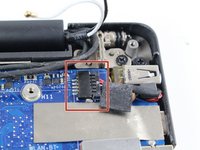
Use tweezers to remove the little white connector by pulling it out and away from its socket.
-
-
-
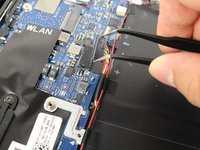
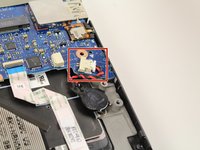
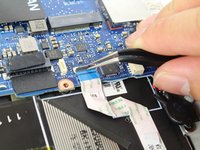
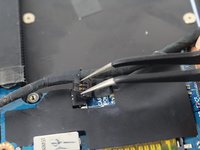
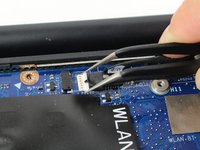
Remove the black standard flat connector by lifting the tab up with your hand.
-
-
-
-
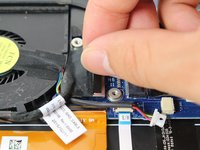
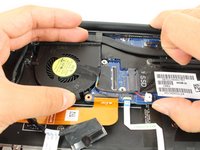
Use your right hand to lift up the larger section of the motherboard, closest to the fan.
-
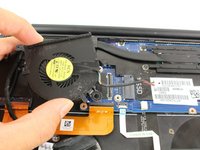
Use your left hand to pull the fan at a 30-degree angle out from underneath the motherboard.
-
-
-
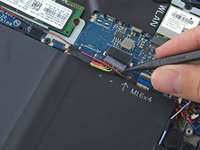
Remove the four 3 mm Phillips #0 screws located on each corner of the battery.
There are two additional screws holding sound speakers.
And there is a another small screw holding the battery right above the “M1 6x4” print.
You also do not need to remove any speaker screws or the speaker, you just have to remove the tape holding the speaker wire to the battery.
-
-
-
Pull the battery cable connector towards the battery to disconnect it from its socket.
-
-
-
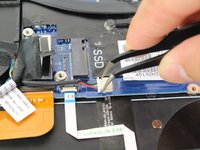
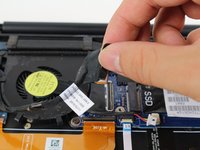
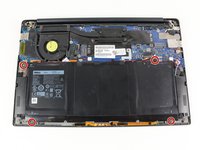
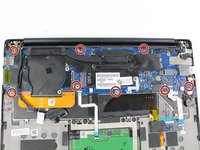
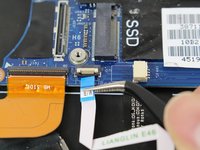
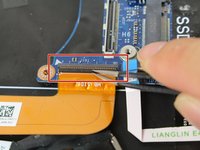
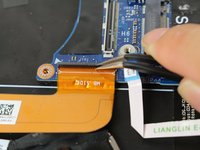
Remove the eight 4 mm Phillips #0 screws from the motherboard.
-
-
-
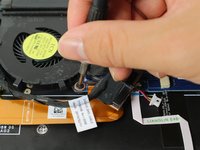
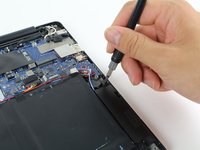
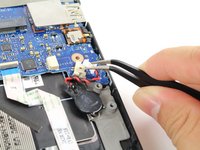
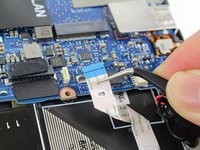
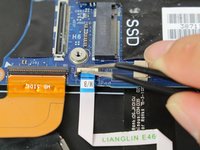
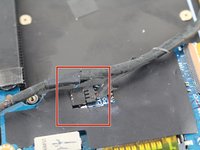
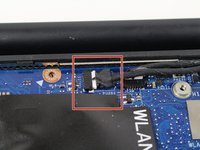
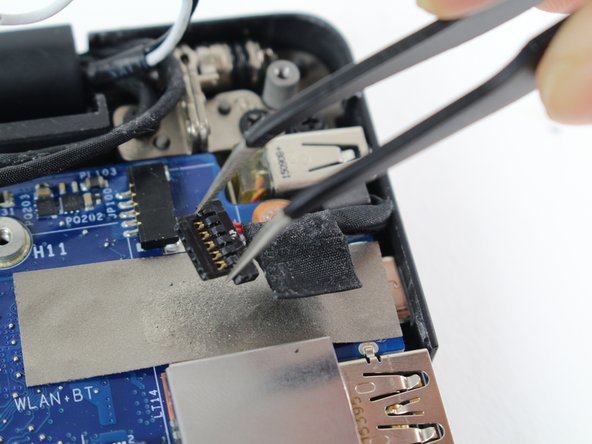
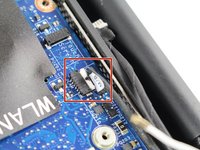
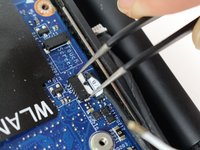
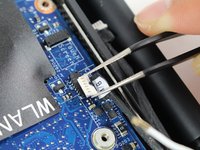
Use tweezers to detach the black cable connector out of its socket by pulling it to the right.
-


To reassemble your device, follow these instructions in reverse order.
To reassemble your device, follow these instructions in reverse order.
Cancel: I did not complete this guide.
12 other people completed this guide.
Team

Cal Poly, Team S21-G6, Livingston Spring 2017 Member of Cal Poly, Team S21-G6, Livingston Spring 2017
CPSU-LIVINGSTON-S17S21G6
5 Members
30 Guides authored
2 Comments
where is camera cable
Missing a step about removing the tiny Phillips head screw under the XPS flip up cover in the middle. Also, there are hooks all the way around the cover so it doesn’t simply lift off.
curtis_p_brown - Reply
What about step 3???
Peter Hecht -
Please dont hurry , take your Time to follow this procedure. It takes 20 min (not 5) and step 4 requires half of this Time. Good luck.
Peter Hecht - Reply
+1 Peter Hecht is right - getting the little clips the back is snapped on with is time consuming and a bit fiddly for people not used to “spudging” off covers. Starting from the back is the key those come loose much easier and help with the rest
Doug Steinschneider - Reply
Great guide. It took me 20 minutes and there were no surprises. Battery installed. :)
dhenniga - Reply