
Disassembling Sony Cyber-shot DSC-W5 Back Cover
Introduction
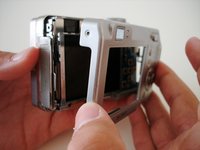
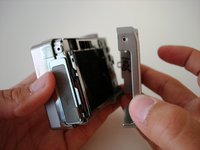
Go to step 1We will be taking off the back cover, or case, of the camera to gain access to the internal components including the speaker, LCD screen, lens, and motherboard.
What you need

-
-
Remove Memory Stick Pro from the card reader slot on the bottom of the camera.
-
Remove both batteries.
-


To reassemble your device, follow these instructions in reverse order.
To reassemble your device, follow these instructions in reverse order.
Cancel: I did not complete this guide.
2 other people completed this guide.
Team

Cal Poly, Team 15-50, Garner Spring 2010 Member of Cal Poly, Team 15-50, Garner Spring 2010
CPSU-GARNER-S10S15G50
5 Members
12 Guides authored