Dremel 4000 Shaft Lock Pin Replacement

Dremel 4000 Shaft Lock Pin Replacement

John Cobb

John Cobb and 2 other contributors

Last updated on May 20, 2020

6 minutes
Very easy
Action Shots
Needs More Images

Introduction

Go to step 1

This is likely the simplest repair possible for this device. Simply access the shaft lock pin after opening the case.

What you need

Parts

Tools

Show more…

  1. Dremel 4000 Shaft Lock Pin Replacement, Back Case: step 1, image 1 of 2 Dremel 4000 Shaft Lock Pin Replacement, Back Case: step 1, image 2 of 2
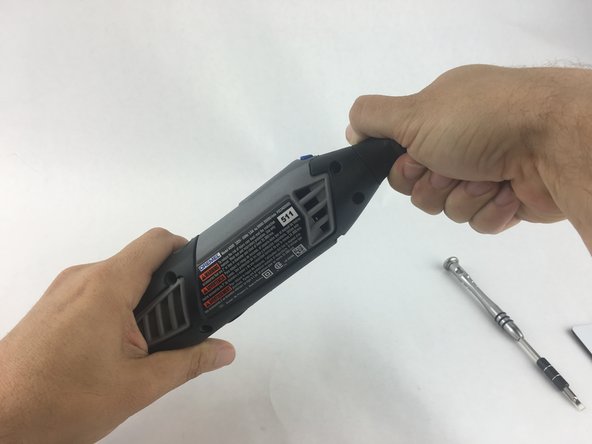
    • Start by removing the housing cap by unscrewing it.

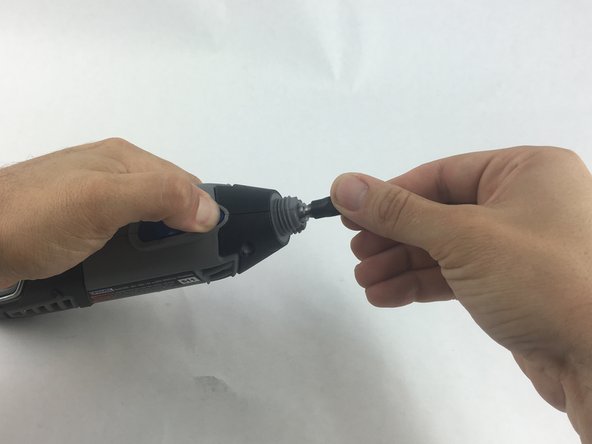
    • Next, unscrew the now exposed collet nut while holding down the shaft lock button.

    • To remove the collet nut, you may need to use the small open-end wrench provided with the Dremel.

  2. Dremel 4000 Shaft Lock Pin Replacement: step 2, image 1 of 1
    • Using your hands, carefully remove hanger from casing.

  3. Dremel 4000 Shaft Lock Pin Replacement: step 3, image 1 of 2 Dremel 4000 Shaft Lock Pin Replacement: step 3, image 2 of 2
    • Remove the brush caps (one on each side) by using a flathead screwdriver bit.

    • The brush caps are spring loaded.

  4. Dremel 4000 Shaft Lock Pin Replacement: step 4, image 1 of 1
    • Using the Torx 15 screwdriver tip, remove the 5 screws (12.5 mm) that hold the casing together.

  5. Dremel 4000 Shaft Lock Pin Replacement: step 5, image 1 of 1
    • Use a plastic opening tool to gently wedge apart the hard plastic threads.

  6. Dremel 4000 Shaft Lock Pin Replacement: step 6, image 1 of 1
    • Use your hands to carefully remove the back casing so that none of the components fall out.

  7. Dremel 4000 Shaft Lock Pin Replacement, Shaft Lock Pin: step 7, image 1 of 1
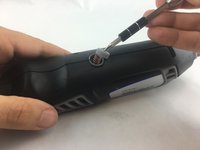
    • If the shaft lock pin is not engaging the rotary gear, or if the spring is missing or damaged, it will need to be replaced.

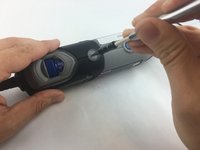
    • Remove the damaged shaft lock pin and spring by hand.

    • Place new shaft lock pin so that the spring functions and the lock engages the rotary gear.

Conclusion

To reassemble your device, follow these instructions in reverse order.

3 other people completed this guide.

John Cobb

Member since: 01/20/16

1,743 Reputation

4 Guides authored

Team

USF Tampa, Team 15-4, Remmell Spring 2016 Member of USF Tampa, Team 15-4, Remmell Spring 2016

USFT-REMMELL-S16S15G4

4 Members

13 Guides authored

3 Comments

These instructions are idiotic! I want to replace the shaft lock pin because it is not WORKING. Step 1 instructs me to use the shaft lock pin to remove the exposed collet nut. The reason I am changing the shaft lock pin is because it won’t hold the shaft for loosening the collet nut. DUH!

mitchthane - Reply

three years later and I came to the same conclusion: DUH

Randy Martin -

Four years later and I came to the same conclusion: DUH

Ben simon -

Add Comment

View Statistics:

Past 24 Hours: 6

Past 7 Days: 54

Past 30 Days: 124

All Time: 13,458