DualSense Edge Rear Trim Replacement

DualSense Edge Rear Trim Replacement

Spencer Pennington

Spencer Pennington

Last updated on October 5, 2024

5 minutes
Moderate

Introduction

Go to step 1

Follow this guide to replace, change, or upgrade the rear trim on your Sony DualSense Edge controller.

Note: This guide recommends removing the joysticks before removing the rear trim. While you can leave the joysticks in, removing them is simple and makes the rear trim removal process easier.

What you need

Tools

  1. DualSense Edge Rear Trim Replacement, Remove the front trim: step 1, image 1 of 3 DualSense Edge Rear Trim Replacement, Remove the front trim: step 1, image 2 of 3 DualSense Edge Rear Trim Replacement, Remove the front trim: step 1, image 3 of 3
    • Place the controller on a work surface with the joysticks facing down.

    • Use a spudger or your finger to slide the Release tab to the left. The front trim should fall to the table.

    • If the front trim doesn't fall open, make sure the front trim has room to fall down and the Release tab is pushed all the way to the left.

    • Lift the controller up, leaving the front trim on the table.

    • During reassembly, insert the front trim at an angle so the top slots in first, then lower the trim into place and snap it onto the controller.

  2. DualSense Edge Rear Trim Replacement, Remove the joysticks: step 2, image 1 of 3 DualSense Edge Rear Trim Replacement, Remove the joysticks: step 2, image 2 of 3 DualSense Edge Rear Trim Replacement, Remove the joysticks: step 2, image 3 of 3
    • Flip the controller over so the joysticks are facing up.

    • Lift the metal lever that holds the joystick in place until the joystick slides out slightly.

    • Slide the joystick out from its slot.

  3. DualSense Edge Rear Trim Replacement: step 3, image 1 of 1
    • Repeat this process to remove the other joystick.

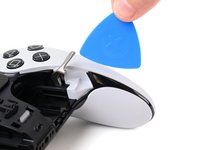
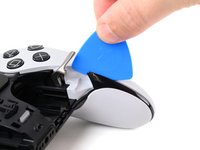
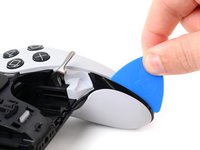
  4. DualSense Edge Rear Trim Replacement, Insert an opening pick: step 4, image 1 of 3 DualSense Edge Rear Trim Replacement, Insert an opening pick: step 4, image 2 of 3 DualSense Edge Rear Trim Replacement, Insert an opening pick: step 4, image 3 of 3
    • The rear trim is held in place by fragile plastic clips. Work slowly and gently to avoid breaking the clips.

    • If you installed the back button paddles included with your controller, remove them before beginning this process.

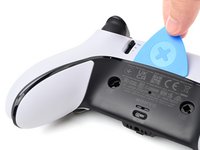
    • Insert the flat edge of an opening pick between the black portion of the rear trim and the top cover, near the joystick lever.

    • Slide the opening pick towards the bottom of the grip to release the clips.

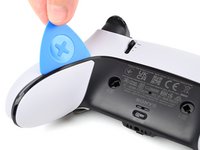
  5. DualSense Edge Rear Trim Replacement, Release the clips: step 5, image 1 of 2 DualSense Edge Rear Trim Replacement, Release the clips: step 5, image 2 of 2
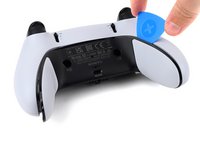
    • Slide the pick around to the rear of the controller and flip the controller over so the buttons are facing down.

    • Slide the opening pick around the edge of the rear trim to release the clips.

  6. DualSense Edge Rear Trim Replacement, Remove the rear trim: step 6, image 1 of 3 DualSense Edge Rear Trim Replacement, Remove the rear trim: step 6, image 2 of 3 DualSense Edge Rear Trim Replacement, Remove the rear trim: step 6, image 3 of 3
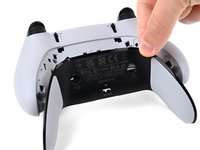
    • Slide the opening along the edge of the trim on the other grip.

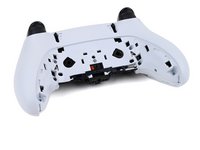
    • Once all clips are released, remove the trim.

    • If at any point the trim feels stuck, stop and look for any clips that may have re-engaged and release them with the opening pick to avoid damaging them.

Conclusion

To reassemble your device, follow these instructions in reverse order.

Repair didn’t go as planned? Try some basic troubleshooting, or ask our Answers community for help.

Spencer Pennington

Member since: 09/09/23

17,527 Reputation

114 Guides authored

Team

iFixit Member of iFixit

Staff

118 Members

19,583 Guides authored

One Comment

Wo kann man eine Zierblende kaufen?

Nic Ley - Reply

Add Comment

View Statistics:

Past 24 Hours: 5

Past 7 Days: 55

Past 30 Days: 350

All Time: 1,943