
Echo Chain Saw CS590 2019 Carburetor Replacement

What you need

  1. Echo Chain Saw CS590 2019 Carburetor Replacement, Turn off the chainsaw: step 1, image 1 of 2 Echo Chain Saw CS590 2019 Carburetor Replacement, Turn off the chainsaw: step 1, image 2 of 2
    • Make sure you have the ignition switch turned off before starting your repair.

    • The chainsaw should be cool to the touch before continuing.

  2. Echo Chain Saw CS590 2019 Carburetor Replacement, Loosen the air filter cover: step 2, image 1 of 2 Echo Chain Saw CS590 2019 Carburetor Replacement, Loosen the air filter cover: step 2, image 2 of 2
    • Use your fingers to loosen the air filter cover knob.

  3. Echo Chain Saw CS590 2019 Carburetor Replacement: step 3, image 1 of 3 Echo Chain Saw CS590 2019 Carburetor Replacement: step 3, image 2 of 3 Echo Chain Saw CS590 2019 Carburetor Replacement: step 3, image 3 of 3
    • Remove the air filter cover.

  4. Echo Chain Saw CS590 2019 Carburetor Replacement, Disconnect the spark plug: step 4, image 1 of 3 Echo Chain Saw CS590 2019 Carburetor Replacement, Disconnect the spark plug: step 4, image 2 of 3 Echo Chain Saw CS590 2019 Carburetor Replacement, Disconnect the spark plug: step 4, image 3 of 3
    • Use your fingers to pull up and disconnect the spark plug boot.

  5. Echo Chain Saw CS590 2019 Carburetor Replacement, Remove the air filter: step 5, image 1 of 3 Echo Chain Saw CS590 2019 Carburetor Replacement, Remove the air filter: step 5, image 2 of 3 Echo Chain Saw CS590 2019 Carburetor Replacement, Remove the air filter: step 5, image 3 of 3
    • To minimize debris entering the intake, pull the choke shut before continuing.

    • Remove the air filter

    • During reassembly, clean the air filter with compressed air or with light brushing before reinstalling it.

  6. Echo Chain Saw CS590 2019 Carburetor Replacement, Unfasten the front handle: step 6, image 1 of 2 Echo Chain Saw CS590 2019 Carburetor Replacement, Unfasten the front handle: step 6, image 2 of 2
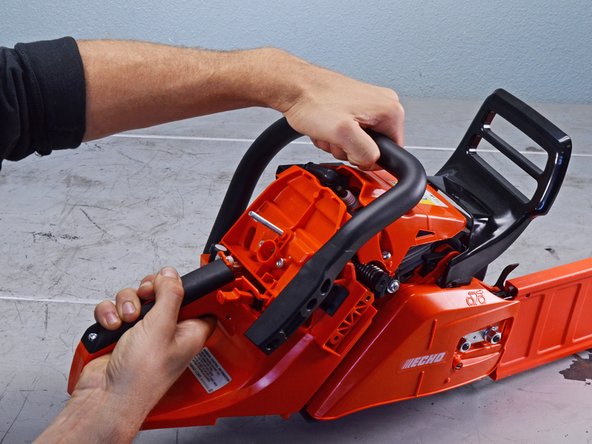
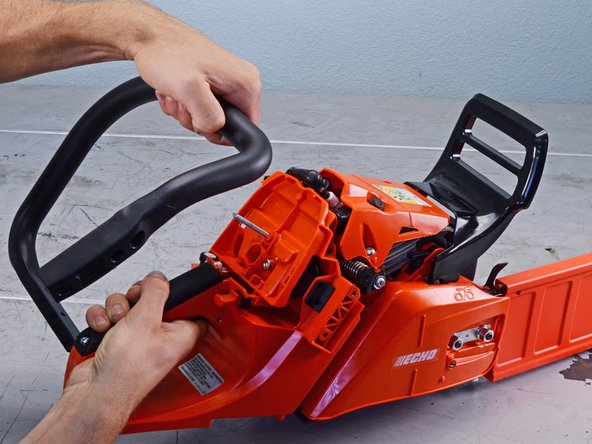
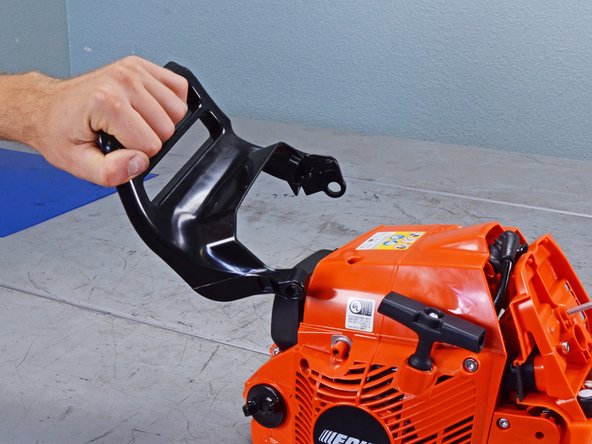
    • Use a T25 Torx screwdriver to remove the five screws securing the front handle to the bottom and right side of the device:

    • Four 24 mm-long screws

    • One 25 mm-long screw

  7. Echo Chain Saw CS590 2019 Carburetor Replacement, Remove the front handle: step 7, image 1 of 3 Echo Chain Saw CS590 2019 Carburetor Replacement, Remove the front handle: step 7, image 2 of 3 Echo Chain Saw CS590 2019 Carburetor Replacement, Remove the front handle: step 7, image 3 of 3
    • Pull the handle toward the rear of the device to remove it.

  8. Echo Chain Saw CS590 2019 Carburetor Replacement, Remove the sprocket guard: step 8, image 1 of 2 Echo Chain Saw CS590 2019 Carburetor Replacement, Remove the sprocket guard: step 8, image 2 of 2
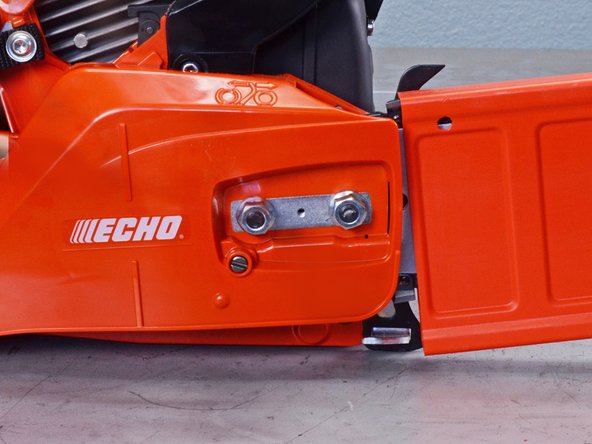
    • Use a 13 mm wrench to remove the two nuts securing the sprocket guard.

  9. Echo Chain Saw CS590 2019 Carburetor Replacement: step 9, image 1 of 3 Echo Chain Saw CS590 2019 Carburetor Replacement: step 9, image 2 of 3 Echo Chain Saw CS590 2019 Carburetor Replacement: step 9, image 3 of 3
    • Remove the sprocket guard.

  10. Echo Chain Saw CS590 2019 Carburetor Replacement, Remove the guide bar: step 10, image 1 of 3 Echo Chain Saw CS590 2019 Carburetor Replacement, Remove the guide bar: step 10, image 2 of 3 Echo Chain Saw CS590 2019 Carburetor Replacement, Remove the guide bar: step 10, image 3 of 3
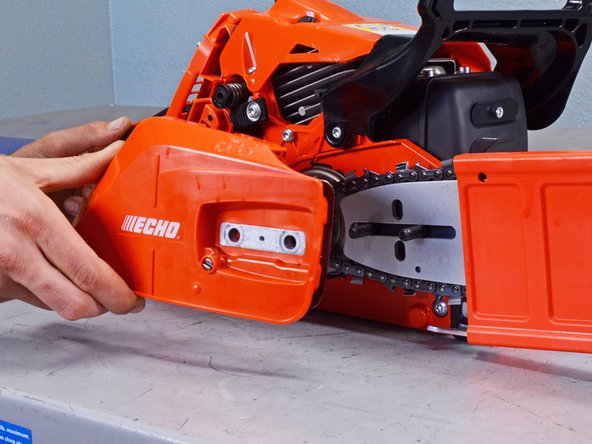
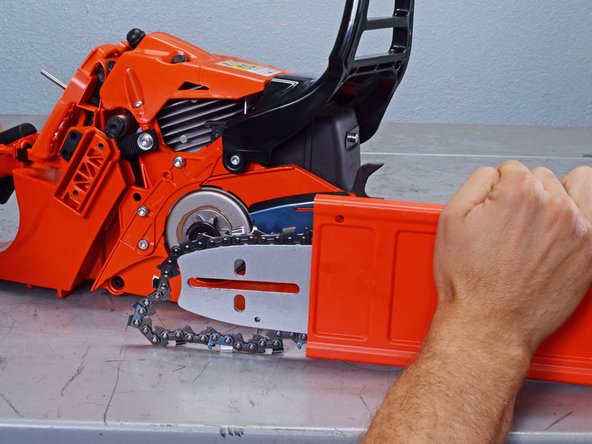
    • Push the guide bar towards the back of the device to create slack in the saw chain.

    • Pull the guide bar away from the device to separate the saw chain from the clutch drum.

    • Remove the guide bar.

  11. Echo Chain Saw CS590 2019 Carburetor Replacement, Unfasten the front hand guard: step 11, image 1 of 2 Echo Chain Saw CS590 2019 Carburetor Replacement, Unfasten the front hand guard: step 11, image 2 of 2
    • Make sure the front hand guard is in the unlocked position before continuing.

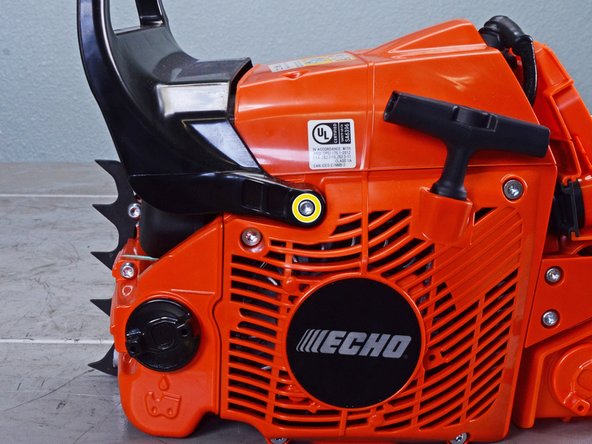
    • Use a T25 Torx screwdriver to remove the two 20 mm screws securing the front hand guard.

  12. Echo Chain Saw CS590 2019 Carburetor Replacement, Remove the front hand guard: step 12, image 1 of 2 Echo Chain Saw CS590 2019 Carburetor Replacement, Remove the front hand guard: step 12, image 2 of 2
    • Pull the front hand guard toward the rear of the device to remove it.

  13. Echo Chain Saw CS590 2019 Carburetor Replacement, Unfasten the engine cover: step 13, image 1 of 2 Echo Chain Saw CS590 2019 Carburetor Replacement, Unfasten the engine cover: step 13, image 2 of 2
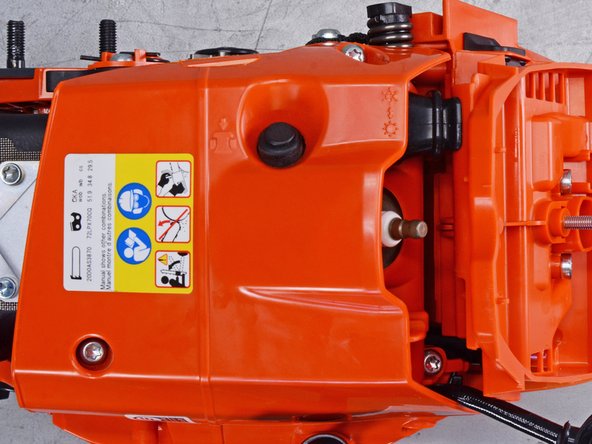
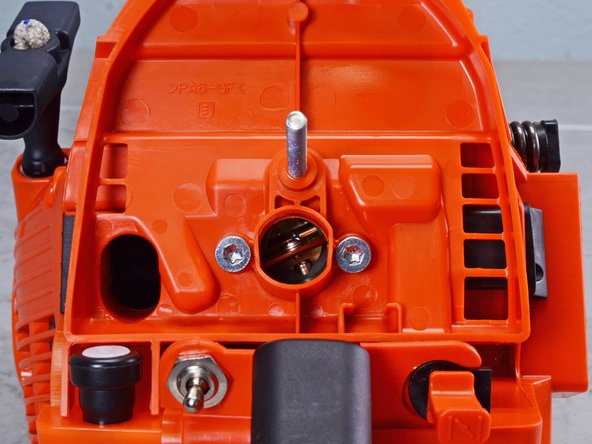
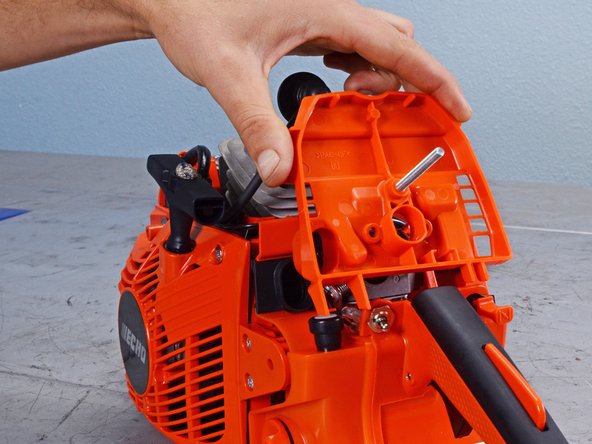
    • Use a T25 Torx screwdriver to remove the three 20 mm screws securing the engine cover.

  14. Echo Chain Saw CS590 2019 Carburetor Replacement, Remove the engine cover: step 14, image 1 of 3 Echo Chain Saw CS590 2019 Carburetor Replacement, Remove the engine cover: step 14, image 2 of 3 Echo Chain Saw CS590 2019 Carburetor Replacement, Remove the engine cover: step 14, image 3 of 3
    • Pull the engine cover straight off the device to remove it.

  15. Echo Chain Saw CS590 2019 Carburetor Replacement, Unfasten the carburetor cover: step 15, image 1 of 2 Echo Chain Saw CS590 2019 Carburetor Replacement, Unfasten the carburetor cover: step 15, image 2 of 2
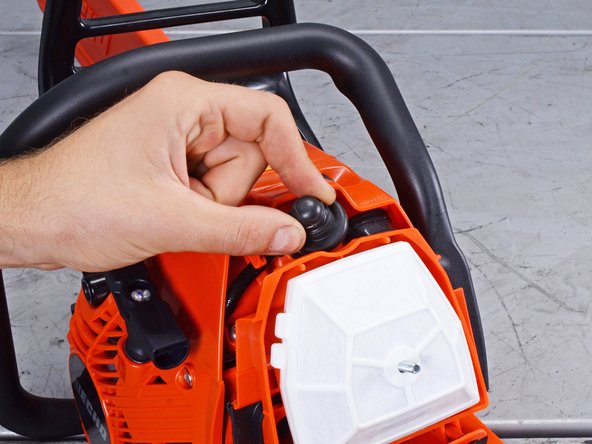
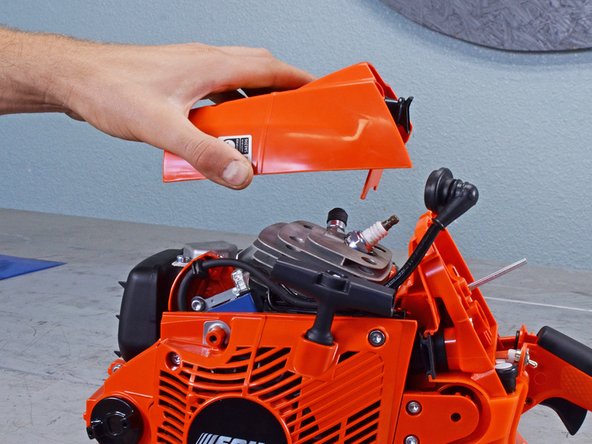
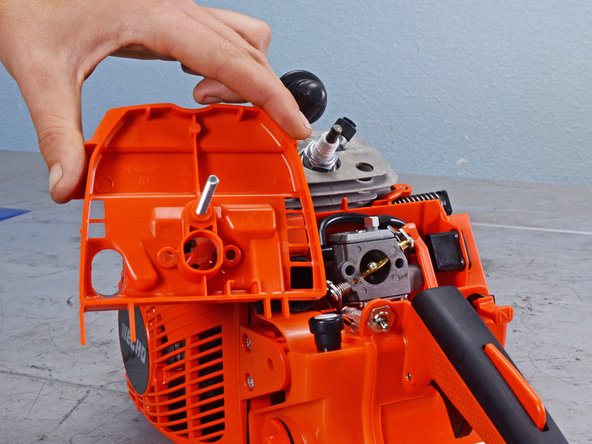
    • Use a T25 Torx screwdriver to remove the two 54 mm screws securing the carburetor cover.

  16. Echo Chain Saw CS590 2019 Carburetor Replacement, Remove the carburetor cover: step 16, image 1 of 3 Echo Chain Saw CS590 2019 Carburetor Replacement, Remove the carburetor cover: step 16, image 2 of 3 Echo Chain Saw CS590 2019 Carburetor Replacement, Remove the carburetor cover: step 16, image 3 of 3
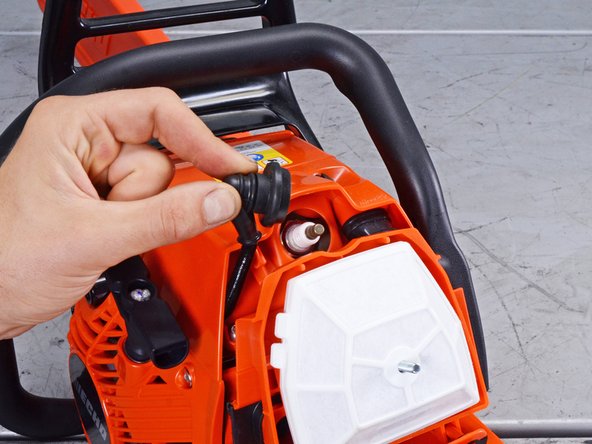
    • Pull the carburetor cover straight off its housing to remove it.

  17. Echo Chain Saw CS590 2019 Carburetor Replacement, Disconnect the carburetor: step 17, image 1 of 3 Echo Chain Saw CS590 2019 Carburetor Replacement, Disconnect the carburetor: step 17, image 2 of 3 Echo Chain Saw CS590 2019 Carburetor Replacement, Disconnect the carburetor: step 17, image 3 of 3
    • Before performing this step, put on safety glasses to avoid any fuel spraying in your eyes.

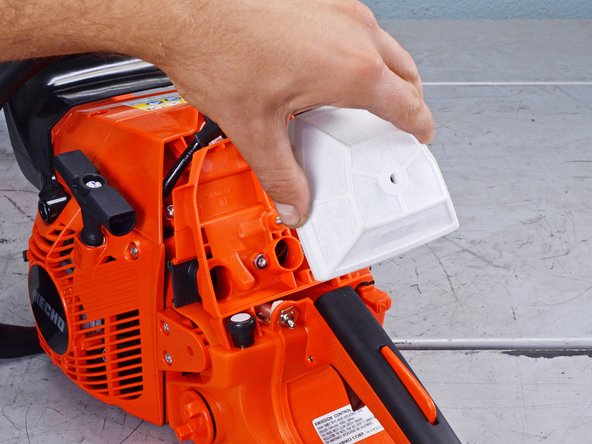
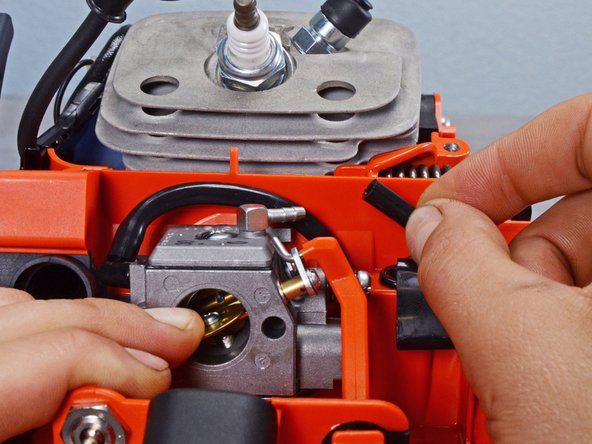
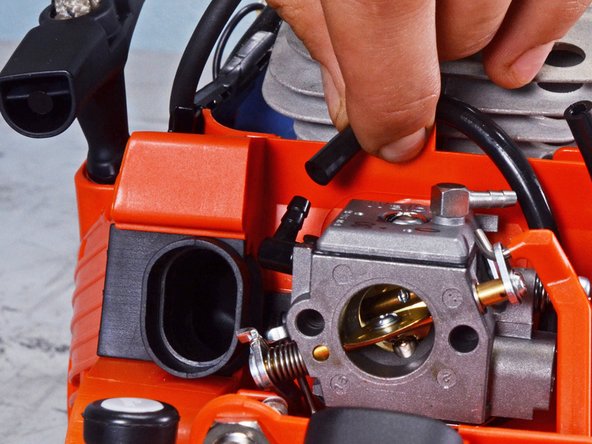
    • Use your fingers to pull the right fuel pipe out of the carburetor.

    • Repeat the same procedure for the left fuel pipe.

  18. Echo Chain Saw CS590 2019 Carburetor Replacement: step 18, image 1 of 3 Echo Chain Saw CS590 2019 Carburetor Replacement: step 18, image 2 of 3 Echo Chain Saw CS590 2019 Carburetor Replacement: step 18, image 3 of 3
    • Pull the choke lever through its bracket to separate it from the frame.

    • Twist the lever counter-clockwise to disconnect its clip on the carburetor.

    • Remove the choke lever.

  19. Echo Chain Saw CS590 2019 Carburetor Replacement, Remove the carburetor: step 19, image 1 of 3 Echo Chain Saw CS590 2019 Carburetor Replacement, Remove the carburetor: step 19, image 2 of 3 Echo Chain Saw CS590 2019 Carburetor Replacement, Remove the carburetor: step 19, image 3 of 3
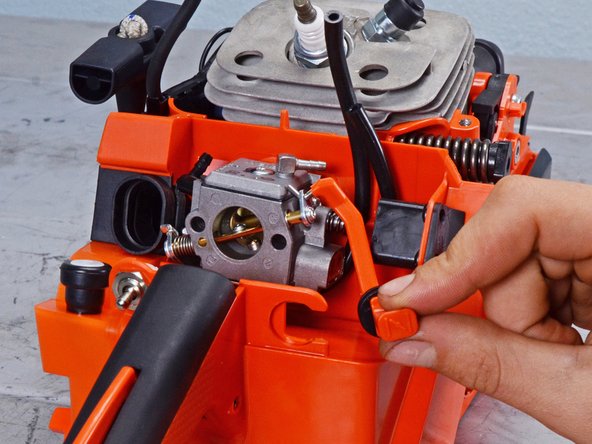
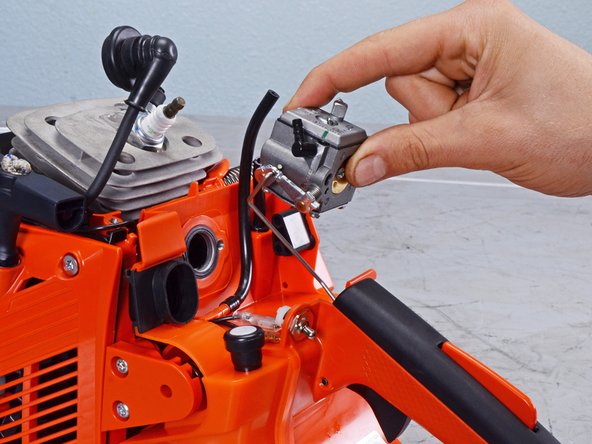
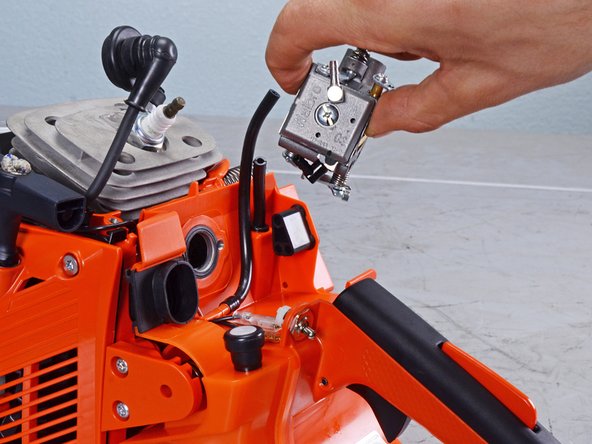
    • Lift the carburetor out of its housing.

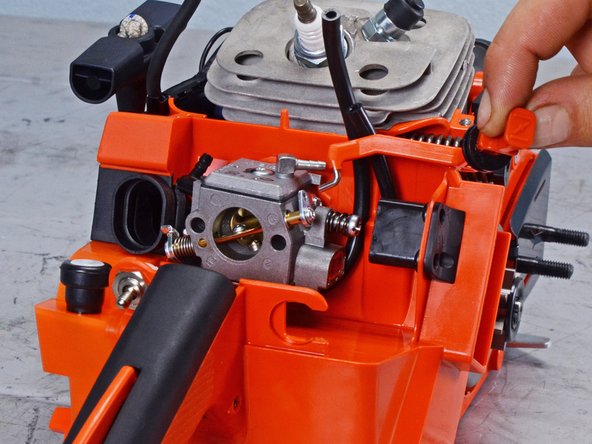
    • Twist the carburetor counter-clockwise to disconnect the throttle rod's metal clip.

    • Remove the carburetor.

Conclusion

To reassemble your device, follow these instructions in reverse order.

5 other people completed this guide.

Alex Diaz-Kokaisl

Member since: 01/16/22

127,879 Reputation

592 Guides authored

Team

iFixit Member of iFixit

Staff

141 Members

17,908 Guides authored

2 Comments

And what about using a new carburetor gasket? Got a part # to go with it?

TED - Reply

steps 6 to 14 are unnecessary they have nothing to to with the removal or install

HECTOR - Reply

Add Comment

View Statistics:

Past 24 Hours: 5

Past 7 Days: 44

Past 30 Days: 124

All Time: 1,439