Flashforge Finder 2 Fan Cleaning or Replacement

Flashforge Finder 2 Fan Cleaning or Replacement

dinoo_fixit

dinoo_fixit and one other contributor

Last updated on September 17, 2024

10 - 25 minutes
Moderate
Community-Contributed Guide

Introduction

Go to step 1

Fan cleaning is part of the preventive maintenance of a 3d printer. Approximately every 300 printing hours, disassemble and clean it to prevent fan blockages and subsequent printing errors. This guide can also be applied to fan replacement.

What you need

Tools

Show more…

iFixit earns commission when you buy through these links.
  1. Flashforge Finder 2 Fan Cleaning or Replacement, Work safely: step 1, image 1 of 1
    • Shut down the back switch and disconnect the printer power supply

    • If used recently wait for the extruder to cool down

  2. Flashforge Finder 2 Fan Cleaning or Replacement, Remove extruder cover: step 2, image 1 of 3 Flashforge Finder 2 Fan Cleaning or Replacement, Remove extruder cover: step 2, image 2 of 3 Flashforge Finder 2 Fan Cleaning or Replacement, Remove extruder cover: step 2, image 3 of 3
    • Remove the three screws on the extruder top with a 2.5 Allen key or an appropriate screwdriver bit

    • Gently lift up the extruder cover

    • Pay attention to the flat cable while lifting the cover

  3. Flashforge Finder 2 Fan Cleaning or Replacement, Disconnect the fan: step 3, image 1 of 1
    • Using a spudger, disconnect the fan connector

    • Route the cable to free it

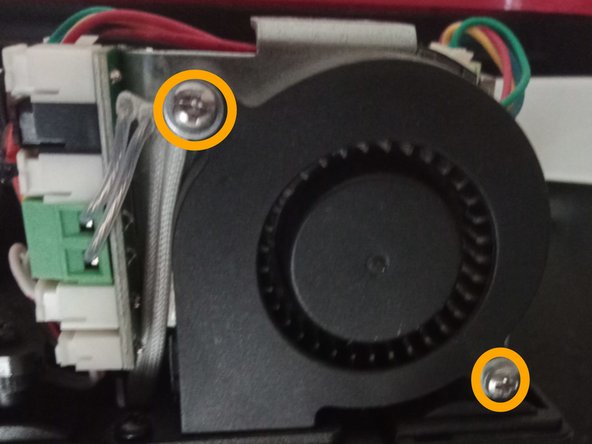
  4. Flashforge Finder 2 Fan Cleaning or Replacement, Unscrew the fan: step 4, image 1 of 2 Flashforge Finder 2 Fan Cleaning or Replacement, Unscrew the fan: step 4, image 2 of 2
    • Remove the two Phillips screw holding the fan

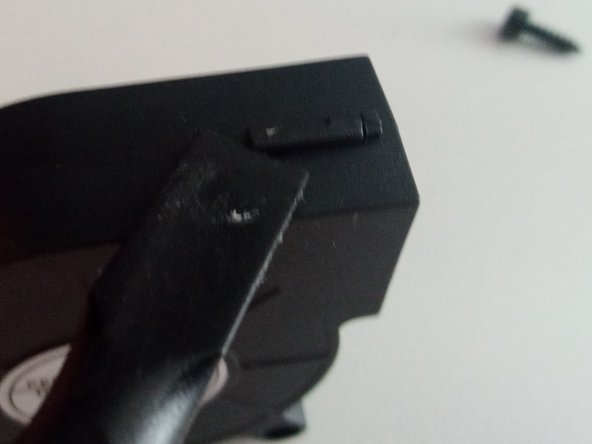
  5. Flashforge Finder 2 Fan Cleaning or Replacement, (Optional) Disassemble the fan: step 5, image 1 of 2 Flashforge Finder 2 Fan Cleaning or Replacement, (Optional) Disassemble the fan: step 5, image 2 of 2
    • The fan can now be removed from the extruder. If you need to replace it, just follow the steps in reverse order with the new fan

    • If you are cleaning the fan, release the three clips holding it together with a spudger

  6. Flashforge Finder 2 Fan Cleaning or Replacement, Clean the fan: step 6, image 1 of 1
    • Using compressed air and a brush, clean the fan from dust and debris

Conclusion

To reassemble your device, follow these instructions in reverse order.

dinoo_fixit

Member since: 03/22/22

1,386 Reputation

4 Guides authored

0 Comments

Add Comment

View Statistics:

Past 24 Hours: 0

Past 7 Days: 3

Past 30 Days: 21

All Time: 81