
Gateway MA6 Laptop Cooling Assembly Replacement
Introduction
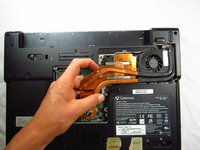
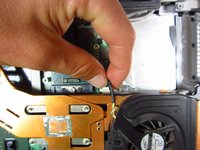
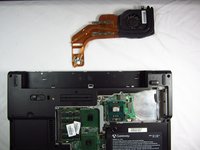
Go to step 1The cooling assembly is made up of a cooling fan and a large piece of copper to help dissipate heat out of the bottom of your laptop. Over time, the fan can wear out and it will need to be replaced.
What you need


To reassemble your device, follow these instructions in reverse order.
To reassemble your device, follow these instructions in reverse order.
Cancel: I did not complete this guide.
2 other people completed this guide.
Team

Cal Poly, Team 6-2, Forte Spring 2014 Member of Cal Poly, Team 6-2, Forte Spring 2014
CPSU-FORTE-S14S6G2
5 Members
20 Guides authored