Gateway NE56R27u Keyboard Replacement

Gateway NE56R27u Keyboard Replacement

Piper Moeller

Piper Moeller and 3 other contributors

Last updated on July 19, 2020

10 minutes
Moderate

Introduction

Go to step 1

The main functionality of your Gateway NE56R27u depends on your ability to use the keyboard. Thus, if you find that your Gateway laptop is not typing properly, certain buttons no longer work, or you now have a short circuit due to damage, replacing your keyboard might resolve such issues. This will allow for a faster and easier operation of your device.

What you need

Parts

Tools

Show more…

  1. Gateway NE56R27u Keyboard Replacement, Battery: step 1, image 1 of 2 Gateway NE56R27u Keyboard Replacement, Battery: step 1, image 2 of 2
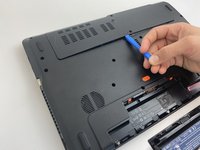
    • Using the spudger, push the orange tab to the unlock position.

  2. Gateway NE56R27u Keyboard Replacement: step 2, image 1 of 2 Gateway NE56R27u Keyboard Replacement: step 2, image 2 of 2
    • Lift the battery from its compartment.

    • When reinstalling, insert back end of battery first, then clicking into place.

  3. Gateway NE56R27u Keyboard Replacement, Hard Drive: step 3, image 1 of 3 Gateway NE56R27u Keyboard Replacement, Hard Drive: step 3, image 2 of 3 Gateway NE56R27u Keyboard Replacement, Hard Drive: step 3, image 3 of 3
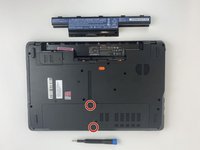
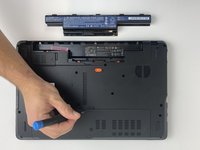
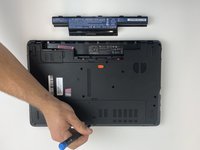
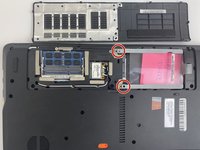
    • Unscrew the two 7.9mm Phillips #0 screws that secure the service cover.

  4. Gateway NE56R27u Keyboard Replacement: step 4, image 1 of 2 Gateway NE56R27u Keyboard Replacement: step 4, image 2 of 2
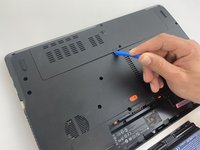
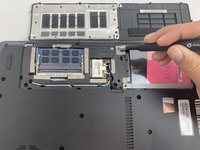
    • Use the opening tool to gently pry open the compartment covering.

  5. Gateway NE56R27u Keyboard Replacement: step 5, image 1 of 3 Gateway NE56R27u Keyboard Replacement: step 5, image 2 of 3 Gateway NE56R27u Keyboard Replacement: step 5, image 3 of 3
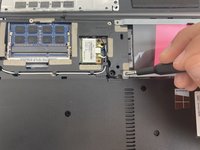
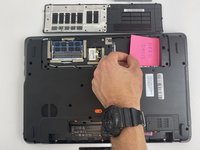
    • Unscrew the two 0.5mm screws from the hard drive brackets using the Phillips #0 screwdriver.

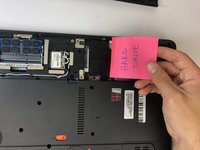
    • Pull the plastic tab attached to the hard drive to the right to remove the hard drive.

    • The hard drive plugs into the port on the left within the compartment. Be sure to gently remove the hard drive without damaging the port.

  6. Gateway NE56R27u Keyboard Replacement: step 6, image 1 of 2 Gateway NE56R27u Keyboard Replacement: step 6, image 2 of 2
    • Remove the hard drive by lifting up the right side, releasing the hard drive from the compartment clips on the left.

  7. Gateway NE56R27u Keyboard Replacement, Keyboard: step 7, image 1 of 2 Gateway NE56R27u Keyboard Replacement, Keyboard: step 7, image 2 of 2
    • Flip your laptop over to view the keyboard.

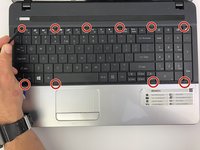
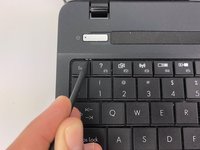
    • Using the spudger, push in the ten tabs at the edges of the keyboard.

  8. Gateway NE56R27u Keyboard Replacement: step 8, image 1 of 2 Gateway NE56R27u Keyboard Replacement: step 8, image 2 of 2
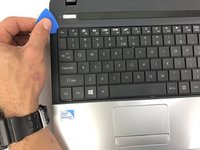
    • Using the opening pick, lift the edges of the keyboard.

    • Repeat around the edges of the device.

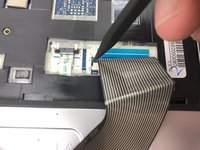
    • Lift up the keyboard to expose the cables underneath.

  9. Gateway NE56R27u Keyboard Replacement: step 9, image 1 of 3 Gateway NE56R27u Keyboard Replacement: step 9, image 2 of 3 Gateway NE56R27u Keyboard Replacement: step 9, image 3 of 3
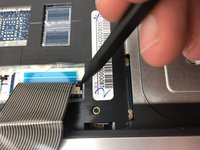
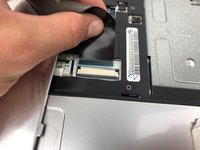
    • Release the clamp holding the mini-DIN cord by lifting the two black tabs on either side.

    • Gently pull the mini-DIN cord out of the clamp.

    • Remove the keyboard.

Conclusion

To reassemble your device, follow these instructions in reverse order.

0 Comments

Add Comment

View Statistics:

Past 24 Hours: 0

Past 7 Days: 4

Past 30 Days: 15

All Time: 738