Introduction
This repair guide was authored by the iFixit staff and hasn’t been endorsed by Google. Learn more about our repair guides here.
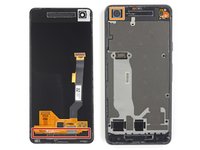
Use this guide to replace the worn-out battery in your Google Pixel 2.
Before disassembling your phone, discharge the battery below 25%. A charged lithium-ion battery can catch fire and/or explode if accidentally punctured. If your battery is swollen, take appropriate precautions.
Warning: Because of the strong adhesive securing the display, minimal clearance for inserting your tools, and high heat required, there is a good chance of accidentally damaging your display during this procedure. Unless you plan to replace your display in conjunction with this repair, work very carefully and be prepared to replace the display, should it not work upon reassembly. Follow the instructions carefully and observe all warnings to increase your odds of success.
The battery is held in place by very strong adhesive. You will need to use high concentration (over 90%) isopropyl alcohol in order to loosen the battery from the phone.
What you need
-
-
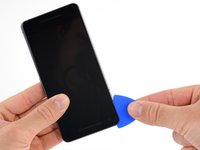
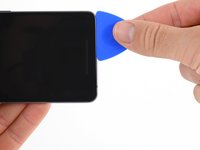
If your display glass is cracked, keep further breakage contained and prevent bodily harm during your repair by taping the glass. This also makes a smooth surface allowing the suction cup to bond.
-
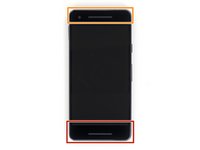
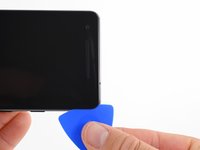
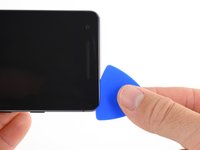
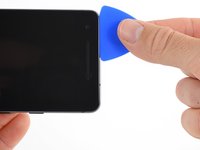
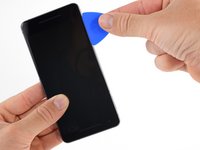
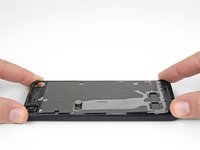
Apply a suction cup as close to the volume button edge of the phone as you can while avoiding the curved edge.
-
-
-
-
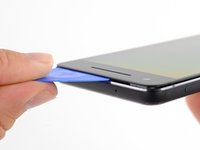
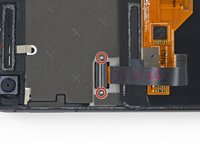
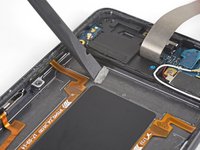
Apply a heated iOpener to the proximity sensor on the top edge of the midframe for two minutes to soften its adhesive.
-
-
-
Fill a plastic dropper or syringe with high concentration isopropyl alcohol and apply a few drops of alcohol under each corner of the battery. Give the alcohol a minute to weaken the battery adhesive.
-
Alternatively, apply a heated iOpener to the back of the phone over the battery for at least two minutes. Reheat and reapply the iOpener as needed until the battery adhesive is sufficiently weakened.
-
-
-
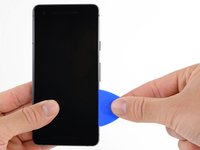
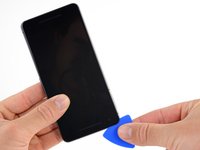
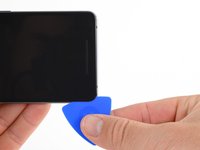
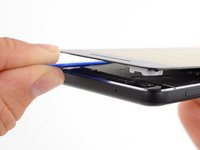
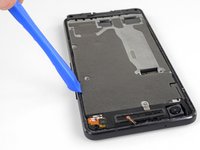
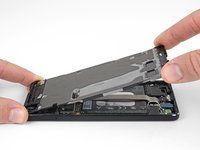
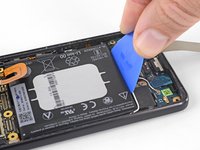
Hold the charging assembly cable out of the way and insert an opening pick along the bottom edge of the battery.
-
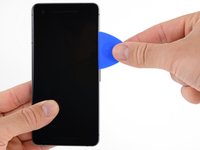
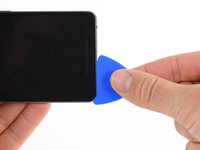
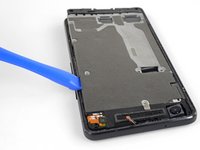
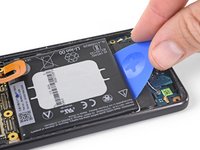
Apply steady, even pressure to slowly lever the battery up and out of the phone.
-
Only pry from the center of the battery to avoid damaging the delicate ribbon cables beneath either side of the battery.
-
If you are having trouble, apply some more alcohol under the battery and try again.
-
-
Tool used on this step:Tesa 61395 Tape$5.99
-
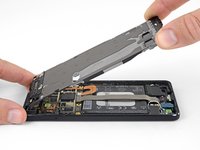
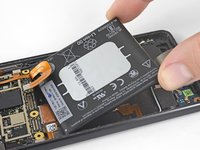
Remove the battery.
-
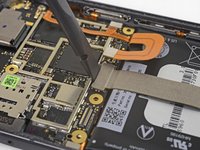
Use a spudger to scrape away any remaining adhesive from the phone, and clean the glued areas with isopropyl alcohol and a lint-free cloth.
-
Secure the new battery with pre-cut adhesive or double-sided adhesive tape. In order to position it correctly, apply the new adhesive into the phone, not directly onto the battery. The adhesive should not touch any of the cables under the battery.
-
Press the battery firmly into place for 20-30 seconds.
-


Compare your new replacement part to the original part—you may need to transfer remaining components or remove adhesive backings from the new part before installing.
To reassemble your device, follow the above steps in reverse order.
After completing this guide, calibrate your newly-installed battery.
Take your e-waste to an R2 or e-Stewards certified recycler.
Repair didn’t go as planned? Check out our Answers community for troubleshooting help.
Cancel: I did not complete this guide.
95 other people completed this guide.

40 Guide Comments
The instructions say “No parts required” and yet I believe that for a battery replacement you might possibly require a new battery (and maybe a new screen in the case of a broken screen). Also you might suggest replacement adhesive and where to find that, too.
Hey. So I bought a new housing and a new screen for my Pixel 2. And I have a problem with that. After moving the parts to the new housing my vibromotor stopped working and bottom of the screen easily comes off. What should I do?
Hi Rauf, it’s hard to say exactly what’s wrong, but as a start I would disconnect and reconnect the vibrator motor to make sure it’s connected correctly. As for the screen, make sure you carefully clean any old adhesive off the screen and case (use 90% or higher isopropyl alcohol for stubborn), and apply new adhesive to the screen before you replace it. That should help the display seat in the case and stay put.
I have a quick question, if we were to replace the screen adhesive with the Tesa 61395 tape, would the phone still remain water resistant to IP67? I am only worried it would not hold it as strong as the original adhesive
Hi Tony, Tesa tape creates a strong bond and should secure your screen just as well as the old adhesive. Unfortunately, the phone won’t be waterproof since you can’t create a continuous seal using the tape.