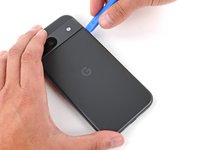
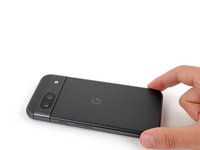
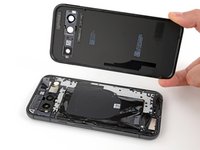
Google Pixel 8a Back Cover Replacement

Google Pixel 8a Back Cover Replacement

Spencer Day

Spencer Day and 2 other contributors

Last updated on June 26, 2024

30 - 45 minutes
Moderate

Introduction

Go to step 1

This repair guide was authored by the iFixit staff and hasn’t been endorsed by Google. Learn more about our repair guides here.

Follow this guide to replace a broken or cracked back cover on your Google Pixel 8a.

You'll need replacement back cover adhesive to complete this repair.

Note: Any repair can compromise the water resistance of your phone. Retaining water resistance after the repair will depend on how well you reapply the back cover adhesive.

What you need

Parts

Tools

Show more…

iFixit earns commission when you buy through these links.
  1. Google Pixel 8a Back Cover Replacement, Prepare your Pixel for disassembly: step 1, image 1 of 3 Google Pixel 8a Back Cover Replacement, Prepare your Pixel for disassembly: step 1, image 2 of 3 Google Pixel 8a Back Cover Replacement, Prepare your Pixel for disassembly: step 1, image 3 of 3
    • Let your Pixel's battery drain below 25% before starting this repair. A charged lithium‑ion battery may catch fire if damaged.

    • Unplug all cables from your phone.

    • Completely power off your phone.

    • Press the power and volume up buttons at the same time to bring up the shutdown menu.

  2. Google Pixel 8a Back Cover Replacement, Adhesive information: step 2, image 1 of 3 Google Pixel 8a Back Cover Replacement, Adhesive information: step 2, image 2 of 3 Google Pixel 8a Back Cover Replacement, Adhesive information: step 2, image 3 of 3
    • The back cover is secured with adhesive around the perimeter and near the cameras. To avoid damaging your phone's internals, note the following:

    • Unless stated otherwise, don't insert your tool more than 3 mm (the width of your opening tool's flat section) around the edges.

    • Don't insert your tool under the edges of the camera bump.

  3. Google Pixel 8a Back Cover Replacement, Insert an opening tool: step 3, image 1 of 3 Google Pixel 8a Back Cover Replacement, Insert an opening tool: step 3, image 2 of 3 Google Pixel 8a Back Cover Replacement, Insert an opening tool: step 3, image 3 of 3
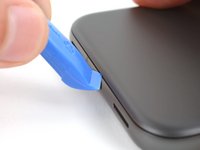
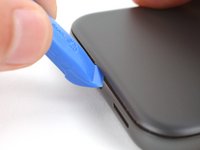
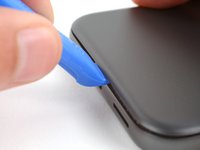
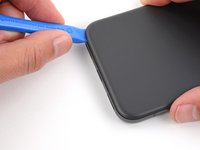
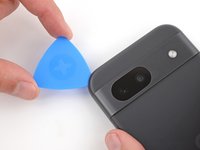
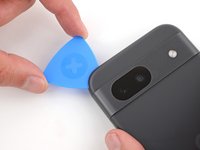
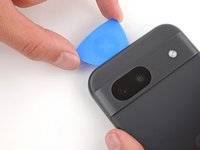
    • Your opening tool has a flat end and a curved end. During the opening procedure, use the flat end and angle it so the tool's sharp edge points upward.

    • Insert the edge of an opening tool between the back cover and the frame, starting with a sharp corner of the tool to help separate the adhesive.

  4. Google Pixel 8a Back Cover Replacement, Separate the perimeter adhesive: step 4, image 1 of 3 Google Pixel 8a Back Cover Replacement, Separate the perimeter adhesive: step 4, image 2 of 3 Google Pixel 8a Back Cover Replacement, Separate the perimeter adhesive: step 4, image 3 of 3
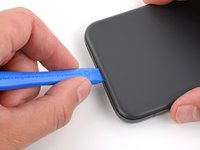
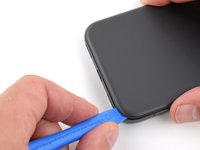
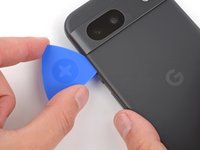
    • Slide your opening tool along the bottom edge to separate the adhesive securing the back cover.

  5. Google Pixel 8a Back Cover Replacement: step 5, image 1 of 3 Google Pixel 8a Back Cover Replacement: step 5, image 2 of 3 Google Pixel 8a Back Cover Replacement: step 5, image 3 of 3
    • Slide your opening tool around the bottom right corner and up the right edge, stopping at the bottom of the camera bump.

    • Remove your opening tool from under the back cover.

  6. Google Pixel 8a Back Cover Replacement: step 6, image 1 of 3 Google Pixel 8a Back Cover Replacement: step 6, image 2 of 3 Google Pixel 8a Back Cover Replacement: step 6, image 3 of 3
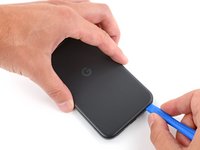
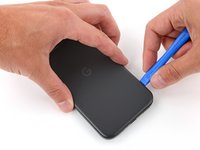
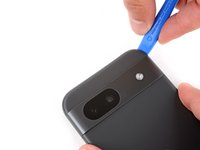
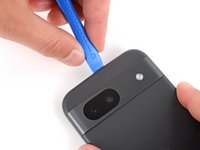
    • Insert your opening tool under the top right corner of the back cover, just above the camera bump.

    • Slide your opening tool along the top edge, stopping at the top left corner just above the camera bump.

    • Remove your opening tool from under the back cover.

  7. Google Pixel 8a Back Cover Replacement: step 7, image 1 of 3 Google Pixel 8a Back Cover Replacement: step 7, image 2 of 3 Google Pixel 8a Back Cover Replacement: step 7, image 3 of 3
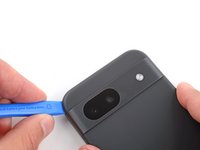
    • Insert your opening tool under the left edge of the back cover, just below the camera bump.

    • Slide your opening tool down the left edge to separate the adhesive.

  8. Google Pixel 8a Back Cover Replacement, Separate the camera bump adhesive: step 8, image 1 of 3 Google Pixel 8a Back Cover Replacement, Separate the camera bump adhesive: step 8, image 2 of 3 Google Pixel 8a Back Cover Replacement, Separate the camera bump adhesive: step 8, image 3 of 3
    • A strip of adhesive above the camera bump secures the top edge of the back cover.

    • Insert an opening pick under the top left corner of the back cover until the tip is close to the top edge of the camera bump.

    • You can insert the opening pick more than 3 mm along the top edge.

    • Slide the pick to the right, stopping when you reach the right edge of the cameras.

  9. Google Pixel 8a Back Cover Replacement: step 9, image 1 of 3 Google Pixel 8a Back Cover Replacement: step 9, image 2 of 3 Google Pixel 8a Back Cover Replacement: step 9, image 3 of 3
    • A final strip of adhesive below the camera bump secures the back cover.

    • Insert the flat edge of an opening pick under the back cover, just below the camera bump.

    • Insert a second opening pick in the same spot on the other side.

  10. Google Pixel 8a Back Cover Replacement: step 10, image 1 of 3 Google Pixel 8a Back Cover Replacement: step 10, image 2 of 3 Google Pixel 8a Back Cover Replacement: step 10, image 3 of 3
    • Pry up simultaneously with both picks and apply constant pressure to separate the final piece of adhesive securing the back cover.

    • Be careful not to bend the back cover. If the adhesive feels stubborn, rotate the cover side-to-side to further loosen the adhesive.

    • If the adhesive isn't separating, you can lightly heat the back cover just below the camera bump with a hair dryer or iOpener to soften the adhesive.

  11. Google Pixel 8a Back Cover Replacement, Remove the back cover: step 11, image 1 of 2 Google Pixel 8a Back Cover Replacement, Remove the back cover: step 11, image 2 of 2
    • Remove the back cover.

    • During reassembly:

    • Now is a good time to test your phone before sealing it up. Power it on and check that it works. Power it back down before you continue reassembly.

    • Follow this guide to apply new adhesive and install your back cover.

Conclusion

To reassemble your device, follow this guide.

To run a diagnostics test with the built-in Pixel Diagnostic tool, click here.

Repair didn’t go as planned? Try some basic troubleshooting, or ask our Answers community for help.

3 other people completed this guide.

Spencer Day

Member since: 09/14/22

95,787 Reputation

662 Guides authored

Team

iFixit Member of iFixit

Staff

118 Members

19,583 Guides authored

0 Comments

Add Comment

View Statistics:

Past 24 Hours: 12

Past 7 Days: 63

Past 30 Days: 298

All Time: 2,631