
HKC P776A Screen Replacement

What you need

  1. HKC P776A Screen Replacement, Separating Digitizer and Case: step 1, image 1 of 1
    • Insert the plastic opening tool between the digitizer and the case.

    • Place the spudger in the gap created by the plastic opening tool to assist in separation.

  2. HKC P776A Screen Replacement: step 2, image 1 of 2 HKC P776A Screen Replacement: step 2, image 2 of 2
    • Slide the spudger along the perimeter of the device to fully separate the two pieces.

  3. HKC P776A Screen Replacement, Separating the Screen and Digitizer: step 3, image 1 of 2 HKC P776A Screen Replacement, Separating the Screen and Digitizer: step 3, image 2 of 2
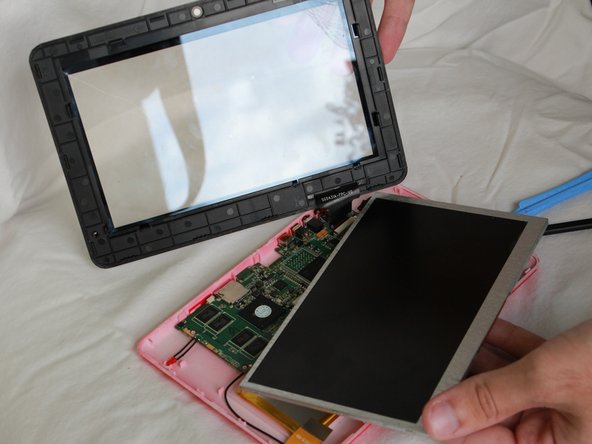
    • Use your fingers to pop the screen out from the digitizer.

  4. HKC P776A Screen Replacement, Removing the Optical Cord from the Motherbaord: step 4, image 1 of 1
    • With the plastic opening tool, lift the black latch up.

  5. HKC P776A Screen Replacement: step 5, image 1 of 1
    • Pull the optical cord out from the motherboard.

Conclusion

To reassemble your device, follow these instructions in reverse order.

Spencer Pheasant

Member since: 01/20/15

301 Reputation

3 Guides authored

Team

USF Tampa, Team 7-6, Remmell Winter 2015 Member of USF Tampa, Team 7-6, Remmell Winter 2015

USFT-REMMELL-W15S7G6

3 Members

14 Guides authored

0 Comments

Add Comment

View Statistics:

Past 24 Hours: 1

Past 7 Days: 1

Past 30 Days: 4

All Time: 232