
HP 15-ac142dx CMOS Battery Replacement

Introduction
Go to step 1Follow this guide to replace the CMOS battery in your HP 15-ac142dx laptop.
The CMOS battery (sometimes referred to as the RTC/"Real Time Clock" battery) helps maintain system settings such as the date, time, and BIOS settings when your laptop is turned off. If these settings aren't being maintained between power cycles, you may need to replace the CMOS battery.
What you need


-
-
Turn off your laptop and flip it upside down onto a flat surface.
-
Slide the battery lock tabs towards each other to unlock the battery.
-
Lift the battery from the center and remove.
-
-
-
Align the new battery with the cut-out in the laptop.
-
Insert the battery into it slot until you hear a "click" indicating the battery is fully seated.
-
-
-
Turn off your laptop and flip it over onto a flat surface.
-
Remove battery by sliding the battery lock.
-
Remove the 10 screws
-
-
-
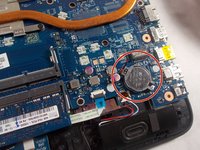
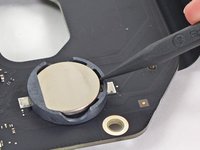
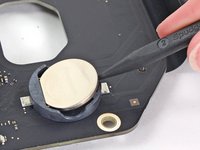
Use the tip of a spudger to pry the motherboard battery out of its socket.
-


To reassemble your device, follow these instructions in reverse order.
Take your e-waste to an R2 or e-Stewards certified recycler.
Repair didn’t go as planned? Try some basic troubleshooting, or ask our Answers community for help.
To reassemble your device, follow these instructions in reverse order.
Take your e-waste to an R2 or e-Stewards certified recycler.
Repair didn’t go as planned? Try some basic troubleshooting, or ask our Answers community for help.
Cancel: I did not complete this guide.
One other person completed this guide.

Team

UMass Dartmouth, Team S2-G4, Bernier Spring 2018 Member of UMass Dartmouth, Team S2-G4, Bernier Spring 2018
UMASSD-BERNIER-S18S2G4
3 Members
5 Guides authored