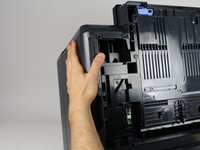
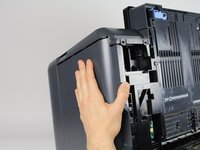
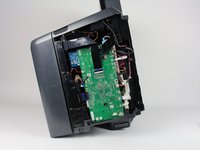
Free Shipping on Domestic Orders $75+

HP Officejet Pro 8620 Left Panel Replacement

Prerequisite Only
This is a prerequisite-only guide! This guide is part of another procedure and isn’t meant to be used alone.

What you need

  1. HP Officejet Pro 8620 Left Panel Replacement, Left Panel: step 1, image 1 of 3 HP Officejet Pro 8620 Left Panel Replacement, Left Panel: step 1, image 2 of 3 HP Officejet Pro 8620 Left Panel Replacement, Left Panel: step 1, image 3 of 3
    • Turn off the printer and remove the power cable.

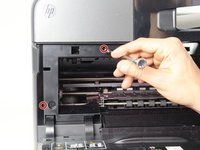
    • Remove two 13mm T9 screws using a T9-Torx screwdriver. Turn counterclockwise until the screws are released.

  2. HP Officejet Pro 8620 Left Panel Replacement: step 2, image 1 of 2 HP Officejet Pro 8620 Left Panel Replacement: step 2, image 2 of 2
    • Open the front door by placing your finger on the indented groove on the left side of the printer and pulling down

    • This will give you access to the two T9-TORX 13mm screws that need to be removed to release the panel.

  3. HP Officejet Pro 8620 Left Panel Replacement: step 3, image 1 of 2 HP Officejet Pro 8620 Left Panel Replacement: step 3, image 2 of 2
    • Remove the two 13mm screws with a T9-TORX screwdriver by turning counter-clockwise (left).

  4. HP Officejet Pro 8620 Left Panel Replacement: step 4, image 1 of 3 HP Officejet Pro 8620 Left Panel Replacement: step 4, image 2 of 3 HP Officejet Pro 8620 Left Panel Replacement: step 4, image 3 of 3
    • Gently remove the left side panel by placing your palm flat against the surface and pulling down.

Conclusion

To reassemble your device, follow these instructions in reverse order.

Jeremy Taylor

Member since: 01/24/18

445 Reputation

2 Guides authored

Team

Cal Poly, Team S19-G2, Livingston Winter 2018 Member of Cal Poly, Team S19-G2, Livingston Winter 2018

CPSU-LIVINGSTON-W18S19G2

3 Members

8 Guides authored

0 Guide Comments

Add Comment

View Statistics:

Past 24 Hours: 0

Past 7 Days: 0

Past 30 Days: 2

All Time: 84