HP Pavilion x360 14m-ba011dx Screen Replacement

HP Pavilion x360 14m-ba011dx Screen Replacement

Christopher Joseph McGinnis

Christopher Joseph McGinnis and 3 other contributors

Last updated on October 19, 2024

30 minutes
Moderate

Introduction

Go to step 1

If the touchscreen on your HP Pavilion x360 14m-ba011dx laptop isn’t responding to touch, is cracked, or looks burned out, this guide will walk you through how to replace it.

Make sure to exercise caution when removing the touchscreen, as it is made of glass and will crack if it is bent.

What you need

Parts

Tools

Show more…

  1. HP Pavilion x360 14m-ba011dx Screen Replacement, Battery: step 1, image 1 of 2 HP Pavilion x360 14m-ba011dx Screen Replacement, Battery: step 1, image 2 of 2
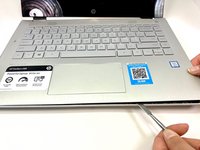
    • Remove the top left and right rubber pads closest to the hinge of screen using a plastic spudger to expose the screws underneath.

    • Remove the following 6 screws from the bottom of the device using a Phillips #00 Screwdriver:​

    • Two 7.5 mm screws.

    • Three 5 mm screws.

    • One 6.5 mm screw.

  2. HP Pavilion x360 14m-ba011dx Screen Replacement: step 2, image 1 of 1
    • Push into the two screw holes that were under the rubber pads with the screwdriver to pop the keyboard out just a little.

    • Do this with the screen open so that you do not damage the screen.

    • Do not remove keyboard all the way.

  3. HP Pavilion x360 14m-ba011dx Screen Replacement: step 3, image 1 of 2 HP Pavilion x360 14m-ba011dx Screen Replacement: step 3, image 2 of 2
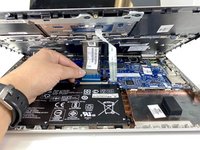
    • Separate the keyboard from the rest of the device using a metal or plastic spudger around the edges.

    • Pull up gently just until you can see the cables attaching the keyboard to the motherboard.

    • Flip the small white flaps holding the cables to the motherboard open to unplug the cords.

  4. HP Pavilion x360 14m-ba011dx Screen Replacement: step 4, image 1 of 2 HP Pavilion x360 14m-ba011dx Screen Replacement: step 4, image 2 of 2
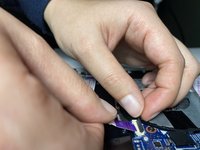
    • Remove the purple cable attaching the battery to the motherboard by flipping the black flap and pulling the cable out.

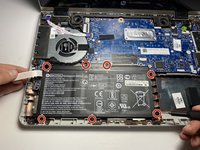
    • Remove seven 4 mm screws using a Phillips #00 Screwdriver.

  5. HP Pavilion x360 14m-ba011dx Screen Replacement: step 5, image 1 of 1
    • Remove the battery by gently pushing battery up, then pulling.

  6. HP Pavilion x360 14m-ba011dx Screen Replacement, Screen: step 6, image 1 of 2 HP Pavilion x360 14m-ba011dx Screen Replacement, Screen: step 6, image 2 of 2
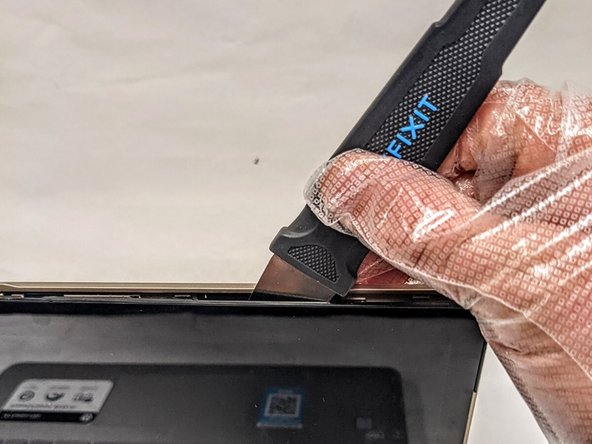
    • Insert the Jimmy between the screen and back case.

    • Carefully detach the screen from the back case by sliding the Jimmy around the casing and prying the screen from the case.

  7. HP Pavilion x360 14m-ba011dx Screen Replacement: step 7, image 1 of 2 HP Pavilion x360 14m-ba011dx Screen Replacement: step 7, image 2 of 2
    Tool used on this step:
    Tweezers
    $4.99
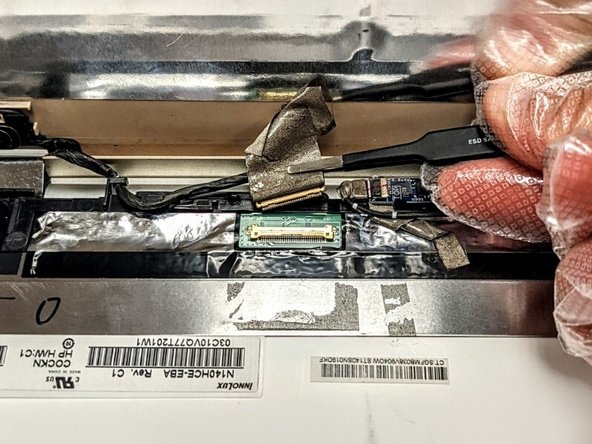
    • Using the tweezers, remove the tape securing the connector and gently disconnect the wire.

  8. HP Pavilion x360 14m-ba011dx Screen Replacement: step 8, image 1 of 2 HP Pavilion x360 14m-ba011dx Screen Replacement: step 8, image 2 of 2
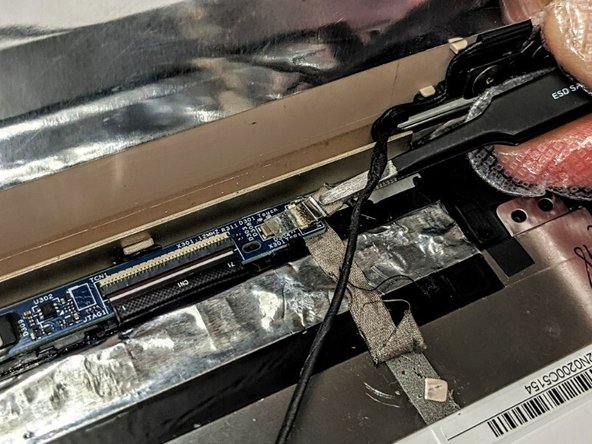
    • Using the tweezers, remove the right side connector from the connector port and free the wiring from right to left.

  9. HP Pavilion x360 14m-ba011dx Screen Replacement: step 9, image 1 of 2 HP Pavilion x360 14m-ba011dx Screen Replacement: step 9, image 2 of 2
    • Using the tweezers, remove the left side connector from the connector port and ensure all tape securing the wiring harness is free.

    • Remove the screen from the rest of the laptop.

Conclusion

To reassemble your device, follow these instructions in reverse order.

One other person completed this guide.

0 Comments

Add Comment

View Statistics:

Past 24 Hours: 1

Past 7 Days: 11

Past 30 Days: 48

All Time: 1,189