
HP Photosmart Plus B210a Printhead Replacement

  1. HP Photosmart Plus B210a Printhead Replacement, Ink tank removal: step 1, image 1 of 3 HP Photosmart Plus B210a Printhead Replacement, Ink tank removal: step 1, image 2 of 3 HP Photosmart Plus B210a Printhead Replacement, Ink tank removal: step 1, image 3 of 3
    • Remove the ink cartridges from the printer. Install the shipping caps or put the ink cartridges in a plastic bag.

  2. HP Photosmart Plus B210a Printhead Replacement, Remove the printhead (See calibration warning): step 2, image 1 of 3 HP Photosmart Plus B210a Printhead Replacement, Remove the printhead (See calibration warning): step 2, image 2 of 3 HP Photosmart Plus B210a Printhead Replacement, Remove the printhead (See calibration warning): step 2, image 3 of 3
    • If the printhead is being removed for cleaning and is plugged in, the calibration data may be erased. Verify the printer is unplugged BEFORE REMOVING the printhead!

    • When the printer is unplugged, lift the lever up and remove the printhead.

    • Remove the printhead as shown. IMPORTANT: Leave the scanner lid open, or put a note near the printer.

  3. HP Photosmart Plus B210a Printhead Replacement, Clean the printer contacts: step 3, image 1 of 2 HP Photosmart Plus B210a Printhead Replacement, Clean the printer contacts: step 3, image 2 of 2
    • Failure to clean this area may result in an Ink System Failure warning. If you are cleaning the printhead, this error will destroy your existing calibration!

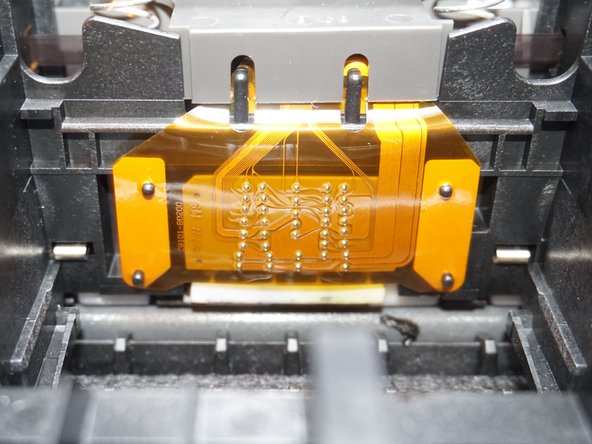
    • Using an alcohol wipe, clean the printhead interface on the printer before installing the replacement part to avoid any errors like Ink System Failure.

Conclusion

To reassemble your device, follow these instructions in reverse order.

Nick

Member since: 11/10/09

89,943 Reputation

52 Guides authored

Team

Master Techs Member of Master Techs

Community

321 Members

1,525 Guides authored

0 Comments

Add Comment

View Statistics:

Past 24 Hours: 0

Past 7 Days: 0

Past 30 Days: 4

All Time: 17