What you need
-
-
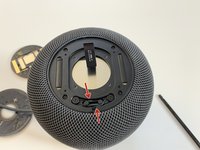
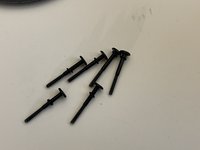
Remove four T6 screws.
-
Using a hair dryer on hot, soften the adhesive holding the touch pad assembly to the top frame.
-
Using a guitar pick, carefully pry up the touch pad.
-
-
-
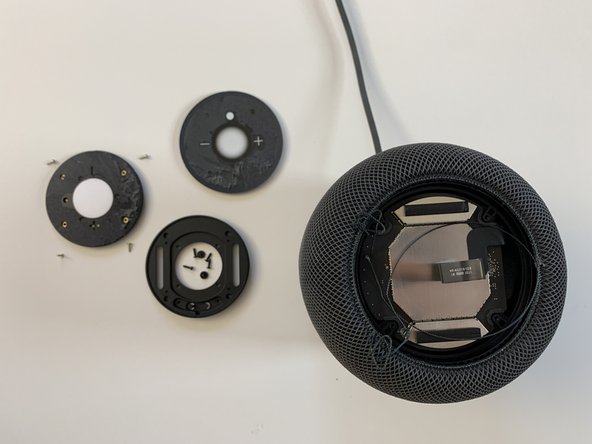
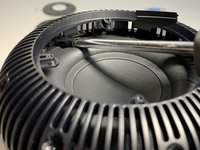
Maneuver the touch assembly board up from the top frame.
-
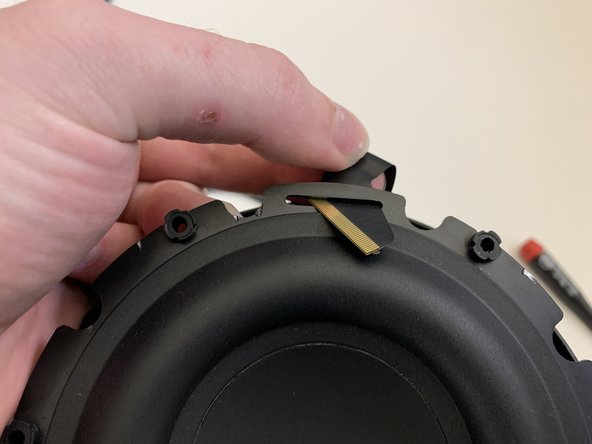
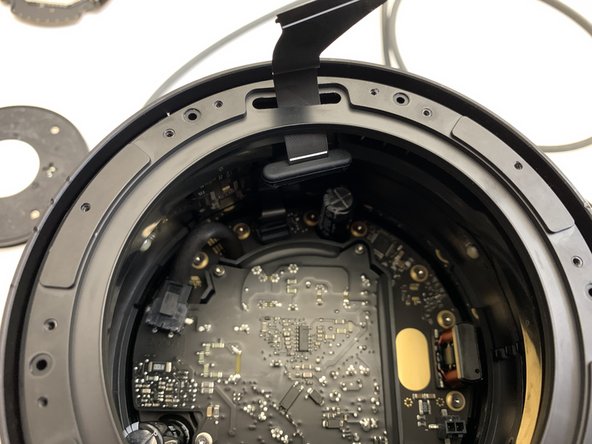
Flip the retaining lever upwards with a spudger to release the ribbon cable.
-
Remove the ribbon cable from the connector.
-
-
Tool used on this step:Tweezers$4.99
-
Using tweezers (or fingers) unwind the drawstrings from the moorings.
-
The drawstrings are wrapped/looped around each T6 screw post. Remove or loosen each and unwrap the drawstring.
-
-
-
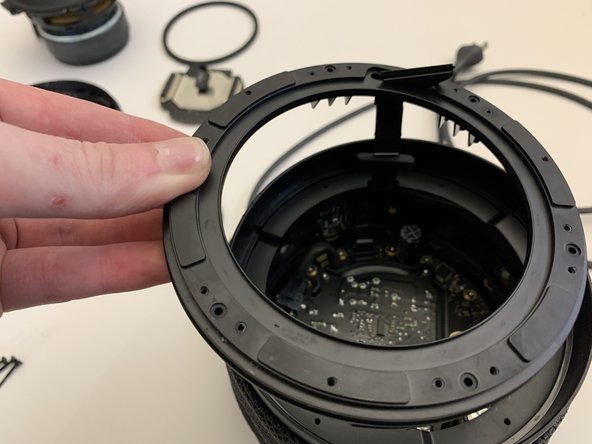
Remove the four T6 screws securing the touch surface support disc to the lid and slide the 3D mesh fabric sleeve downwards.
-
Remove the touch surface support frame disk from the HomePod.
-
-
-
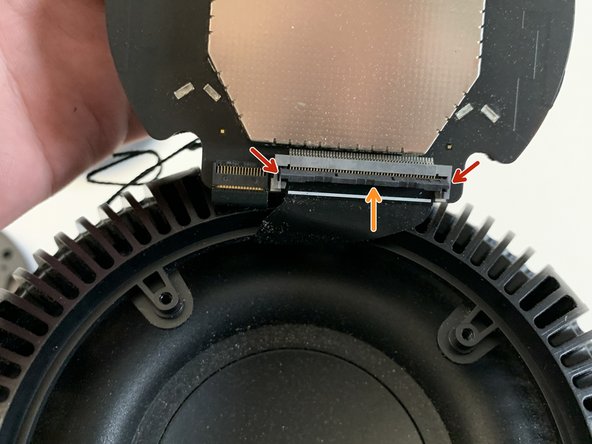
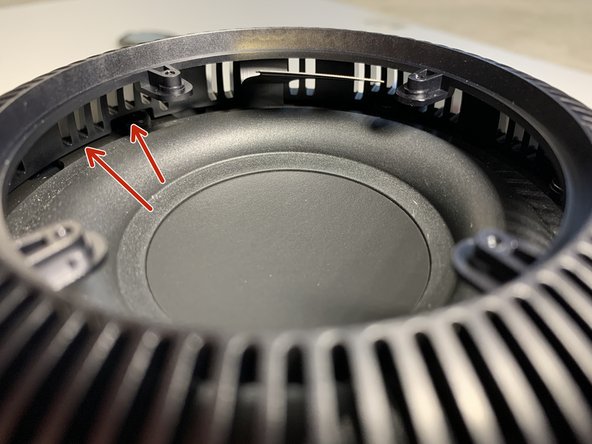
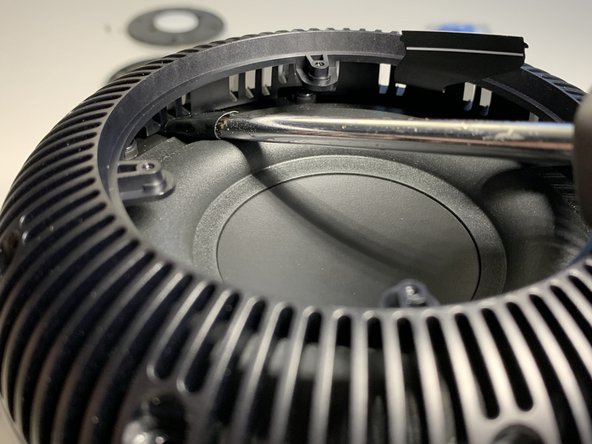
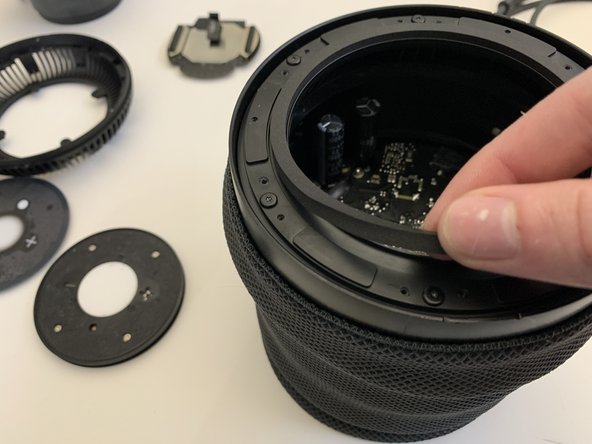
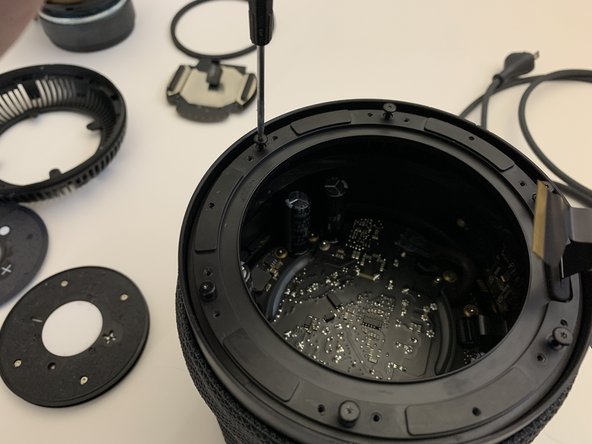
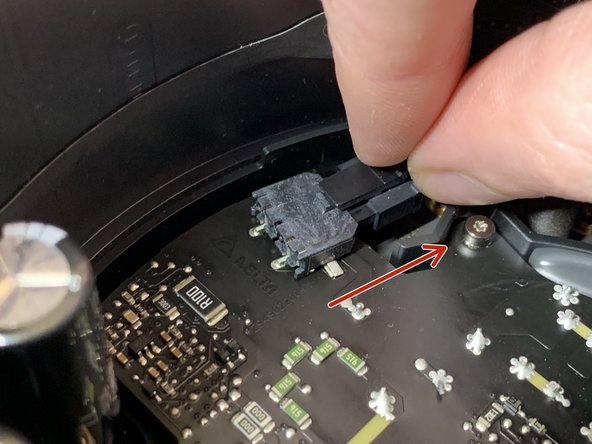
Flip the logic board up and using a spudger, carefully pry the retaining lever upwards.
-
Pop the ribbon cable straight upwards and out. This cable has "ears" on each side and doesn't not slide into the connector.
I accidentally broke the ribbon cable, can you recommend where I could buy a new one?
Thanks
-
-
-
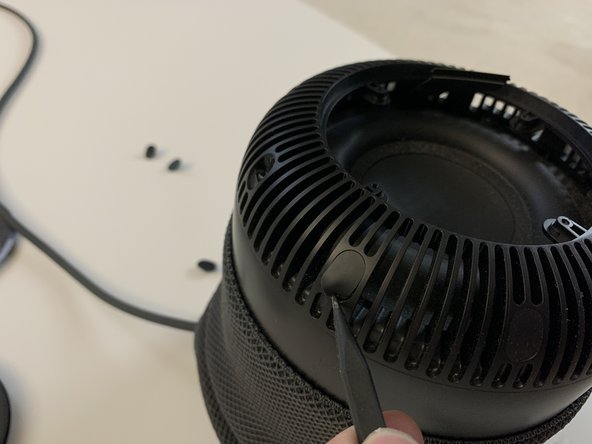
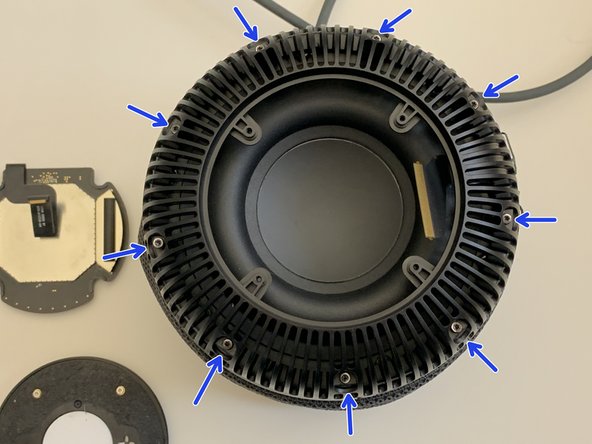
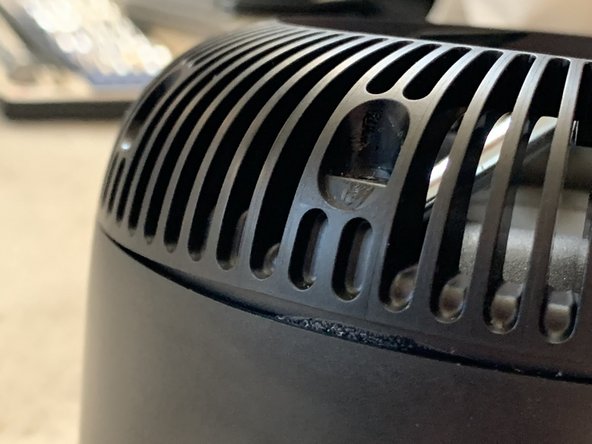
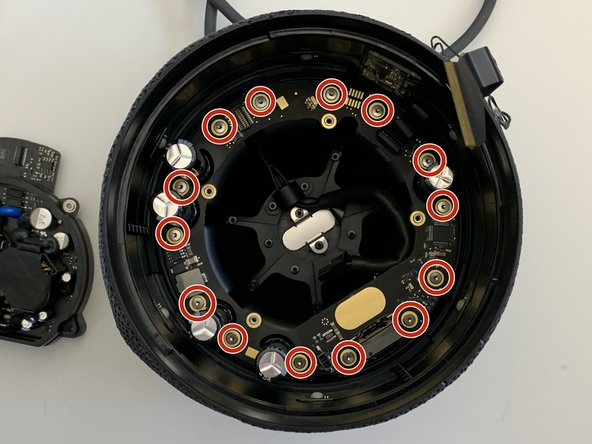
Using a spudger, remove the nine rubber screw caps.
-
Using a Torx T6 screwdriver, remove the nine T6 screws securing the top to the main housing.
-
-
-
Using a hairdryer on high heat, aim the hairdryer as shown and heat the perimeter just below the seam where the top meets the main housing.
-
This step is critical. If you have trouble with the next step, repeat the heating process in the trouble area.
-
-
-
-
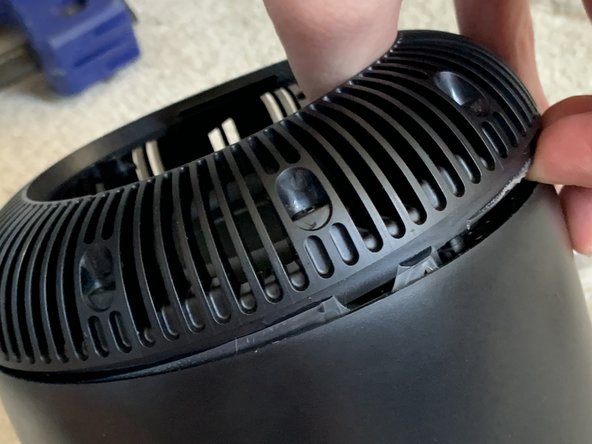
This step requires significant force even with plenty of heat applied in the previous step.
-
Insert a wide flat blade screwdriver wrapped in 1-2 layers of electrical tape.
-
You will need to apply a fair amount of pressure to wedge the screwdriver head in the small gap.
-
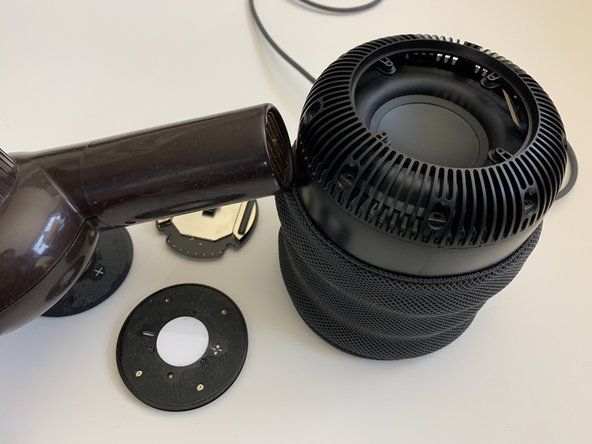
Pull the top cover straight up. This will need to be done in four sections.
-
-
I accidentally broke the flexible cable, can you recommend where I could buy a new one?
-
-
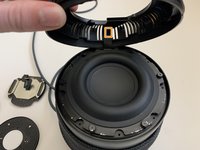
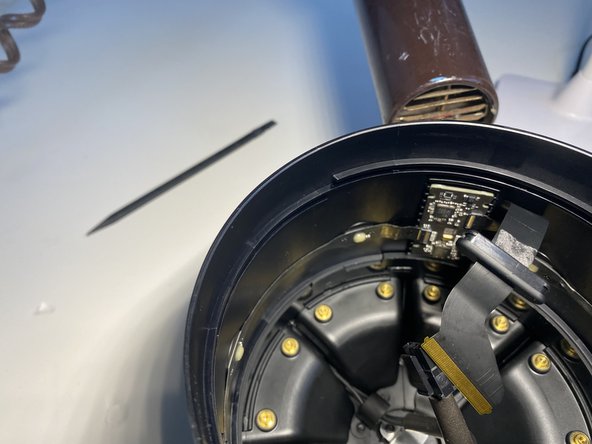
Careful peel the ribbon cable from the top.
The moment you have the upper basket accessible I’d recommend the first thing you do is; release the logic board flex cable that is secured with high bond adhesive with either heat/99% ISOPROPYL or both.
It’s sooooo easy to forget it’s attached while attempting to release the silicone sealant. I personally find the sealant the most time consuming part of the repair. After that it’s smooth sailing 😎
-
-
-
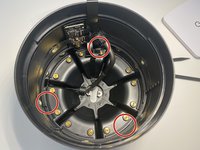
Remove the six Torx T6 screws securing the woofer.
-
Carefully lift the woofer out by it's edges and slip the logic board ribbon cable through.
-
-
-
Support the woofer on the top edge of the HomePod with your hand.
-
With your other hand, reach inside and squeeze the tab on the connector and pull strait up to disconnect the woofer from the amplifier board.
-
Remove the woofer from the HomePod.
-
-
-
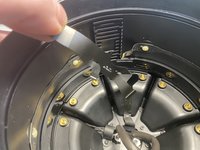
Using a spudger, push the silicone grommet through the upper ring.
-
Remove the upper ring from the HomePod.
-
-
-
With the upper ring removed, remove the grommet from the ribbon cable.
-
Rotate the middle ring counter clockwise to unscrew it from the HomePod.
A warning: if you intend to reassemble the homepod, pay attention to the exact amount you have to rotate this middle ring to unscrew it. When you go to put it back on, only rotate it that far and do not try to tighten it any further or it will scrape components off the mic board with very little resistance. It should be loose; the upper ring will hold it in place after tightening the screws.
-
-
-
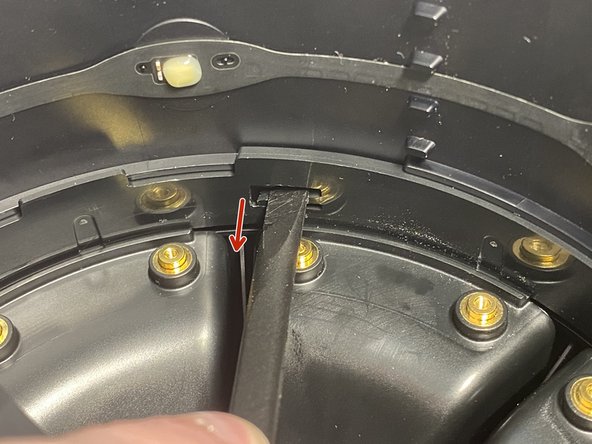
Push down on the locking tab and pull in the direction of the arrow.
-
Remove the four Torx T6 screws securing the power supply to the amplifier board.
-
-
-
Disconnect the ribbon cable connecting the amplifier board to the logic board.
-
Remove the 14 Torx T6 screws securing the amplifier board to the 7 tweeters.
-
Carefully lift out and remove the amplifier board from the HomePod.
Be very carefull with this ribbon cable , slight pressure and it will break the connector.
Very peculiar connector, Contrary to logic, when it is closed, it is in the release position. (as in picture)
When mounting back, close the connector, both sides close together, slide the ribbon connector inside, and spread the connector sides, to lock the ribbon cable
-
-
-
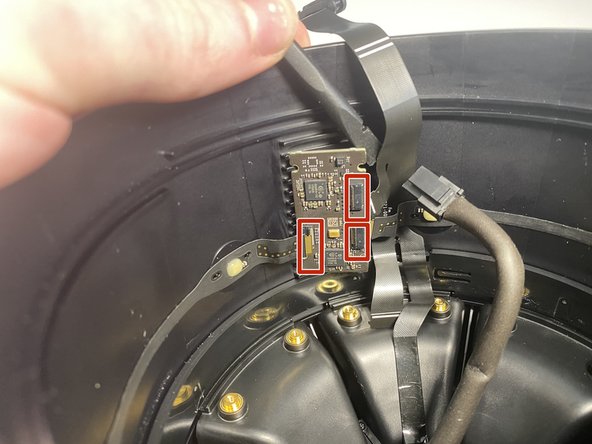
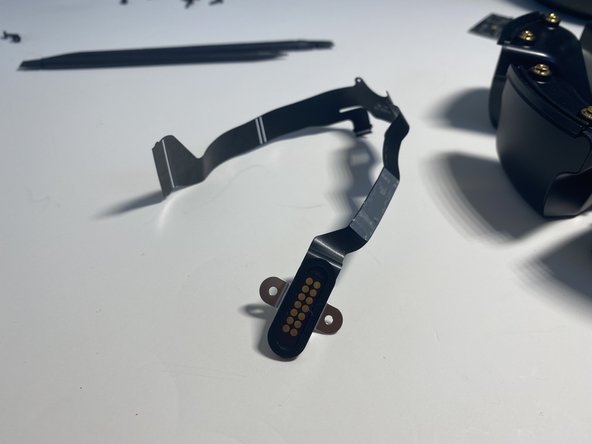
Disconnect the 3 ribbon cables from the Microphone board.
-
Using a hair dryer, heat the microphone board from the back side.
-
Using a plastic spudger, remove the PCB from the housing.
-
-
-
This is difficult to do, but with two spudgers and a finger nail, it's possible.
-
Using one hand to depress the 2 spiders and a finger nail to depress the 3rd clip, use your free hand to unscrew (counter clockwise) the tweeter retaining ring.
-
-
-
Remove the two T6 screws securing the diagnostic port to the bottom housing
-


To reassemble your device, follow these instructions in reverse order.
To reassemble your device, follow these instructions in reverse order.
Cancel: I did not complete this guide.
15 other people completed this guide.
6 Comments
My homepod was knocked off a table during a party and started buzzing like crazy with any bass. I was able to follow this, and remove the woofer with no problems. turns out the woofer cage had bent unsealing the woofer, i was able to hammer it straight, reassemble, and it works perfectly again. THANK YOU.
Thank you for the information, it is really very useful.
A family member gave me his first generation Homepod which is not working after a fall from a table. Due to its age it is out of warranty and was not repaired or replaced by the official Apple service. He tried unsuccessfully to repair it.
Today I opened it up and the flat cable that connects the motherboard to other components on the bottom of the device is broken very close to its connection to this motherboard.
I really don't think this is the original fault of the device but I would like to know if there is a possibility to repair or replace this cable.
Thank you very much.
Someone in Mexico that repairs Homepod First version/Alguien en mexico que repare homepod primera version
I would also strongly recommend to use an iFixit Jimmy device opener (metal blade) for separating the top control surface from the control board underneath. It is notably better than using a plastic pryer of any kind. Also, while removing it, make sure to not scrape off the perimeter of the plastic surface at the bottom, as you'd scrape off the paint underneath (the white or space gray color) and you'll end up with a transparent surface. There are a few DIY videos in Youtube. If you would rather have someone else to professionally repair these units, you also have a few options such as Nics Fix and Minn-Tech.com in the US.