Introduction
While many repairs can be accomplished without soldering, there are times when it's necessary to replace certain components, e.g., joysticks, headphone batteries, and rumble motors. Additionally, soldering opens up a new world of fun electronics projects. It may sound intimidating, but it's easy to get started!
This guide will demonstrate basic soldering skills as well as specific instructions for the following:
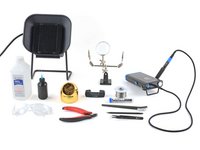
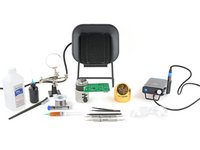
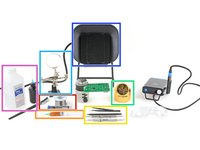
What you need
-
Tool used on this step:Helping Hands$8.99
-
A vise, clamp, or "helping hands" tool. If you're joining two wires, our Soldering Splint is a great tool.
-
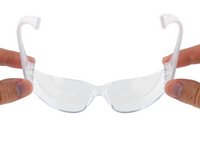
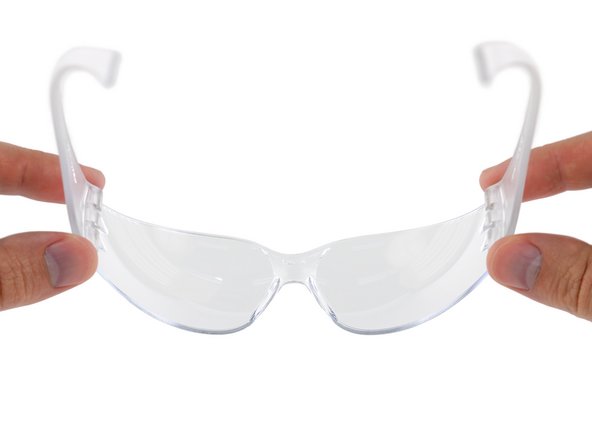
A pair of safety glasses (eyeglasses will protect your eyes, but solder spatter will damage the glasses).
-
A tip cleaning tool (wet sponge or brass wire)
-
A fume extractor (if you're working indoors)
-
High concentration (>90%) isopropyl alcohol and a soft bristle brush (like a toothbrush)
-
A spudger, tweezers, and flush cutters
-
-
-
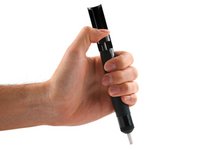
Set up your tools in a well-lit area, away from anything flammable.
-
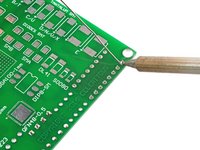
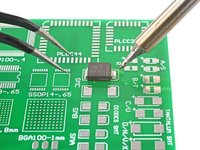
Secure the circuit board with a vise or a "helping hands" tool. Angle the board such that you can easily access the solder pads.
-
Place the fume extractor close to the project so it'll catch the solder fumes.
-
Wear your safety goggles.
-
-
-
Turn on your soldering iron. If your soldering iron has temperature control:
-
Set it to 300 °C (~570 °F) if you're using leaded solder
-
Set it to 375 °C (~700 °F) if you're using lead-free solder
-
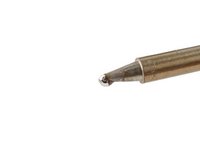
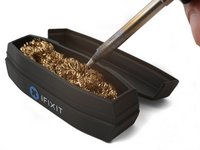
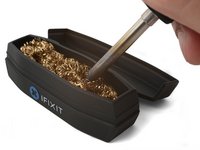
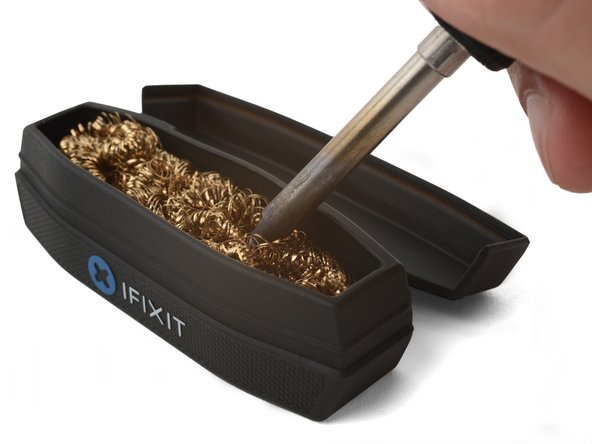
Clean the tip of your soldering iron. If you're using a sponge, wet the sponge and quickly wipe the tip across it. If you're using brass wire, stab the tip into the wire a few times.
-
-
-
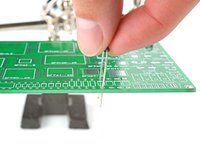
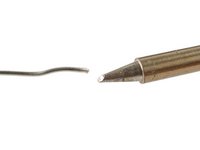
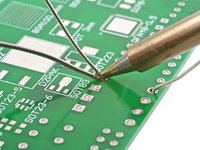
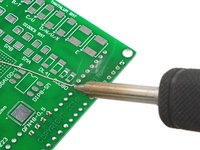
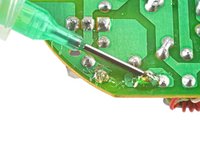
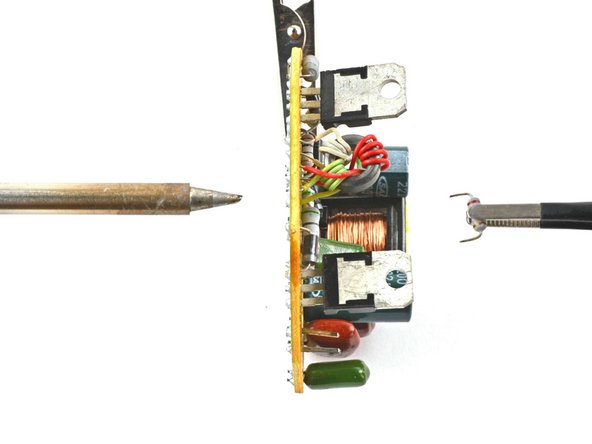
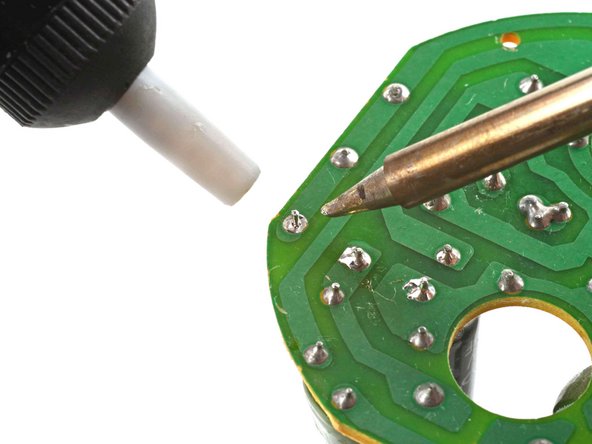
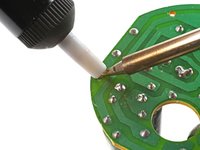
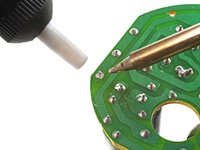
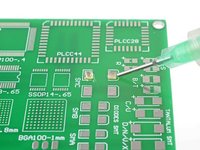
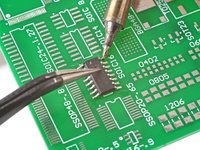
Press the tip against the circuit board's solder pad and the component lead for about 1 second to heat them both. Angle the tip so it has maximum contact with the pad and lead.
-
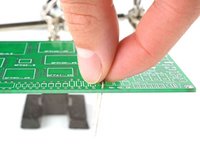
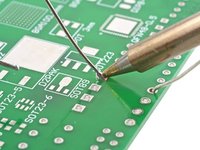
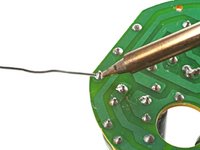
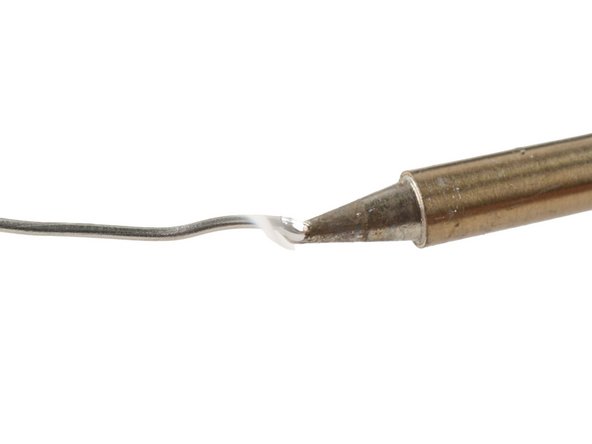
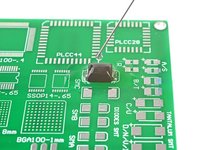
Feed the solder wire into the heated area until there's a concave pool of solder surrounding the lead.
-
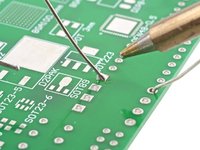
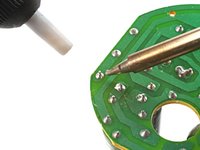
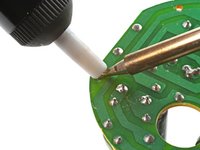
Remove the solder wire, then remove the soldering iron from the solder pad.
-
-
-
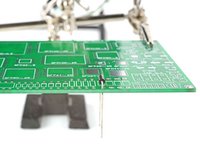
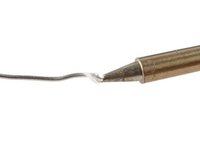
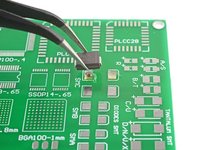
Congratulations—you've created a solder joint! Inspect the joint to see if it formed correctly:
-
Leaded solder joints should look like a shiny, concave tent surrounding the entire lead.
-
Lead-free solder joints should look like a concave tent surrounding the entire lead. They may be shiny or dull.
-
-
-
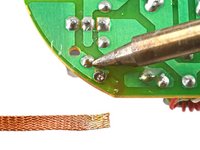
Tool used on this step:Solder Wick Braid$4.99
-
Solder wick (aka desoldering braid) and/or a desoldering pump.
-
A spudger, tweezers, and/or pliers (to help loosen stubborn components)
-
-
-
Secure the circuit board with a vise or a "helping hands" tool. Angle the board such that you can easily access the solder pads. Wear safety goggles.
-
If possible, use a tip with the largest surface area that can still fit between the solder joint.
-
Turn on your soldering iron. If your soldering iron has temperature control:
-
Set it to 350 °C (~650 °F) if you're using leaded solder
-
Set it to 375 °C (~700 °F) if you're using lead-free solder
-
-
Tool used on this step:Tack Flux SMD291 no clean 5cc ROHS$13.99
-
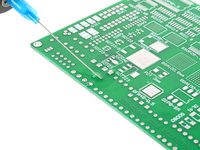
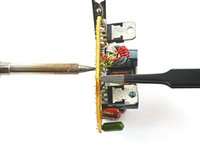
Apply a bead of flux to the solder joint.
-
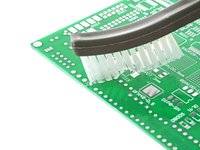
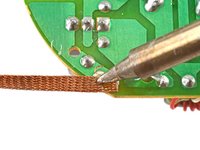
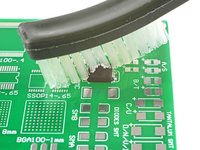
Place a clean portion of the solder wick on top of the solder joint.
-
Press the soldering iron tip firmly against the wick for 2-3 seconds. You're trying to heat the wick hot enough so that it melts the solder underneath it.
-
As the solder saturates the wick, slide the wick so that a new portion touches the joint. You'll know it's saturated when the wick's color changes from copper to silver.
-
Once most of the solder has soaked into the wick, lift the wick and tip away together from the joint.
-
-
-
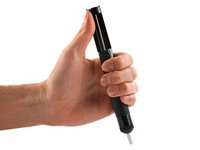
Depress the desoldering pump plunger until it locks in place.
-
-
Tool used on this step:ChipQuik SMD Removal Kit$17.99
-
Tool used on this step:Solder Leaded 63/37 Rosin Core$19.99
-
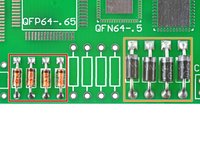
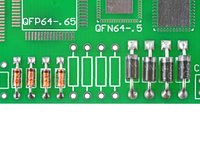
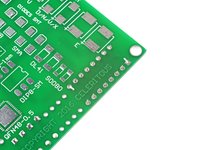
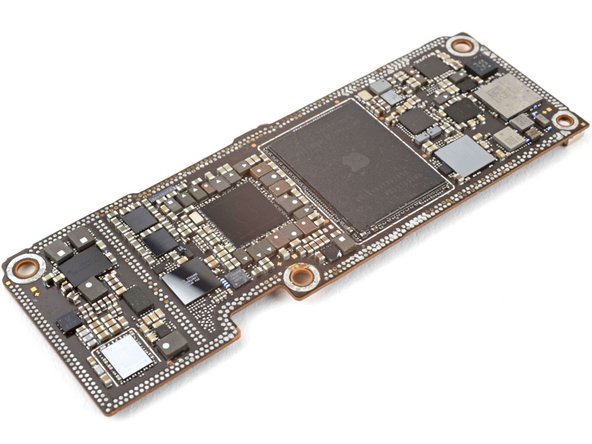
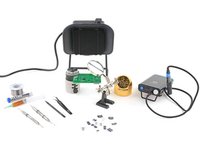
The next 6 steps will show you how to solder surface-mount components onto a circuit board. You'll need a fine-tipped soldering iron in addition to the following:
-
A tip cleaning tool (wet sponge or brass wire)
-
A magnifying glass or lens
-
A fume extractor (if you're working indoors)
-
High concentration (>90%) isopropyl alcohol and a soft bristle brush (like a toothbrush)
-
-
Tool used on this step:Omnivise Board Holder Hakko C1390C$64.99
-
Set up your tools in a well-lit area, away from anything flammable.
-
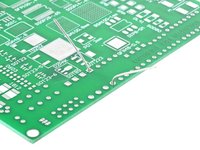
Set the circuit board on a flat, non-flammable, heat-resistant surface or secure it with helping hands or a PCB vise.
-
Place the fume extractor close to the project so that it'll catch the solder fumes.
-
Wear your safety goggles.
-
-
-
Turn on your soldering iron. If your soldering iron has temperature control:
-
Set it to 350 °C (~650 °F) if you're using leaded solder
-
Set it to 400 °C (~750 °F) if you're using lead-free solder
-
Clean the tip of your soldering iron. If you're using a sponge, wet the sponge and quickly wipe the tip across it. If you're using brass wire, stab the tip into the wire a few times.
-
If you're not using solder paste, melt a small amount of solder onto the tip. You'll transfer this solder onto the joint.
-
-
-
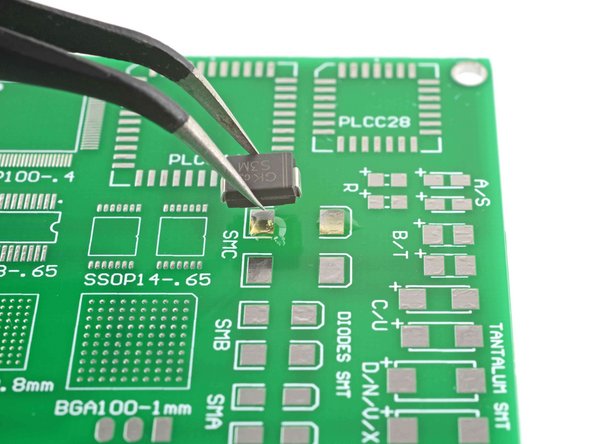
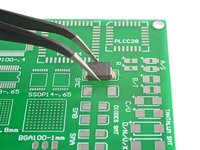
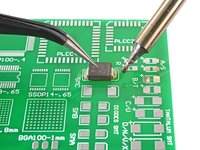
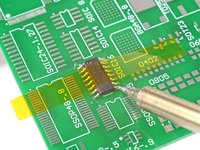
Carefully press a tweezer point or the tip of a spudger on top of the component to hold it in place.
-
Touch the soldering iron tip to the solder pad and the component. Once the pad heats up, it will draw the molten solder onto itself.
-
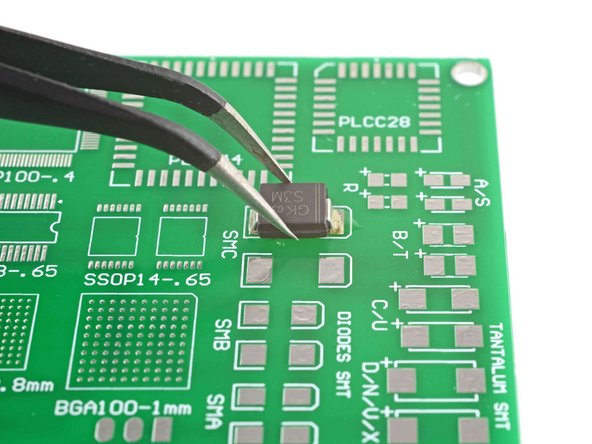
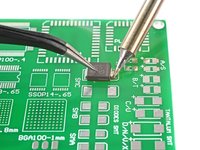
Remove the tip from the solder joint.
-
Repeat this process for the rest of the component leads.
-
-
-
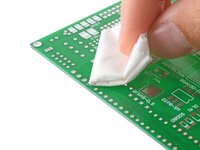
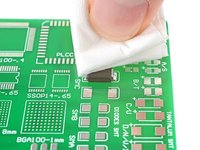
Apply some isopropyl alcohol to the solder joints and scrub the area with a soft bristled brush to remove any flux residue.
-
Wipe the solder joint with a lint-free cloth to soak up the flux and alcohol residue.
-
-
Tool used on this step:Polyimide Tape$9.99
-
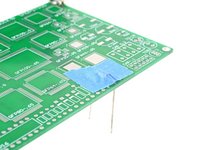
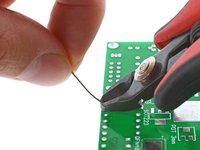
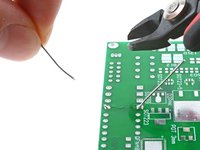
Hold the component in place and solder the corner leads to secure it in place.
-
Alternatively, you can secure the component to the board using polyimide tape and then solder the corner leads.
-


Congratulations on completing this introductory soldering guide! You've taken the first step toward mastering a valuable and versatile skill. With the basics under your belt, you're well-equipped to tackle various electronics projects and repairs. Remember, practice makes perfect, so don't hesitate to experiment and refine your techniques.
For more soldering information, click here.
Cancel: I did not complete this guide.
457 other people completed this guide.


33 Comments
TIP: Another method which works well for clearing solder from holes (especially on repairs like AC Jacks on laptops) is to use compressed air to clear melted solder from holes. A quick blast with a duster can works well (I have even used a drink straw in a pinch and blown out with a blast of air from mouth). Heat the solder until it liquefies, put the duster straw right above the solder and quickly hit the melted solder with an air blast to instantly clear the hole of solder. This works well on very small holes as melted solder does not always push out cleanly with metal tools. You have to be quick with the air blast because the solder re-hardens rapidly.
just be careful doing this lol, flying molten solder can and will burn you or other components.
Logixal -
Flying solder might also get into places you don't want it. Making shorts and other unwanted connections of which you don't know where they are, so it can give you a very hard time finding them.
This is not IPC standards but for the ghetto approach, it will get the job done. I solder in manufacture settings, run my own shop. This is wrong to a degree but will do. If ifixit would like tips from ILLFIXIT then your more then welcome!
yeaaaa….. i was going to say something along these lines lol. itll get the job done but its by no means the right \ best way to do the job.
Logixal -
A very good guide to soldering.
I have never soldered anything (I'm a girl you see), but your clear and detailed guidance inspired me to give it a go.
I was well prepared in advance-it could be difficult-and that helped a lot.
I have now got a new battery soldered into my Palm TX and I'm as happy as Larry (or Lorraine in this case)..
Go Gurl! I'm a gurl, too. I worked in my dad's machine shop for 13+ years. I hit the ground running. Programmed, set up, and fixtured, retro-fitted CNC Mills, using SurfCam and G Code programming. We used Master Cam for the wire EDM. My fave was running a standard lathe. I guess I enjoy cylindrical objects. We held tolerances of .005+/- .001, all the way down to .0003+/-.0002. That…is very microscopic. lol
…add to that, Public Relations, Inventory, Inspector, Fixing Crashed tools, Shipping, Document Control, and so on. All I know is, if it needs to be done, it can be done, if your sharp. And, sometimes we gurls, have a different “feel” for delicate or fine work, as compared to some of the guys. There is nothing we cannot do, as well as anyone else, if we want to, and are willing to learn, and practice. I'm ready to try a little delicate connecting, myself.
Happy Trails and Tablets,
PoniGurll, or
DIY Gurll, otherwise, it won't get done!!
Using a solder wick braid is a good thing to do every time you are trying to remove solder from the thru-hole and pad. This is because after you use the solder wick you have a clean hole and a clean pad with just a slight film of solder on it and you have a nice open workspace without any old solder in there. Old solder doesn't have solder flux anymore -it's burned off-and won't "flow" around the component or wire leads and leaves an icy-looking "cold" solder joint, a dull grey glob of solder that is weak and doesn't conduct electricity very well. By wicking it off, the new solder, which does have solder flux, will be shiny, smooth, quite strong and conductive. I've been soldering since the early 70's and solder wick is a good friend if you use it right. No need for staples or picks, either.
Also, to help the solder wick pickup the solder faster and to help clean the solder pad at the same time, put just a little flux on the wick before applying the iron to the wick, then wipe the area clean with some alcohol, works great.
C.Vos -
Perfect Illustrations, Thank you.
I found this to be a clear and easy tutorial on how to solder to remove and install small electrical components. Excellent for beginners and useful for experts in teaching situations.
Very good guidance
another tip is if you do not have a soldering station and your iron gets too hot just unplug it and continue and never ever dunk your soldering iron in flux if it is excessively hot because it will take the conductive coating off the tip of your soldering iron. also dont dip touch the tip of your iron (while its off) because the oils from your hand can burn through the tip like the flux.
ps: this is from my personal experience and its just some things to look out for
Nice job!
Well done,,,,
This is a good job thanks.
Sooo just bought a soldering iron, never used one before in my life, re attaching wires to a little motherboard for a light switch and dimmer, this page literally just taught me exactly what i needed to know and success the first try! Thank so much! finally someone knows they’re stuff instead of me having to go through 30 different pages of nothing on google lol respect dude! keep it up!
Great guide! It also helps to use a bit of flux on the points to aid with adhesion of new solder to the contact points, and to help with heat transfer from the solder tip onto the solder pad.
I need to solder my wifi it came loose on my insignia tablet. All i need to know is where its located on mother board. Please guide me
Plug in the soldering iron. Wait for it to heat up… test by tapping solder on to the soldering iron tip. Having ‘tinned’ the soldering tip, apply the tip to the component leg and PCB. If the component leg is comparatively ‘thick’, apply more heat to the leg than the PCB. Tap the solder jointly on the component leg and the iron tip. If the component leg is at the right temperature, the solder will flow and make a sound electrical connection. If the component leg is not at the right temperature, the solder will melt on the iron tip and ‘drip’ onto the component not making a good connection.
I’d never do any soldering without a solder sucker e.g. https://www.amazon.co.uk/Draper-23553-De... but be careful when using it on delicate PCBs as the suck can lift circuit tracks where too much heat has been applied.
I’m a little late with my comments but just had to brag about my younger days with Heathkits and other companies! I learned how to solder the hard way (without any instructions) and put together a B/W TV, a color TV, an AM/FM receiver and various other little projects. I understand Heathkit is coming back and encourage you younger people to enjoy the hobby of putting together their kits after doing these soldering lessons.
Absolutely. I’ve worked alongside women in the US Navy. Most of them are very competent, excellent technicians. Like guys, though, you have your whiners and slackers. We are all the same.
Some information in the top title area was misleading, as the iPod isn’t sold anymore (except for the touch with a soldered battery) and the iPhone has had a socketed battery since 2008. I fixed it in the latest unverified version.
and where/how do we post future questions ?
practice on eWaste first
We refreshed the soldering guide!
Great presentation. Very helpful for a newbie like me. One comment, in Step 10 you say concave and I think you meant convex. A concave tent would hold water if it rains.
Thank you @miha821! You may actually change the respective section yourself!