How to Install a 2.5" Hard Drive into an External Enclosure

What you need

  1. How to Install a 2.5" Hard Drive into an External Enclosure, Install the drive into the enclosure: step 1, image 1 of 1
    • Before you begin, look at your hard drive's ports and make sure that it has the right connectors:

    • Narrow data port

    • Wide power port

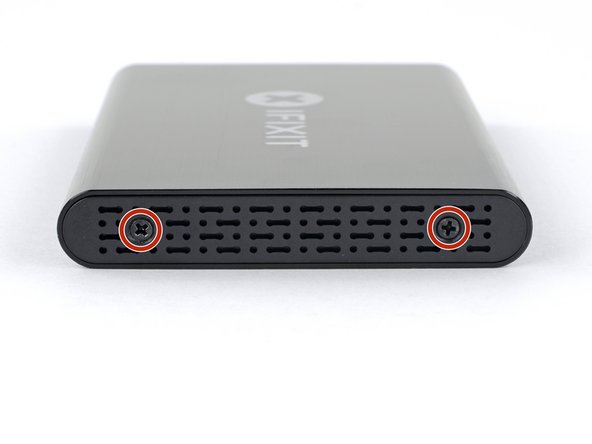
  2. How to Install a 2.5" Hard Drive into an External Enclosure, Open the enclosure: step 2, image 1 of 1
    • Use the included screwdriver to remove the two Phillips screws.

  3. How to Install a 2.5" Hard Drive into an External Enclosure: step 3, image 1 of 2 How to Install a 2.5" Hard Drive into an External Enclosure: step 3, image 2 of 2
    • Slide the plastic tray out of the aluminum housing.

  4. How to Install a 2.5" Hard Drive into an External Enclosure, Install the SSD: step 4, image 1 of 3 How to Install a 2.5" Hard Drive into an External Enclosure, Install the SSD: step 4, image 2 of 3 How to Install a 2.5" Hard Drive into an External Enclosure, Install the SSD: step 4, image 3 of 3
    • Set the drive in the plastic tray and align the drive ports with the tray socket.

    • To prevent strain on the enclosure socket, lay the drive as flat against the tray as possible.

    • Carefully push the drive into the tray socket to seat the ports.

    • Press the drive's raised edge down into the plastic tray.

    • If the drive edge catches on the foam block, the drive is not fully seated against the tray socket. Continue pressing the drive into the socket until it clears the foam block.

  5. How to Install a 2.5" Hard Drive into an External Enclosure: step 5, image 1 of 1
    • Flip the drive tray over.

    • Use the a Phillips screwdriver to install the four mounting screws (included in the kit) to secure the drive to the tray.

  6. How to Install a 2.5" Hard Drive into an External Enclosure: step 6, image 1 of 3 How to Install a 2.5" Hard Drive into an External Enclosure: step 6, image 2 of 3 How to Install a 2.5" Hard Drive into an External Enclosure: step 6, image 3 of 3
    • Slide the tray back into the aluminum housing.

    • Reinstall the two Phillips screws to secure the tray.

Conclusion

Your drive is ready for use!

48 other people completed this guide.

Arthur Shi

Member since: 01/03/18

253,346 Reputation

526 Guides authored

Team

iFixit Member of iFixit

Staff

135 Members

17,183 Guides authored

8 Comments

Now what do I do?

Louise McCampbell - Reply

You will need to plug the enclosure into a computer to access it. From there, you can format the drive or retrieve data.

Arthur Shi -

How do I plug the enclosure into a computer? Are there cables? Thank you.

Shannon Mikus - Reply

Very good explanation on "How to do it yourself"

Jawa Herath - Reply

Very good Instructions with clear explanations.

Jawa Herath - Reply

Add Comment

View Statistics:

Past 24 Hours: 29

Past 7 Days: 133

Past 30 Days: 572

All Time: 30,957