Introduction
In this set of instructions, you’ll find easy steps on how to properly remove and replace an air filter in a 2017 Honda Civic LX. A cabin air filter’s job is to remove dust, pollutants, pollen, and other small particles from your car’s air flow. Therefore, it fills with these particles and needs to be replaced between every 15,000 and 30,000 miles in order to properly do its job. If your air flow is weak, smells musty, or makes a whistling noise, those are all signs you’re due for a new cabin filter.
All you’ll need is a new AQ1182 Cabin Air Filter and a few minutes to remove the proper parts, remove the old filter, and replace it with the brand new one. Be careful when removing the old filter that you don’t accidentally inhale any of the particles. Linked below is a video of replacing an air filter on a similar (but not exact) Honda Civic model, if you need the extra visual aid.
What you need
-
-
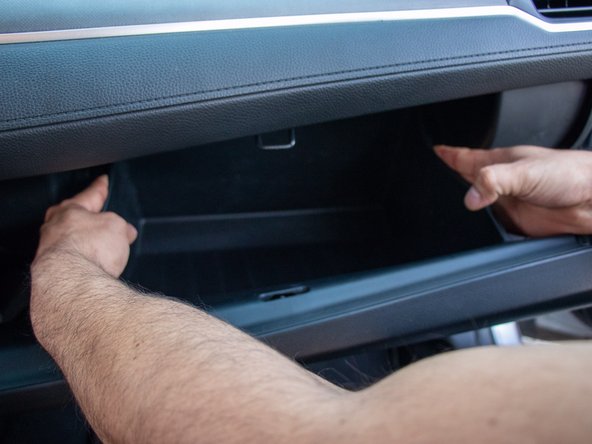
Direct your attention to the glove compartment directly in front of the front passenger seat.
-
-


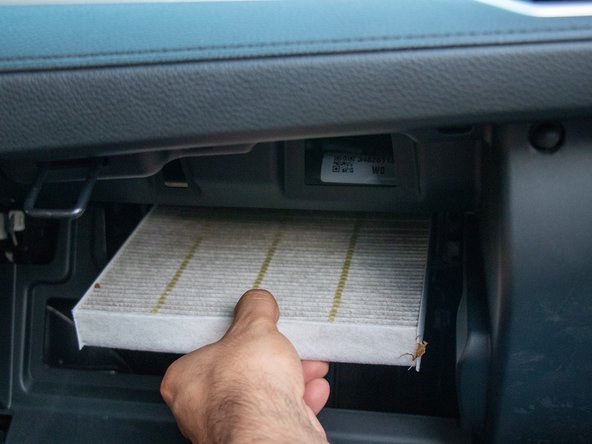


Enjoy a breath of fresh air as your cabin air filter has now been replaced!
Enjoy a breath of fresh air as your cabin air filter has now been replaced!
Cancel: I did not complete this guide.
3 other people completed this guide.
Team

University of North Texas, Team S2-G6, Raign Fall 2020 Member of University of North Texas, Team S2-G6, Raign Fall 2020
UNT-RAIGN-F20S2G6
2 Members
1 Guide authored