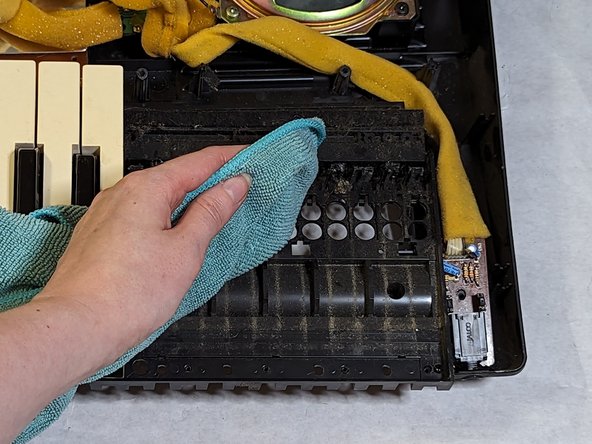
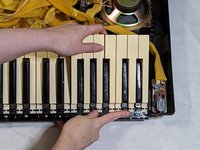
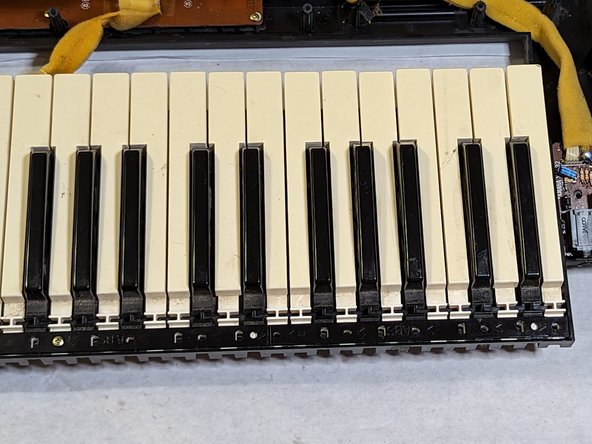
How to Replace the Keys on a Yamaha PSR-330 Piano Keyboard

What you need

  1. How to Replace the Keys on a Yamaha PSR-330 Piano Keyboard, Keys: step 1, image 1 of 3 How to Replace the Keys on a Yamaha PSR-330 Piano Keyboard, Keys: step 1, image 2 of 3 How to Replace the Keys on a Yamaha PSR-330 Piano Keyboard, Keys: step 1, image 3 of 3
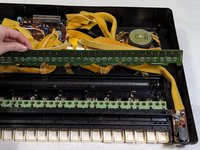
    • Unplug and flip the keyboard over.

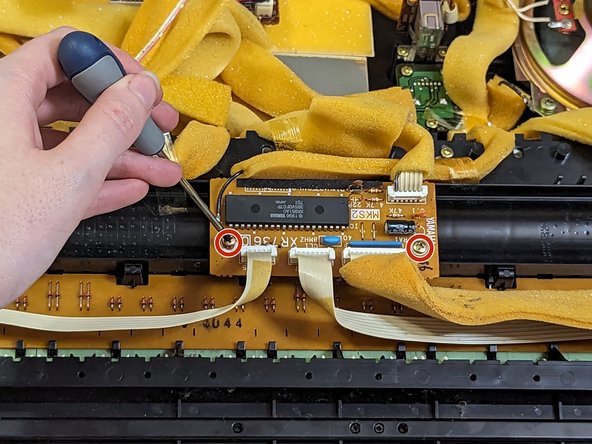
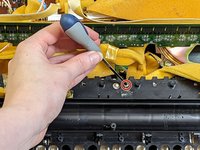
    • Remove the 4 inner 25 mm screws using a Phillips screwdriver.

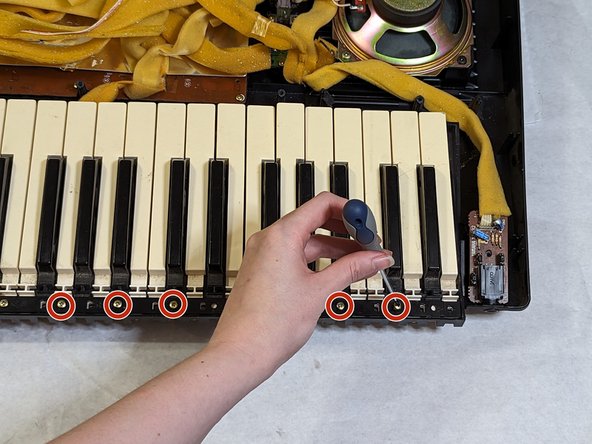
    • Remove the rest of the 7 mm screws using a Phillips screwdriver.

  2. How to Replace the Keys on a Yamaha PSR-330 Piano Keyboard: step 2, image 1 of 2 How to Replace the Keys on a Yamaha PSR-330 Piano Keyboard: step 2, image 2 of 2
    • Carefully remove the back casing with both hands from the bottom.

    • The back casing is connected via a ribbon cable so make sure to hold it steady before proceeding.

  3. How to Replace the Keys on a Yamaha PSR-330 Piano Keyboard: step 3, image 1 of 1
    • While holding the back casing, unplug the ribbon cable connecting both front and back casings together.

    • Set aside the back casing.

  4. How to Replace the Keys on a Yamaha PSR-330 Piano Keyboard: step 4, image 1 of 2 How to Replace the Keys on a Yamaha PSR-330 Piano Keyboard: step 4, image 2 of 2
    • Remove both 7 mm Phillips #1 screws from the XR736(C) PCB.

    • Carefully move the XR736(C) PCB away from the contact pad.

  5. How to Replace the Keys on a Yamaha PSR-330 Piano Keyboard: step 5, image 1 of 3 How to Replace the Keys on a Yamaha PSR-330 Piano Keyboard: step 5, image 2 of 3 How to Replace the Keys on a Yamaha PSR-330 Piano Keyboard: step 5, image 3 of 3
    • Push down on the black tabs on the contact pad.

    • Starting from the ends, carefully remove the contact pad by wiggling it out.

    • Be careful of the smaller black hooks on the bottom. These are fragile.

  6. How to Replace the Keys on a Yamaha PSR-330 Piano Keyboard: step 6, image 1 of 3 How to Replace the Keys on a Yamaha PSR-330 Piano Keyboard: step 6, image 2 of 3 How to Replace the Keys on a Yamaha PSR-330 Piano Keyboard: step 6, image 3 of 3
    • Flip over the contact pad.

    • Using a clean cloth, dust the contact pad and the silicone molds.

  7. How to Replace the Keys on a Yamaha PSR-330 Piano Keyboard: step 7, image 1 of 3 How to Replace the Keys on a Yamaha PSR-330 Piano Keyboard: step 7, image 2 of 3 How to Replace the Keys on a Yamaha PSR-330 Piano Keyboard: step 7, image 3 of 3
    • Remove the silicone molds and dust the other side of them.

    • Set them aside.

  8. How to Replace the Keys on a Yamaha PSR-330 Piano Keyboard: step 8, image 1 of 3 How to Replace the Keys on a Yamaha PSR-330 Piano Keyboard: step 8, image 2 of 3 How to Replace the Keys on a Yamaha PSR-330 Piano Keyboard: step 8, image 3 of 3
    • Remove the 10 mm Phillips #1 screw(s) from the case.

    • The screws would be in the middle and above the keys.

    • Flip the keys rights-side up.

  9. How to Replace the Keys on a Yamaha PSR-330 Piano Keyboard: step 9, image 1 of 3 How to Replace the Keys on a Yamaha PSR-330 Piano Keyboard: step 9, image 2 of 3 How to Replace the Keys on a Yamaha PSR-330 Piano Keyboard: step 9, image 3 of 3
    • Remove the 7 mm Phillips #1 screws from the keys together

    • Remove the keys in sections using both hands.

    • Clean the area using a clean cloth and/or compressed air.

  10. How to Replace the Keys on a Yamaha PSR-330 Piano Keyboard: step 10, image 1 of 3 How to Replace the Keys on a Yamaha PSR-330 Piano Keyboard: step 10, image 2 of 3 How to Replace the Keys on a Yamaha PSR-330 Piano Keyboard: step 10, image 3 of 3
    • Using the tabs on the keys, insert them into their respective slots.

  11. How to Replace the Keys on a Yamaha PSR-330 Piano Keyboard: step 11, image 1 of 3 How to Replace the Keys on a Yamaha PSR-330 Piano Keyboard: step 11, image 2 of 3 How to Replace the Keys on a Yamaha PSR-330 Piano Keyboard: step 11, image 3 of 3
    • Place the set of keys back one at a time.

    • The two sets of white keys go on the bottom, and the set of black keys go on top.

Conclusion

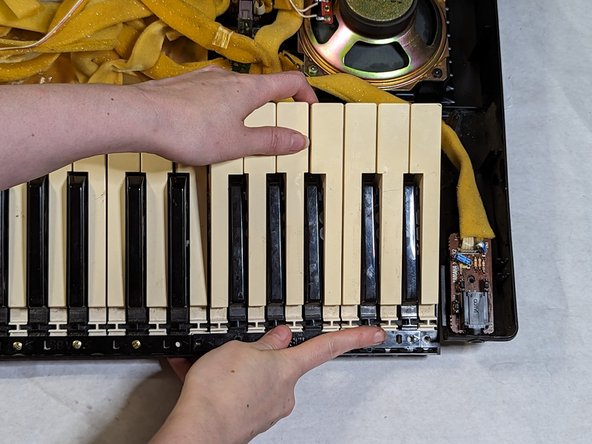
To reassemble your device, follow these instructions in reverse order.

2 other people completed this guide.

Bri

Member since: 06/28/23

247 Reputation

1 Guide authored

0 Comments

Add Comment

View Statistics:

Past 24 Hours: 1

Past 7 Days: 10

Past 30 Days: 37

All Time: 587