Introduction
This is a prerequisite guide! This guide is part of another procedure and is not meant to be used alone.
This guide was performed on the A2783 (international) model.
Use this guide to open the iPhone SE 2022 for repairs.
You’ll need replacement adhesive to reattach components when reassembling the device.
What you need
-
-
Power off your phone before beginning disassembly.
-
Remove the two 3.4 mm P2 pentalobe screws on the bottom edge of the iPhone.
-
-
-
Lay overlapping strips of clear packing tape over the iPhone's screen until the whole face is covered.
-
If you can't get the suction cup to stick in the next few steps, fold a strong piece of tape (such as duct tape) into a handle and lift the screen with that instead.
-
-
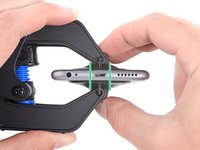
Tool used on this step:Clampy - Anti-Clamp$24.95
-
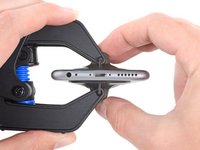
Pull the blue handle backwards to unlock the Anti-Clamp's arms.
-
Slide the arms over either the left or right edge of your iPhone.
-
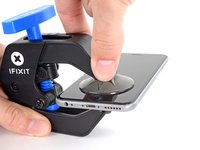
Position the suction cups near the bottom edge of the iPhone just above the home button—one on the front, and one on the back.
-
Squeeze the cups together to apply suction to the desired area.
-
-
-
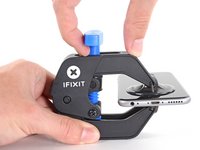
Heat an iOpener and thread it through the arms of the Anti-Clamp.
-
Fold the iOpener so it lays on the bottom edge of the iPhone.
-
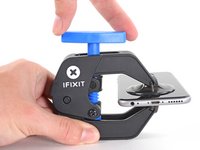
Wait one minute to give the adhesive a chance to release and present an opening gap.
-
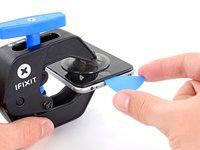
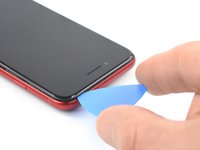
Insert an opening pick under the screen's plastic bezel, not the screen itself.
-
Skip the next two steps.
-
-
-
-
Prepare an iOpener and apply it to the screen for at least two minutes to loosen the adhesive underneath.
-
-
-
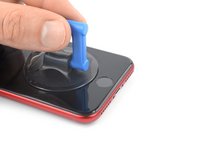
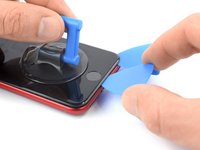
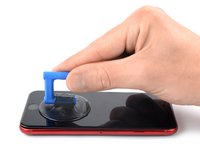
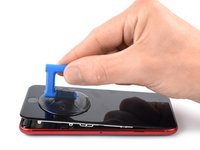
Secure a suction handle to the lower half of the front panel, as close to the home button as possible.
-
Lift the front panel with the suction handle to create a small gap between the front panel and the frame.
-
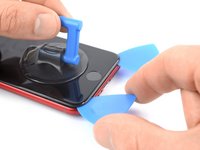
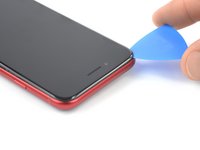
Insert an opening pick into the gap under the screen's plastic bezel.
-
-
-
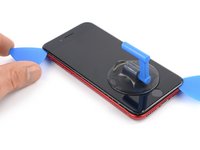
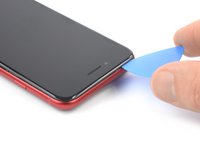
Slide the opening pick to the bottom right corner to slice the front panel adhesive.
-
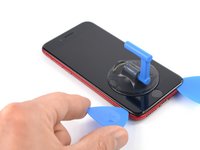
Insert a second opening pick at the bottom edge of your phone.
-
Slide the opening pick to the bottom left corner to slice the adhesive.
-
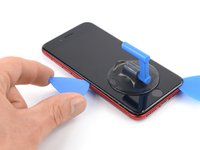
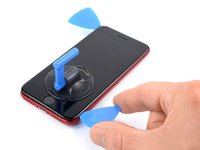
Leave the opening picks in place to prevent the adhesive from resealing.
-
-
-
Slide the bottom left opening pick along the left edge of your phone to slice the adhesive.
-
Stop near the top left corner of the display.
-
-
-
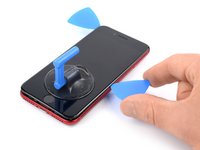
Remove the opening picks.
-
Gently pull up on the suction handle to lift up the bottom edge of the display.
-
Remove the suction handle.
-
-
-
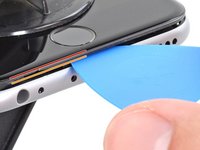
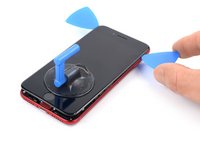
Slide an opening pick underneath the top left corner of the display.
-
Slide the opening pick around the top left corner and along the top edge of the phone to slice the remaining adhesive.
-
-
-
Slide the display assembly slightly down in direction of the charging port to disengage the clips holding it to the rear case.
-
-
-
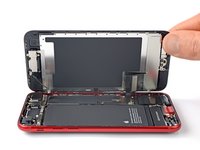
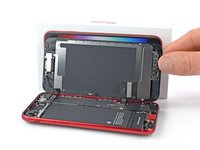
Open the phone by swinging the display up from the left side, like the back cover of a book.
-
Lean the display against something to keep it propped up while you're working on the phone.
-


To reassemble your device, follow these instructions in reverse order.
To reassemble your device, follow these instructions in reverse order.

