
Huawei Honor 10 Battery Replacement

Introduction
Go to step 1Use this guide to replace a worn-out or dead battery in your Honor 10.
If your battery is swollen, take appropriate precautions. For your safety, discharge your battery below 25% before disassembling your phone. This reduces the risk of a dangerous thermal event if the battery is accidentally damaged during the repair.
Although it’s possible to remove the battery without removing the loudspeaker unit and the interconnect flex cable, we recommend doing so to make the removal procedure easier and to prevent damage to the interconnect flex cable.
You’ll need replacement adhesive to reattach components when reassembling the device.


-
-
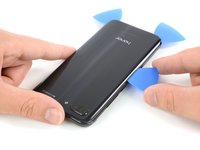
Before you begin, switch off your phone.
-
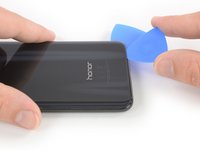
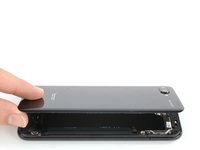
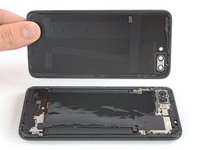
Apply a heated iOpener to a long edge of the phone to loosen the adhesive beneath the rear glass. Apply the iOpener for at least two minutes.
-
-
-
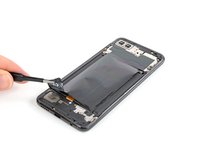
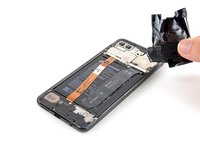
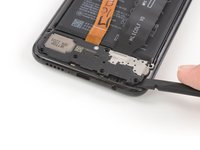
Use a pair of tweezer to carefully peel the black foil off the loudspeaker and daughterboard cover.
-
Remove the foil completely.
-
-
-
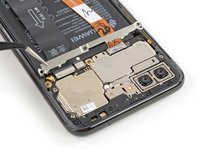
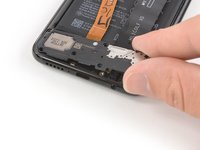
Remove the seven Phillips screws securing the loudspeaker unit:
-
Three silver 2.9 mm long screws
-
Four black 3.4 mm long screws
-
-
-
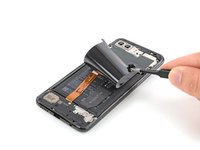
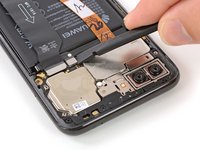
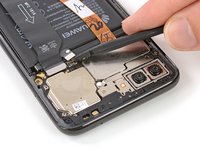
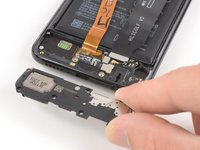
Use a spudger to pry off and disconnect the bottom end of the interconnect flex cable.
-
-
-
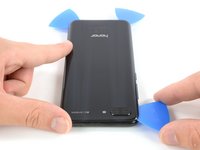
Apply a heated iOpener to the screen for two minutes to loosen the adhesive beneath the battery.
-


If possible, turn on your phone and test your repair before installing new adhesive and resealing the phone.
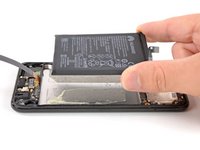
Secure the new battery with pre-cut adhesive or double-sided adhesive tape. In order to position it correctly, apply the new adhesive into the phone at the places where the old adhesive was located, not directly onto the battery. Press the new battery firmly into place.
For optimal performance, calibrate your newly installed battery: Charge it to 100%, and keep charging it for at least two more hours. Then, use it until it shuts off due to low battery. Finally, charge it uninterrupted to 100%
To reassemble your device, follow these instructions in reverse order.
Take your e-waste to an R2 or e-Stewards certified recycler.
Repair didn’t go as planned? Check out our Answers community for troubleshooting help.
If possible, turn on your phone and test your repair before installing new adhesive and resealing the phone.
Secure the new battery with pre-cut adhesive or double-sided adhesive tape. In order to position it correctly, apply the new adhesive into the phone at the places where the old adhesive was located, not directly onto the battery. Press the new battery firmly into place.
For optimal performance, calibrate your newly installed battery: Charge it to 100%, and keep charging it for at least two more hours. Then, use it until it shuts off due to low battery. Finally, charge it uninterrupted to 100%
To reassemble your device, follow these instructions in reverse order.
Take your e-waste to an R2 or e-Stewards certified recycler.
Repair didn’t go as planned? Check out our Answers community for troubleshooting help.
Cancel: I did not complete this guide.
5 other people completed this guide.

