Introduction
Use this guide to replace a fan for an IBM ThinkPad (Model T42). If your computer is making excessive noises, sounds louder than usual, or feels hot to the touch, the fan may need to be replaced. The fans' purpose is to pull cooler air into the computer to cool the hot circuitry. A failing fan can cause your laptop to sound louder because it is working harder than it normally needs to. Prior to using this guide, ensure nothing is blocking the fan or is in the way of the flow of the fan. A quick cleaning of debris or built-up dirt with a microfiber cloth may improve the functionality of the fan. If the fan is still dysfunctional, the next step would be to move forward with replacing the fan. Before beginning the process of replacing the fan make sure that your device is fully turned off and disconnected from any external power sources.
What you need
-
-
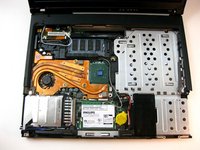
Use a Phillips #0 screwdriver to remove the twenty screws on the underside of the T42.
-
-
-
Remove the four Phillips screws located on either side of the rear of the T42 (there are two on each end.)
-
-
-
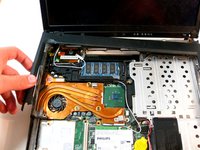
Flip the laptop over and open the screen to access the keyboard and trackpad.
-
-
-
-
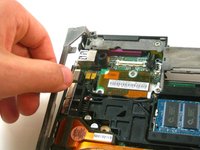
Starting from the bottom right, carefully remove the bezel by pulling it up gently. If needed use a spudger or flathead screwdriver to help.
-
-
-
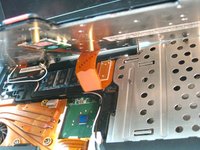
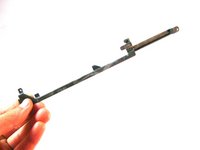
Using the Phillips #0 screwdriver, remove the three screws on the copper heatsink.
-
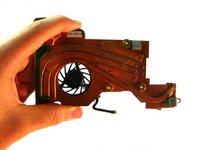
Separate the copper heatsink by pulling it upwards, in order to unplug the connector from the motherboard.
-


To reassemble your device, follow these instructions in reverse order.
Cancel: I did not complete this guide.
8 other people completed this guide.

Team

Cal Poly, Team 29-76, Johann Spring 2010 Member of Cal Poly, Team 29-76, Johann Spring 2010
CPSU-JOHANN-S10S29G76
4 Members
37 Guides authored
2 Guide Comments
How about you just down the freely available Hardware Maintenance Manual (HMM) for the laptop. They are downloadable in PDF format, and very well done.
It doesnt take this much, if you remove the palm rest and keyboard you can get it at an angle it slides straight out.