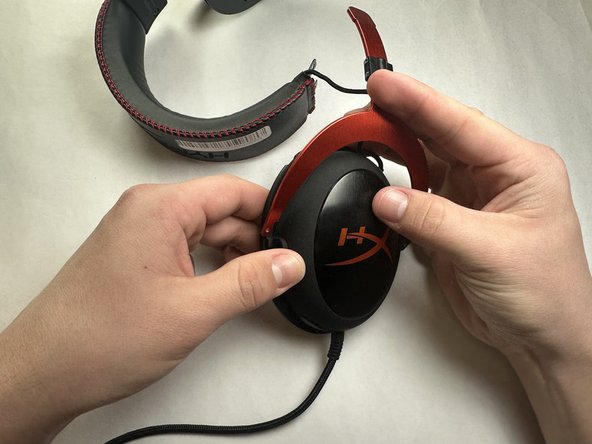
Kingston HyperX Cloud II Speaker Wire Repair

What you need

  1. Kingston HyperX Cloud II Speaker Wire Repair, Kingston HyperX Cloud II Speaker Wire Repair: step 1, image 1 of 1
    • Pulling along the edges, take off the ear padding.

  2. Kingston HyperX Cloud II Speaker Wire Repair: step 2, image 1 of 2 Kingston HyperX Cloud II Speaker Wire Repair: step 2, image 2 of 2
    • Use a Phillips #0 screwdriver to remove the two 11 mm screws from the bracket support.

  3. Kingston HyperX Cloud II Speaker Wire Repair: step 3, image 1 of 3 Kingston HyperX Cloud II Speaker Wire Repair: step 3, image 2 of 3 Kingston HyperX Cloud II Speaker Wire Repair: step 3, image 3 of 3
    • Remove the inside bracket support, and then remove the outside bracket support.

    • Expand and remove the microphone speaker from the frame.

  4. Kingston HyperX Cloud II Speaker Wire Repair: step 4, image 1 of 3 Kingston HyperX Cloud II Speaker Wire Repair: step 4, image 2 of 3 Kingston HyperX Cloud II Speaker Wire Repair: step 4, image 3 of 3
    • Use a Phillips #1 screwdriver to remove the two 7.90 mm screws from the red support attached to the microphone speaker.

  5. Kingston HyperX Cloud II Speaker Wire Repair: step 5, image 1 of 3 Kingston HyperX Cloud II Speaker Wire Repair: step 5, image 2 of 3 Kingston HyperX Cloud II Speaker Wire Repair: step 5, image 3 of 3
    • Separate the red frame support from the microphone speaker by putting it to the side.

  6. Kingston HyperX Cloud II Speaker Wire Repair: step 6, image 1 of 2 Kingston HyperX Cloud II Speaker Wire Repair: step 6, image 2 of 2
    • Remove the four 11 mm screws on the speaker frame with a Phillips #2 screwdriver.

  7. Kingston HyperX Cloud II Speaker Wire Repair: step 7, image 1 of 3 Kingston HyperX Cloud II Speaker Wire Repair: step 7, image 2 of 3 Kingston HyperX Cloud II Speaker Wire Repair: step 7, image 3 of 3
    • Remove the headphone speaker frame.

    • Solder the detached blue wire onto the driver.

    • Be cautious not to solder the wrong wire.

  8. Kingston HyperX Cloud II Speaker Wire Repair: step 8, image 1 of 1
    • Solder the green wire onto the driver.

    • Be cautious not to solder the wrong wire.

Conclusion

To reassemble your device, follow these instructions in reverse order.

Daniel Olaoluwa Ajagbonna

Member since: 03/27/23

325 Reputation

2 Guides authored

Team

IUPUI, Team 1-4, Harley Spring 2023 Member of IUPUI, Team 1-4, Harley Spring 2023

IUPUI-HARLEY-S23S1G4

3 Members

3 Guides authored

0 Comments

Add Comment

View Statistics:

Past 24 Hours: 4

Past 7 Days: 24

Past 30 Days: 114

All Time: 1,783