
Lenovo ThinkPad L390 Lower Case Replacement

What you need

  1. Lenovo ThinkPad L390 Lower Case Replacement, Lower Case: step 1, image 1 of 2 Lenovo ThinkPad L390 Lower Case Replacement, Lower Case: step 1, image 2 of 2
    • Before you begin, discharge your laptop battery below 25%. A charged lithium-ion battery can catch fire and/or explode if accidentally punctured. Lay the device down with the lower case facing up.

    • Power off your laptop and disconnect the charger and any peripheries before beginning disassembly.

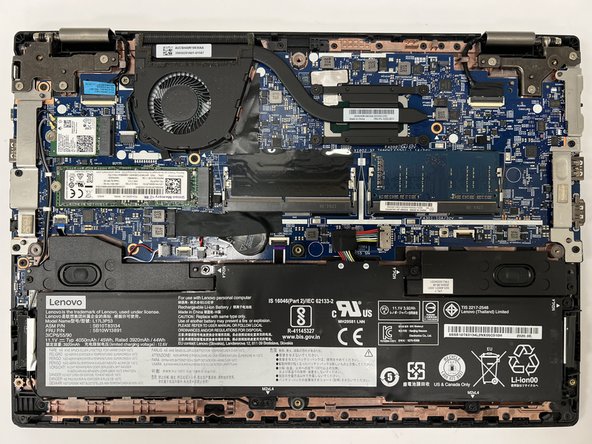
    • Unscrew the nine 5 mm Phillips #00 screws that secure the lower case.

  2. Lenovo ThinkPad L390 Lower Case Replacement: step 2, image 1 of 2 Lenovo ThinkPad L390 Lower Case Replacement: step 2, image 2 of 2
    • Insert an opening tool in the gap between the lower case and the chassis.

    • Pry around the entire perimeter of the lower case until it fully releases.

    • Lift the lower case up and off.

Conclusion

To reassemble your device, follow these instructions in reverse order.

Connor

Member since: 03/29/22

12,364 Reputation

64 Guides authored

Team

iFixit Member of iFixit

Staff

118 Members

19,543 Guides authored

0 Comments

Add Comment

View Statistics:

Past 24 Hours: 2

Past 7 Days: 8

Past 30 Days: 26

All Time: 55