Lenovo ThinkPad T480 Hard Drive Replacement

Lenovo ThinkPad T480 Hard Drive Replacement

Sarah Westberg

Sarah Westberg and 2 other contributors

Last updated on January 16, 2024

20 - 30 minutes
Moderate

Introduction

Go to step 1

This guide will walk you through the steps to replace the hard drive of your Lenovo ThinkPad T480.

The hard drive is a nonvolatile data storage and retrieval device which uses magnetic storage on one or more rotating platters.

If your hard drive fails or becomes corrupted, your computer may start to run extremely slowly, it may overheat, or it may fail to boot. If you experience “blue screen of death” errors or apps that freeze or crash, it might be time to replace your hard drive.

If you need to replace your hard drive, follow the instructions in this guide.

According to the Lenovo Forum, this model has the capacity to upgrade to 1 TB Solid State Drive, PCIe-NVMe OPAL2.0 M.2.

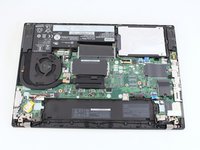
Be sure to disable the internal battery, turn off the computer, and unplug the laptop from the power adapter prior to starting the repair.

What you need

Fix Kit

This kit contains all the parts and tools needed to complete this guide.

Parts

Tools

Show more…

  1. Lenovo ThinkPad T480 Hard Drive Replacement, External Battery: step 1, image 1 of 2 Lenovo ThinkPad T480 Hard Drive Replacement, External Battery: step 1, image 2 of 2
    • Disable the battery, power down, and unplug your device before you begin.

    • Flip the laptop over so the bottom of the device is showing.

  2. Lenovo ThinkPad T480 Hard Drive Replacement: step 2, image 1 of 3 Lenovo ThinkPad T480 Hard Drive Replacement: step 2, image 2 of 3 Lenovo ThinkPad T480 Hard Drive Replacement: step 2, image 3 of 3
    • Using your fingers, slide the lock on each side of the battery to the unlocked position.

    • Remove the battery from the slot.

  3. Lenovo ThinkPad T480 Hard Drive Replacement, Back Cover: step 3, image 1 of 2 Lenovo ThinkPad T480 Hard Drive Replacement, Back Cover: step 3, image 2 of 2
    • Using the Phillips #1 screwdriver, loosen the six captive screws.

  4. Lenovo ThinkPad T480 Hard Drive Replacement: step 4, image 1 of 3 Lenovo ThinkPad T480 Hard Drive Replacement: step 4, image 2 of 3 Lenovo ThinkPad T480 Hard Drive Replacement: step 4, image 3 of 3
    • Insert the blue plastic opening tool into the space between the lower case and the chassis.

    • Slide the opening tool around the perimeter of the case to release the clips holding the case and the chassis together.

    • If it feels like the battery well portion of the back cover isn't loose, these clips may be holding the cover to the laptop. Use your opening tool to pry the clips loose and try removing the cover again.

    • Remove the back case.

  5. Lenovo ThinkPad T480 Hard Drive Replacement, Internal Battery: step 5, image 1 of 2 Lenovo ThinkPad T480 Hard Drive Replacement, Internal Battery: step 5, image 2 of 2
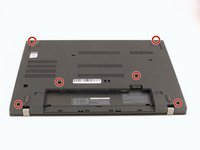
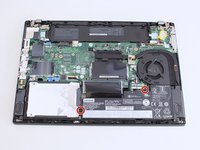
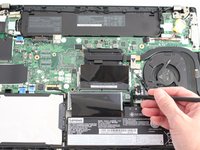
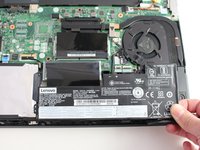
    • Use a Phillips #1 screwdriver to remove the two 4.6 mm screws that secure the internal battery to the frame.

  6. Lenovo ThinkPad T480 Hard Drive Replacement: step 6, image 1 of 3 Lenovo ThinkPad T480 Hard Drive Replacement: step 6, image 2 of 3 Lenovo ThinkPad T480 Hard Drive Replacement: step 6, image 3 of 3
    • Use the spudger to slide the battery socket connector parallel to the motherboard and out of its socket on the motherboard.

  7. Lenovo ThinkPad T480 Hard Drive Replacement: step 7, image 1 of 2 Lenovo ThinkPad T480 Hard Drive Replacement: step 7, image 2 of 2
    • Lift the battery straight out of its recess and remove it.

    • If the battery is difficult to remove from the recess, use a nylon spudger to gently lift it on one edge, making it easier to grasp and remove by hand.

    • To prevent damage or potential fire, do not bend or flex the battery. Only use a plastic spudger and avoid any sharp tools that could puncture the battery.

  8. Lenovo ThinkPad T480 Hard Drive Replacement, Hard Drive: step 8, image 1 of 3 Lenovo ThinkPad T480 Hard Drive Replacement, Hard Drive: step 8, image 2 of 3 Lenovo ThinkPad T480 Hard Drive Replacement, Hard Drive: step 8, image 3 of 3
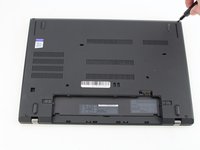
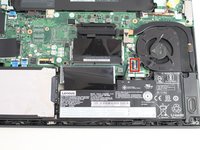
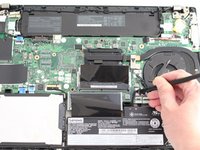
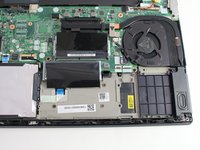
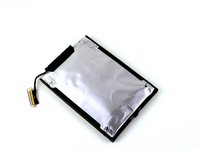
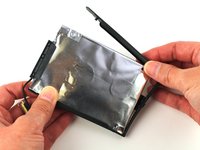
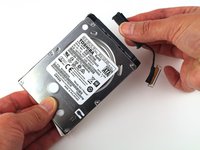
    • Using the black nylon spudger, lift the connector lock up.

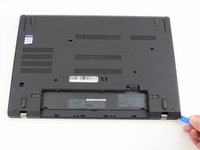
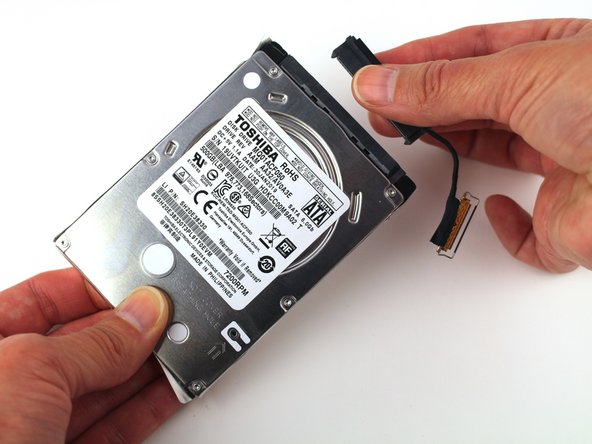
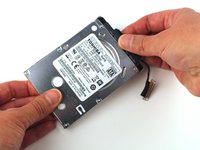
    • Disconnect the storage cable from the motherboard.

  9. Lenovo ThinkPad T480 Hard Drive Replacement: step 9, image 1 of 3 Lenovo ThinkPad T480 Hard Drive Replacement: step 9, image 2 of 3 Lenovo ThinkPad T480 Hard Drive Replacement: step 9, image 3 of 3
    • Lift the hard drive up with a tab if it has one or with your spudger.

    • Lift the drive assembly from the system.

  10. Lenovo ThinkPad T480 Hard Drive Replacement: step 10, image 1 of 3 Lenovo ThinkPad T480 Hard Drive Replacement: step 10, image 2 of 3 Lenovo ThinkPad T480 Hard Drive Replacement: step 10, image 3 of 3
    • Pull the plastic drive bracket outward to remove it from the hard drive.

  11. Lenovo ThinkPad T480 Hard Drive Replacement: step 11, image 1 of 2 Lenovo ThinkPad T480 Hard Drive Replacement: step 11, image 2 of 2
    • Flip it over and remove the drive connector from the assembly.

Conclusion

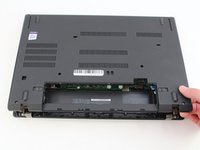
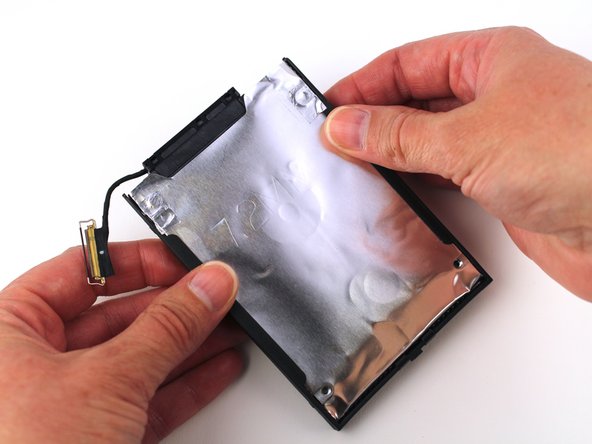
To reassemble your device, follow the above steps in reverse order.

Take your e-waste to an R2 or e-Stewards certified recycler.

Repair didn’t go as planned? Try some basic troubleshooting, or ask our Answers community for help.

5 other people completed this guide.

Sarah Westberg

Member since: 03/11/19

29,645 Reputation

71 Guides authored

Team

iFixit Member of iFixit

Staff

118 Members

19,553 Guides authored

0 Comments

Add Comment

View Statistics:

Past 24 Hours: 11

Past 7 Days: 121

Past 30 Days: 675

All Time: 27,056