
Lenovo ThinkPad Yoga Screen Replacement

What you need

  1. Lenovo ThinkPad Yoga Screen Replacement, Battery: step 1, image 1 of 3 Lenovo ThinkPad Yoga Screen Replacement, Battery: step 1, image 2 of 3 Lenovo ThinkPad Yoga Screen Replacement, Battery: step 1, image 3 of 3
    • Flip the laptop over so the bottom is facing you.

    • Remove the ten screws using a Phillips #1 screwdriver.

    • Using the plastic opening tool, pry the bottom cover off the laptop.

  2. Lenovo ThinkPad Yoga Screen Replacement: step 2, image 1 of 3 Lenovo ThinkPad Yoga Screen Replacement: step 2, image 2 of 3 Lenovo ThinkPad Yoga Screen Replacement: step 2, image 3 of 3
    • Remove two screws from the battery using a Phillips #1 screwdriver.

    • Disconnect the battery connector from the motherboard.

    • Remove the battery from the laptop.

  3. Lenovo ThinkPad Yoga Screen Replacement, Screen: step 3, image 1 of 3 Lenovo ThinkPad Yoga Screen Replacement, Screen: step 3, image 2 of 3 Lenovo ThinkPad Yoga Screen Replacement, Screen: step 3, image 3 of 3
    • Remove two screws under the plastic covers on the front of the screen using a Phillips #0 screwdriver.

    • Pry the plastic cover off with a spudger.

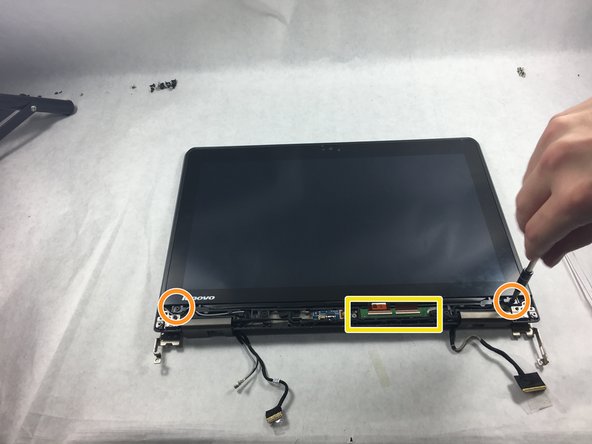
    • Remove the two screws from underneath the cover using a Phillips #0 screwdriver.

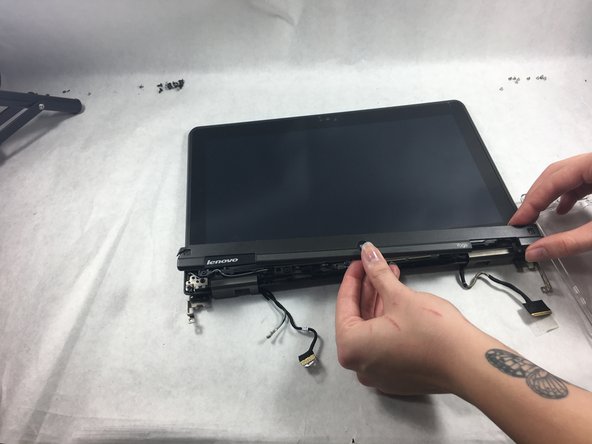
    • Detach the screen connector from the rest of the laptop.

  4. Lenovo ThinkPad Yoga Screen Replacement: step 4, image 1 of 1
    • Remove the screen from the rest of the laptop.

Conclusion

To reassemble your device, follow these instructions in reverse order.

Michael Nessralla

Member since: 10/28/21

171 Reputation

2 Guides authored

Team

0 Comments

Add Comment

View Statistics:

Past 24 Hours: 1

Past 7 Days: 20

Past 30 Days: 125

All Time: 2,219