Introduction
This guide shows you how to replace the Lenovo Yoga 720 15-IKB (88YG7000828) battery. Batteries tend to wear out over time, so if your battery isn’t holding a charge as long as it should, you might need to replace it. Refer to the troubleshooting page for more information about symptoms.
What you need
-
-
Power off the device before starting.
-
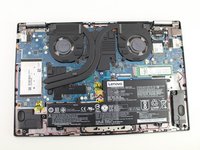
Flip the device over with the hinges facing away from you.
-
Remove seven 5.0 mm Torx T5 screws.
-
Remove three 9.5 mm Torx T5 screws.
-
-
-
-
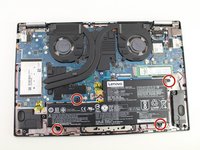
Remove the four 4mm screws surrounding the battery with a Phillips #0 screwdriver.
-
-
-
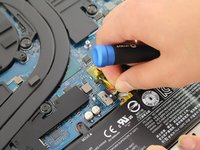
Lift the battery out of the case to remove it.
Before installing the new battery. I recomend doing a battery drain, hold the power button for 30 seconds to discharge any capaciters.
I ran into an issue where once i pulled the battery out and tried to put either the new or old battery back in. When i would try to turn the laptop back on with the power switch, the keyboard back light would blink every few seconds and nothing would come on the screen at all. Doing a battery drain between pulling a battery and puting a new one in fixed the issue.
-


To reassemble your device, follow these instructions in reverse order.
To reassemble your device, follow these instructions in reverse order.
Cancel: I did not complete this guide.
11 other people completed this guide.
Team

Cal Poly, Team S19-G3, White Winter 2020 Member of Cal Poly, Team S19-G3, White Winter 2020
CPSU-WHITE-W20S19G3
4 Members
25 Guides authored
6 Comments
Excellent guide. Made the job a snap. Especially identifying the screwdriver bit requird.
Good guide. Fairly easy project. Getting the battery connector back in on the replacement battery was by far the hardest part. Be patient with it. It took me a few tries, but it slid in fairly easily once it was all lined up correctly.
Thank you for the great informative guide! ordering my battery and tools now!
Hola! Que modelo de conector de batería es?
Como se llama ese modelo de conector?
Gracias