Introduction
Use this guide to replace the display in an Early 2020 MacBook Air.
What you need
-
Tool used on this step:Magnetic Project Mat$19.95
-
If your MacBook is running Big Sur v11.1 or later, disabling Auto Boot may not work. You can proceed normally, but make sure to disconnect the battery as soon as you're inside.
-
Use a P5 driver to remove the following screws:
-
Two 7.9 mm screws
-
Two 7.1 mm screws
-
Six 2.6 mm screws
-
-
-
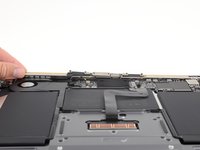
Wedge your fingers between the display and the lower case and pull upward to pop the lower case off the Air.
-
Remove the lower case.
-
Set it in place and press firmly to engage the two hidden clips underneath. You should feel and hear them snap into place.
-
-
-
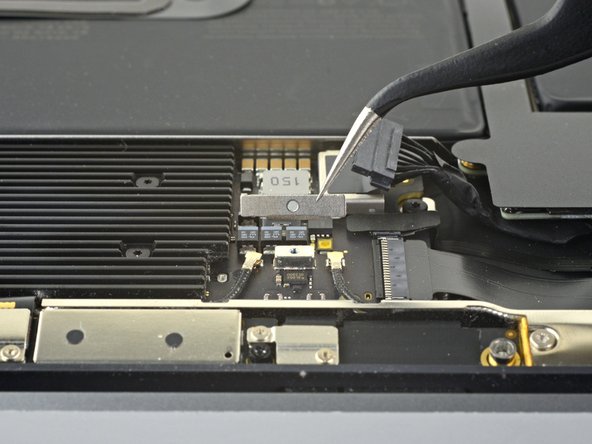
Peel back the tape covering the battery connector enough to reveal the connector underneath.
-
-
-
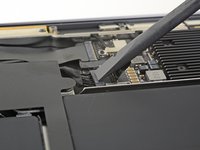
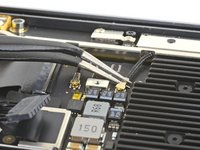
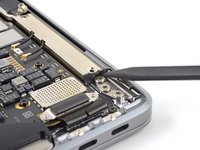
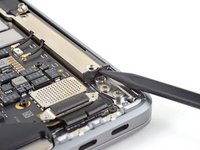
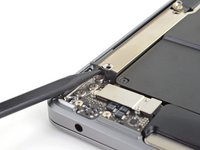
Use a T3 Torx driver to remove the 1.4 mm screw securing the antenna cable cover.
-
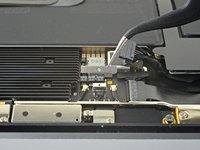
Remove the antenna cable cover.
-
-
-
-
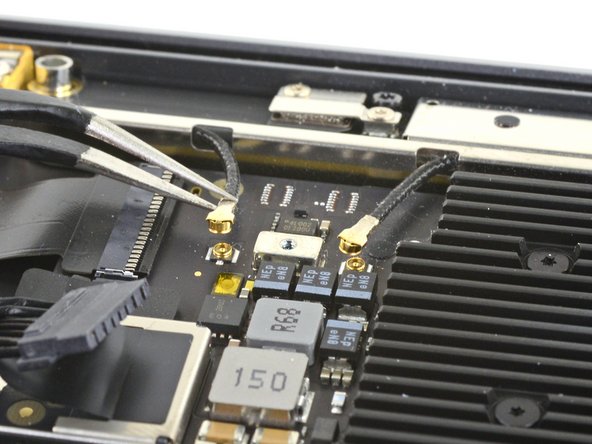
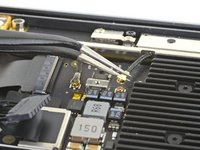
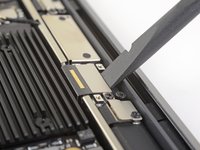
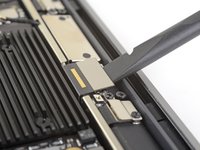
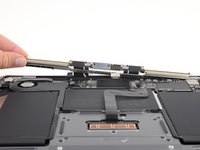
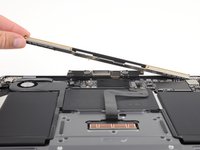
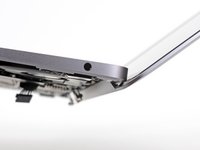
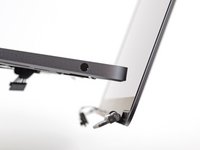
Insert the pointed end of a spudger into the gap between the antenna bar and display hinge.
-
Pivot the spudger against the hinge to pry up the end of the antenna bar.
-
Repeat for the other end of the antenna bar.
-
-
-
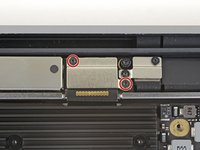
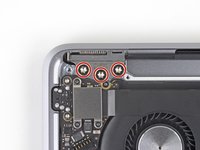
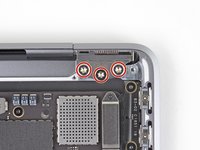
Use a T8 Torx driver to remove the three 4.9 mm screws from each hinge (six screws total).
-
-
-
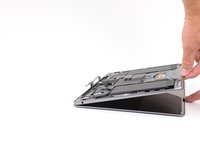
With the MacBook still screen-side down, carefully lift the upper case to open the MacBook as far as possible.
-
-
-
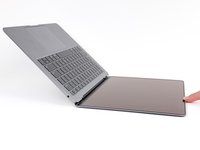
Lift the MacBook and carefully begin to close the display until it's at a ~90 degree angle with the upper case.
-
Keeping the display at a 90 degree angle with the case, move the display straight down while holding the case still, so that the hinges slide out the bottom of the case.
-
Remove the display.
-


Compare your new replacement part to the original part—you may need to transfer remaining components or remove adhesive backings from the new part before installing.
To reassemble your device, follow the above steps in reverse order.
Take your e-waste to an R2 or e-Stewards certified recycler.
Repair didn’t go as planned? Check out our Answers community for troubleshooting help.
Cancel: I did not complete this guide.
44 other people completed this guide.


12 Comments
Thank you so much for this awesome walkthrough! I can’t believe how much I saved doing this myself. Works beautifully! If I could only suggest a more comprehensive “reassembly” page. There are a couple of missteps I made (eg. trying to install the antenna bar and accidentally leaving the display cable connector under it) that would have helped. In any event, thank you so much!
Thanks for the tip! I’ve added a reminder to that step.
when starting the process of installation, make sure that at least the inside hinge screw is installed and mostly tightened. once the antenna is installed, there is almost no room for that screw to be inserted without a tight scrape against the end of the antenna. a very tight fit. i sometimes only install one hinge screw, usually the center ones, and then align the lid before adding the others and tightening everything up. in this case, would save you some concern to address this beforehand.
Definitely not. Also, there is no such thing, perhaps you meant 2020? Also no.