Introduction
Have your MacBook Pro feet seen better days? Use this guide to give your early 2015 MacBook Pro a fresh set of feet.
What you need
-
Tool used on this step:Magnetic Project Mat$19.95
-
Remove the following ten screws securing the lower case to the upper case:
-
Two 2.3 mm P5 Pentalobe screws
-
Eight 3.0 mm P5 Pentalobe screws
-
-
-
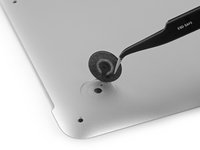
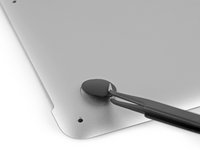
Peel away any stickers from the backside of the rear case covering the feet you have chosen to replace.
-
-
-
-
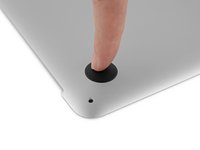
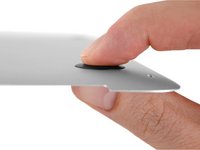
Press the new foot into place firmly with your finger, then apply pressure by pinching the foot from either side of the case with your finger and your thumb.
-
Maintain pressure for 30 seconds to set the pressure-sensitive adhesive.
-
Repeat the last seven steps for any remaining broken or worn feet.
-


To reassemble your device, follow these instructions in reverse order.
To reassemble your device, follow these instructions in reverse order.
Cancel: I did not complete this guide.
60 other people completed this guide.

8 Comments
On the inside of the cover of my A1502 Early 2015 MBP, two of the four feet are covered by large black stickers. So, how do we remove the little piece left behind when we remove any foot that is damaged? Do we just cut through the large black sticker or remove it?
This review was helpful, but it didn’t mention the black stickers on the inside of the lower case. I ended up poking a small hole through the black stickers to get the remaining pieces of previous feet out.
Just peel them back as far as needed, then re-stick them back when you're done. In my case, one did re-stick easily, while the other one didn't, I used a small piece of electrical tape to stick it back. It doesn't really matter that much, either way.
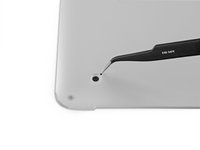
I picked the broken pieces caught underneath the stickers through the little hole from the outer side of the case with pointy tweezers.
Bernhard -
Jason and Taylor, the stickers you mention are on Step 4 of this guide.