
MacBook Pro 13インチ Retina Display Late 2013 SSD の交換

Introduction
Go to step 1MacBook Pro 13" Retina Display Late 2013 のSSDを取り出したり交換するにはこのガイドをご利用ください。このMacBook Proは、専売のストーレッジドライブコネクタを使用しています。そのため、通常の M.2ドライブとは、アダプターを使用しなければ互換性がありません。
修理を始める前に、できれば現在使用中SSDのバックアップをしてください。それから インターネットの回復 もしくは 起動可能な外付けハードドライブを作成してください。そうすれば、macOSを新しいドライブにインストールする準備が整い、データを新しいSSDに移行できます。
最後に、MacBook Proに搭載されていたオリジナルのSSDを交換する前に、macOS 10.13 High Sierra(またはそれ以降のmacOS)のインストールを強く推奨します。 多くの新SSDには、High Sierraより前のバージョンのmacOSにはない最新のストレージドライバが必要です。
What you need
Fix Kit
This kit contains all the parts and tools needed to complete this guide.

Parts

Tools


Show more…
-
Tool used on this step:Magnetic Project Mat$19.95
-
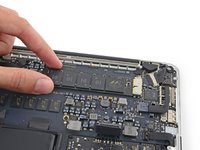
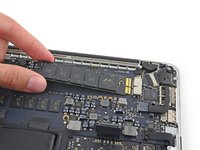
上部ケースと底ケースを留めている次の10本のネジを外します。
-
2.3 mm P5ペンタローブネジ−2本
-
3.0 mm P5ペンタローブネジー8本
-
この修理では、各ネジの装着位置をメモ書きして管理してください。再組み立ての際は、デバイスにダメージを与えないよう、正しい場所に装着してください。
-


デバイスを再組み立てする際は、これらのインストラクションを逆の順番に従って作業を進めてください。
デバイスを再組み立てする際は、これらのインストラクションを逆の順番に従って作業を進めてください。
Cancel: I did not complete this guide.
154 other people completed this guide.
Special thanks to these translators:
100%

Midori Doi is helping us fix the world! Want to contribute?
Start translating ›


25 Comments
So… can I just buy the new PCIe SSDs and use it in the 2013 rMBP? I'm very confused about these PCIe SSDs.
My retina 15" got the logic board damage and fix it is just stupid. Now in the mean time the new ones come up next quarter, I'm using my macbook pro 2011. Now, because the 2011 is no Retina, SSD and all the other good stuff in it (crying in silence) I did some research to make the 2011 better and I found out I can upgrade to 16 ram and a SSD. Now I check and is not that expensive at least for a SSD 128. BUT this morning it hit me, and I want to ask and make research about this idea. Guys I was wondering, can I take the SSD from my Retina that is actually SSD 256 and put it in my 2011? And save in the SSD? I mean, if possible of curse, if not I would go to buy it how I plan in the first place. Anyway guys any suggestions, ideas or advice are all welcome. I want to know whats best to improve the 2011 meanwhile the new ones get the upgrade. Thanks in advance! :)
Can I use an Intel SSD 540s SSD M.2? Intel says it doesn't support NVMe. Does it need to or would that just add extra performance?
You can put an NVMe drive (with an adapter) in a late 2013 MBP, but you must have updated the OS to the latest version because the original, native OS does not support NVMe. Use Clonezilla to make a bare metal backup and use Clonezilla to restore it once NVMe is installed. Clonezilla wont work going down in size ie from a 1TB to 500GB drive.
Can you also please put a link how to reinstall mac os after installing a new hardrive? thanks