Introduction
Use this guide to help you replace a damaged, broken, or faulty right fan.
Note that the right fan is on the right of the machine while you're using it, and on the left while you're working on it.
What you need
-
-
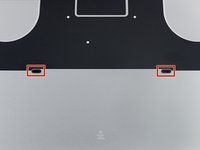
Remove the following P5 pentalobe screws securing the lower case to the MacBook Pro:
-
Eight 3.1 mm
-
Two 2.3 mm
-
-
Tool used on this step:Tweezers$4.99
-
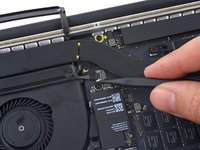
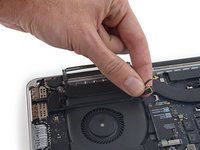
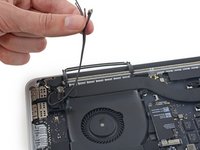
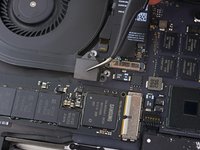
Use a spudger or tweezers to pry the three AirPort antenna cables straight up off of their sockets on the AirPort board, and bend them up and out of the way.
-
-
-
-
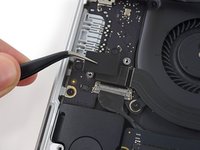
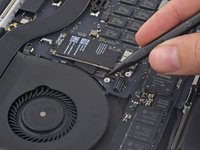
Remove the four 2.2 mm T5 Torx screws securing the I/O board cable connector covers.
-
-
-
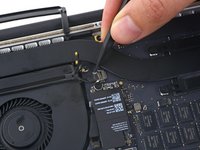
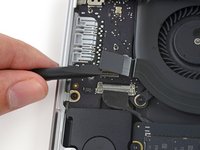
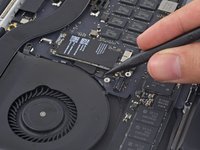
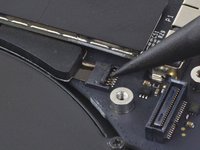
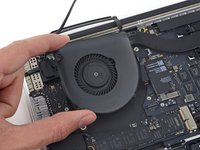
Use a T5 Torx driver to remove the following three screws securing the right fan to the logic board:
-
One 5.0 mm screw with a 2.0 mm long shoulder
-
One 4.0 mm screw with a wide head
-
One 4.4 mm screw
-


To reassemble your device, follow these instructions in reverse order.
To reassemble your device, follow these instructions in reverse order.
Cancel: I did not complete this guide.
47 other people completed this guide.

7 Comments
Great tutorial. I did not notice the screw length in the beginning. Thanks. :)
Strange noise came out of my mac. I found a screw on my right fan fell off and got stuck in the right fan.
Complimenti davvero, una guida veramente ben fatta. Il mio mac ringrazia :)
completed my first mac repair ever, so excited.
I was hearing a strange buzzing / grinding noise coming from my right speaker. After ensuring it wasn’t the speakers, I realized it was the fan (would only start making the noise when the fans were kicking into high gear). I opened it up and found that one of the screws on the right fan wasn’t attached to the logic board: Step 14, top right screw (orange) attaches to a silver nut (?) which should be attached to the logic board. The adhesive that attaches the nut to the logic board had detached! Gotta find what type of adhesive I need to get for this, but putting this here for anyone with a similar problem.