Introduction
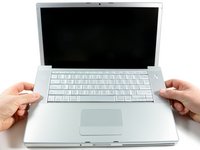
This guide will walk you through how to replace a faulty logic board. This motherboard includes all the ports on the right side of the MacBook Pro.
What you need
-
-
Use your fingers to push both battery release tabs away from the battery, and lift the battery out of the computer.
-
-
-
Remove the three identical 2mm Phillips screws from the memory door.
-
Lift the memory door up enough to grip it and slide it toward you, pulling it away from the casing.
-
-
-
Remove the two 2.8 mm Phillips screws in the battery compartment near the latch.
-
-
-
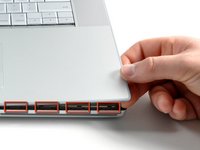
Lift up at the rear of the case and work your fingers along the sides, freeing the case as you go. Once you have freed the sides, you may need to rock the case up and down to free the front of the upper case.
-
There are four plastic clips above the DVD slot, and another above and to the left of the IR sensor. These clips can be very difficult to disengage without prying. They can also be difficult to re-engage during reassembly.
-
-
-
-
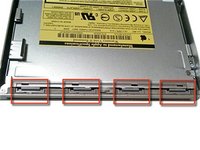
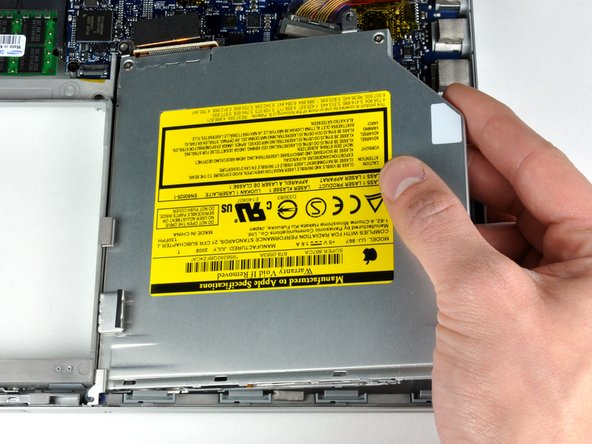
Use the flat end of a spudger to disconnect the orange SuperDrive ribbon cable from the logic board, removing tape as necessary.
-
-
-
Remove the following 4 screws:
-
Two 3.3 mm silver Phillips screws on either side of the SuperDrive.
-
One 4.7 mm silver T6 Torx screw from the top left corner of the drive.
-
One 6.2 mm black Phillips screw at the top right corner of the drive.
-
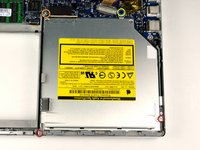
Lift the optical drive up and out of the computer.
-
-
-
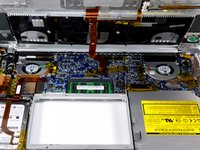
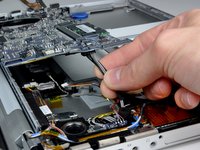
Disconnect the hard drive and ExpressCard connectors from the left side of the logic board.
-
-
-
Remove the following 15 screws:
-
One 4.4 mm black Phillips screw to the right of the ram slot.
-
Eight 4.7 mm silver T6 Torx screws securing the logic board to the lower case.
-
One 6.2 mm black T6 Torx screw on the right side of the left fan.
-
Five 9.4 mm silver T6 Torx screws securing the left and right fans.
-
-
-
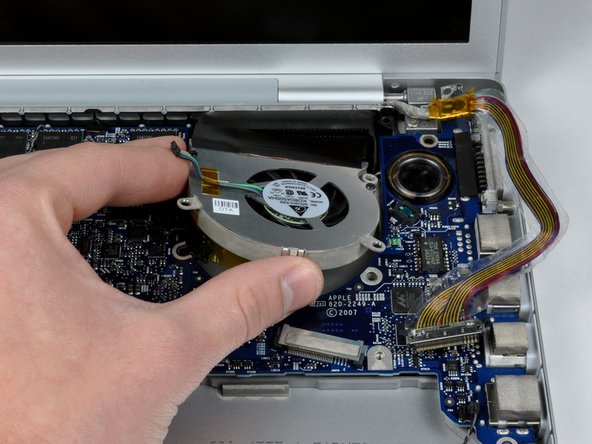
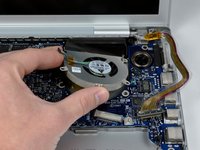
Hold the logic board down with one hand and use your other hand to lift the left fan up from its housing. There is a piece of black tape securing the left fan to the heat sink. Carefully peel this tape up from the heat sink as you lift the left fan up.
-
Lift the right fan up and carefully peel up the tape securing the fan to the heat sink as you go.
-
Remove the right fan from the computer.
-
-
-
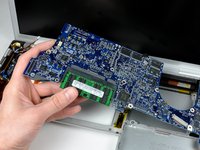
Release the tabs on each side of the RAM chip at the same time. These tabs lock the chip in place and releasing them will cause the chip to "pop" up.
-
Pull the chip directly out from its connector.
-


To reassemble your device, follow these instructions in reverse order.
To reassemble your device, follow these instructions in reverse order.
Cancel: I did not complete this guide.
237 other people completed this guide.

17 Comments
In step 15 re: foam bumper. On the reinstall of the foam bumper what do you use to reattach it and hold it in place?
You can use double sided tape, foam or regular scotch,3m to reattach it.
Thank you ifixit! I used this guide to remove and replace my logic board in my early 2008 MBP. I am among the successful (so far) ones who managed to reflow the gpu solder via the oven method. I purchased a few items from you to do the job. I had nothing to lose, so I went for it - and a detailed step by step guide no doubt was key to my success. The Arctic thermal paste was important to the reassembly as was removing all the dust clogging fans and heatsinks. My machine, which has been sitting collecting dust since last summer is humming quietly - I was able to upgrade to Yosemite on this old workhorse and testing it now. Woo hoo!
I recently had to reflow the chipset on my A1226 and then applied new thermal paste.
However, I forgot to remove the plastic tabs at the top of the logic board and they melted from the temperature of the heat gun. Now I cannot screw in the two center top screws on the back cover. First what are those pieces called and how can I get replacements?
They are tiny but apparently have a key function in reassembling the case.
I would appreciate any advice.
Thank you.
Howard U.
I forgot to attach the two bumpers before reassembling my MBP the first time I baked the logic board, so I saved them (for the next time). I needed to do another baking, so I reinstalled them after I was done. I did not have trouble reinstalling the screws as you describe - so maybe some part of the melted bumpers is obscuring the holes?