Mattel Barbie Boombox BE-466 Antenna Replacement

What you need

  1. Mattel Barbie Boombox BE-466 Antenna Replacement, Antenna: step 1, image 1 of 2 Mattel Barbie Boombox BE-466 Antenna Replacement, Antenna: step 1, image 2 of 2
    • Flip radio upside down.

    • This radio is missing the lid for the battery compartment. If you have a battery cover, you must use a screwdriver to remove the screws before you can take off the cover.

    • Remove the batteries.

  2. Mattel Barbie Boombox BE-466 Antenna Replacement: step 2, image 1 of 1
    • Flip radio so the back facing up.

    • The radio shown is missing the power cord. The power cord is a black cord attached to the back.

    • Unplug power cord.

  3. Mattel Barbie Boombox BE-466 Antenna Replacement: step 3, image 1 of 2 Mattel Barbie Boombox BE-466 Antenna Replacement: step 3, image 2 of 2
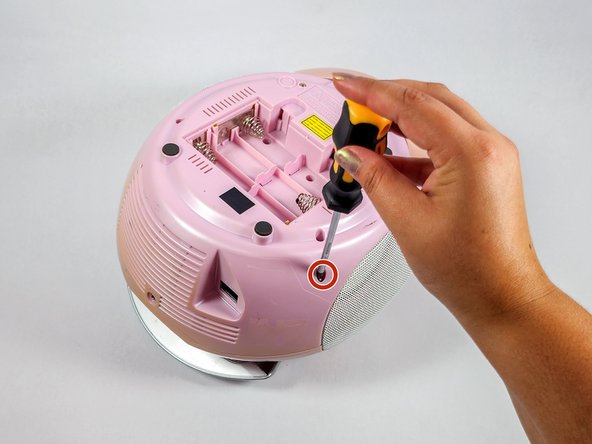
    • Flip the radio over so the bottom of the radio is facing up.

    • Insert the Philips #2 screwdriver into the antenna screw hole.

  4. Mattel Barbie Boombox BE-466 Antenna Replacement: step 4, image 1 of 3 Mattel Barbie Boombox BE-466 Antenna Replacement: step 4, image 2 of 3 Mattel Barbie Boombox BE-466 Antenna Replacement: step 4, image 3 of 3
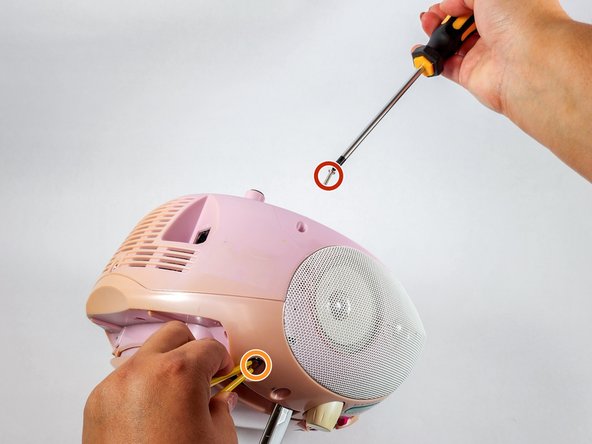
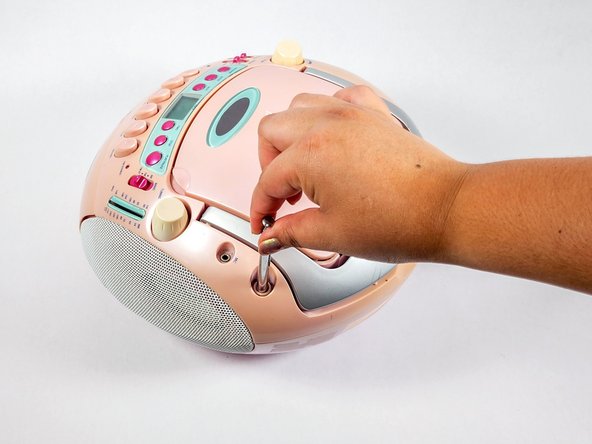
    • Use a Phillips #2 screwdriver to remove the screw securing the antenna.

    • Remove the antenna.

    • Use tweezers/pliers if your antenna is broken off or too short to hold.

  5. Mattel Barbie Boombox BE-466 Antenna Replacement: step 5, image 1 of 2 Mattel Barbie Boombox BE-466 Antenna Replacement: step 5, image 2 of 2
    • Insert the new antenna into the antenna hole on top of the device.

  6. Mattel Barbie Boombox BE-466 Antenna Replacement: step 6, image 1 of 3 Mattel Barbie Boombox BE-466 Antenna Replacement: step 6, image 2 of 3 Mattel Barbie Boombox BE-466 Antenna Replacement: step 6, image 3 of 3
    • The new antenna is slightly bigger than the original. Use a 2.5mm x 8mm Phillips screw instead of the original screw.

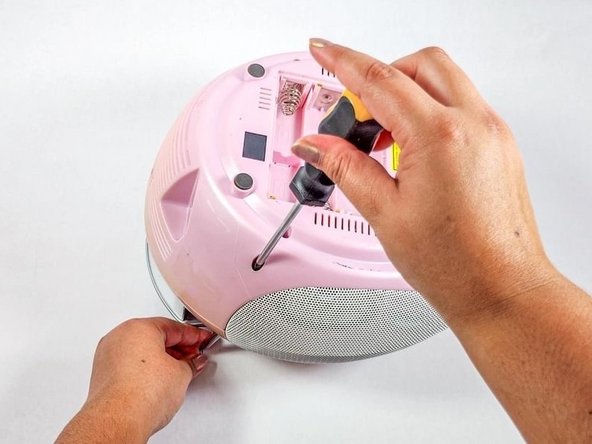
    • Hold the antenna and insert the screw into the antenna screw hole.

    • Use the Phillips #2 screwdriver to secure the screw.

Conclusion

To reassemble your device, follow steps 1 and 2 in reverse order.

Sarah Nguyen

Member since: 04/25/24

133 Reputation

1 Guide authored

Team

UC Davis, Team 4-4, Whithaus Spring 2024 Member of UC Davis, Team 4-4, Whithaus Spring 2024

UCD-WHITHAUS-S24S4G4

3 Members

1 Guide authored

0 Comments

Add Comment

View Statistics:

Past 24 Hours: 0

Past 7 Days: 0

Past 30 Days: 8

All Time: 72