Introduction
No one likes a leaky house!Your thermostat is no different. So fix your leaky thermostat housing gasket now and keep your engine clean and dry on the outside, wet on the inside...As always when dealing with automotive fluids you should wear the proper protective gear, such as gloves and glasses. Also be sure to catch the fluid properly and dispose of it safely and in an environmentally sound way!
What you need
-
-
Start by draining your coolant as described in the coolant change guide.
-
-
-
Use a Phillips head screw driver to loosen the upper of the two hose clamps on the short coolant hose below the thermostat housing.
-
If you'd like to replace this short hose while you have the thermostat housing out, see the replacement guide for the short cooling bypass hose.
-
-
-
-
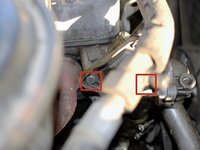
The upper A/C line, the one covered in foam, travels across the top of the housing. It attaches to the housing via a bracket, which acts as one of its mounts.
-
To start the removal of the housing you'll need to detach the A/C line from the bracket. It's held in place with a 10mm bolt and nut.
-
Place a 10mm socket on the nut side, and a 10mm box end wrench on the bolt side, and back out the bolt.
-
-
-
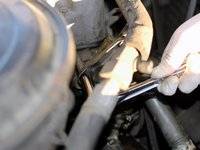
After the two long 13mm bolts are removed the first item that comes out is the bracket that attaches to the A/C line.
-
Note its orientation as you remove it and set it aside.
-
With the two radiator hoses disconnected and the hose clamp on the short lower hose loosened the thermostat housing should pull off the cylinder head and out of the car. If necessary use a small pry tool to gently pry it away from the cylinder head.
-
-
-
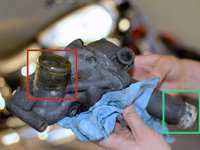
Here is the thermostat housing out of the car.
-
The items on the thermostat housing are as follows:
-
Upper neck, to upper radiator hose.
-
Lower neck, to lower radiator hose.
-
Thermostat cover, thermostat is located just behind this.
-
Neck to short coolant hose for water pump bypass.
-
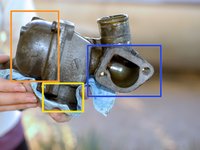
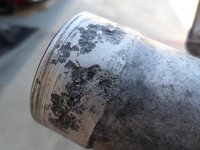
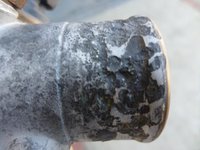
Cylinder head connection point, location of gasket on housing.
-
-
-
Coat the new gasket very lightly with a suitable paper gasket sealant, such as aircraft grade gasket sealant. Use it very sparingly. Allow it to get tacky before installing the housing.
-
Then install the new gasket on the thermostat housing. Put the long bolts through the housing and put the gasket over the bolts to help keep the gasket aligned as you insert the thermostat housing back on the cylinder head.
-


To reassemble your device, follow these instructions in reverse order.
To reassemble your device, follow these instructions in reverse order.
Cancel: I did not complete this guide.
3 other people completed this guide.

Team
